- Catalogs
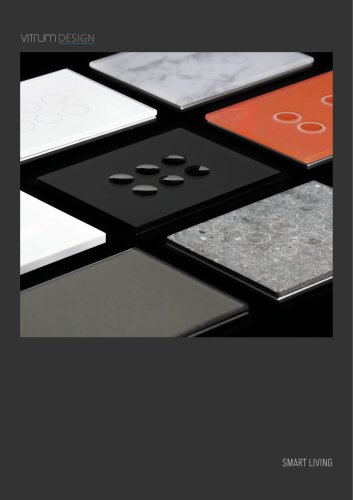
- Vitrum Design
- Roller Blind
Roller Blind

Roller Blind
The Vitrum Roller Blind Control system is designed for managing electrical motors in roller blinds and similar devices. It is available in Classic and Wireless versions, with the Wireless version offering remote control via a handset or iPad. The Vitrum Satellite Roller Blind provides a cost-effective solution for controlling loads from different locations.
The system can operate using limit switches or by memorizing the time for complete opening or closing. Compliance with safety legislation is crucial, and installation must be performed by a qualified electrician. The system requires a 240V power supply, with specific connections for live and neutral wires.
For the Vitrum Roller Blind Control, connect the live wire to terminal "L", the neutral wire to "N", and the motors to "M1" and "M2". A jumper is used between "L" and "COM". The Satellite version requires only live and neutral connections.
Align the glass panel's tabs with anchor holes and press evenly. Buttons recalibrate after installation, indicated by an acoustic signal.
The Wireless version uses Z-Wave technology for network integration and remote control. Inclusion in a network is done via the HOME MASTER remote handset.
The default motor action time is 50 seconds, adjustable through a configuration menu. The system can memorize operation times for automatic shutdown.
Control logic processes allow operation from other Vitrum units or the HOME MASTER remote handset. Device associations are managed through the remote handset.
Factory reset can be performed via the HOME MASTER remote handset or a hidden button on the unit.
Vitrum devices comply with standards like IEC/EN 60670-1 and CEI 23-74:2002. Installation should avoid heat and humidity, and a suitable fuse must be fitted for each channel.
To reset, remove the unit from the wall and press the hidden Factory Reset button for at least 3 seconds. The unit will flash red and emit an acoustic signal.
The HOME MASTER app for iPad enhances functionality with an 'identification' feature, indicated by magenta flashing rings. The app is available on the Apple Store.
Vitrum Wireless units comply with European directives B.T.2006/95/CE, E.M.C.:2004/108/CE, and R&TTE:1999/5/CE. The manufacturer disclaims liability for improper use.
Vitrum Wireless devices are Z-wave certified and can interact with other certified products, functioning as repeaters to extend the network.
- Power Supply: 240V/50Hz
- Operating Temperature: 0-40°C
- Load Capacity: Up to 800W per output
- Wireless Z-Wave Modem Frequency: 868.4 MHz
- Range in Open Air: 20 metres
- Protection Rating: IP 40
Catalog excerpts

EN H O M E C O N T R O L Vitrum Roller Blind Control and Satellite INSTALLATION AND OPERATION
Open the catalog to page 1
Definition CONTENTS A Vitrum Satellite Roller Blind differs from a Vitrum Roller Blind Control Wireless for this reason: there is no exit used for directly control a load. It’s used in all the situations in which you need to control a load that is connected to a Vitrum Roller Blind Control Wireless from a different position. Being with less electronic components on board, it costs less than Vitrum Roller Blind Control Wireless. 0. Before starting. . . . . . . . . . . . . . . . . 3 1. Electrical connections. . . . . . . . . . . . 6 2. Positioning the glass décor panel. . . 9 3. Vitrum is intelligent...
Open the catalog to page 2
0. BEFORE STARTING Vitrum Roller Blind Control is a switch system designed to control electrical motors which open and close roller blinds, curtains or other elements which function in a similar fashion. The system is available in the Classic version as well as the Wireless version, which can be controlled remotely using a remote control handset or using an iPad. Vitrum Roller Blind Control is designed to function in two ways: For roller blinds fitted with limit switches, the upwards (or downwards) movement is actioned by briefly pressing the corresponding key: the movement of the shutter continues...
Open the catalog to page 3
For systems that are different from those described above, it is important to carefully evaluate the necessary control logic before commencing the installation of Vitrum. Always check that the motor used is fitted with all the safety features required by current safety legislation – especially as regards the prevention of injury by crushing - because Vitrum functions solely as a movement control device. Think Simple spa accepts no liability for any injury or damage to persons or things deriving from systems installed by unqualified persons or not in compliance with current legislation. The Vitrum...
Open the catalog to page 4
For each device, connect the power supply and the return wires from the actuators as shown in the circuit diagrams printed on the rear of the boxes in the vicinity of the terminal block. Refer exclusively to the circuit diagrams contained in this manual. Carefully check that the wires and connectors are securely fastened. After securing the unit to the wall-mounting box, temporarily use the plastic cover for protection until the glass décor plate is fitted. Do not install Vitrum in the vicinity of sources of heat or in conditions of high humidity. IMPORTANT: Fit a rapid-acting fuse with a high...
Open the catalog to page 5
1. ELECTRICAL CONNECTIONS Connect the Live wire to the terminal marked “L”, the Neutral wire to the terminal marked “N” and the motors to the terminals marked M1 (open) and M2 (close). Use a jumper to connect the terminals marked “L” and “COM”. Vitrum II EU Roller Blind Control Wireless and Classic 6 Vitrum II BS Roller Blind Control Wireless and Classic
Open the catalog to page 6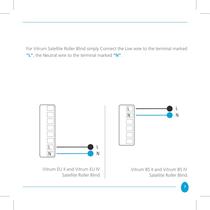
For Vitrum Satellite Roller Blind simply Connect the Live wire to the terminal marked “L”, the Neutral wire to the terminal marked “N”. Vitrum EU II and Vitrum EU IV Satellite Roller Blind Vitrum BS II and Vitrum BS IV Satellite Roller Blind 7
Open the catalog to page 7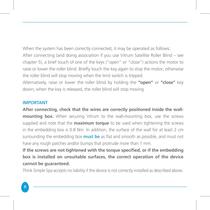
When the system has been correctly connected, it may be operated as follows: After connecting (and doing association if you use Vitrum Satellite Roller Blind – see chapter 5), a brief touch of one of the keys (“open” or “close”) actions the motor to raise or lower the roller blind. Briefly touch the key again to stop the motor; otherwise the roller blind will stop moving when the limit switch is tripped. Alternatively, raise or lower the roller blind by holding the “open” or “close” key down; when the key is released, the roller blind will stop moving. IMPORTANT After connecting, check that the...
Open the catalog to page 8
2. POSITIONING THE GLASS DECOR PANEL In order to fit the glass panel correctly, ensure that the four plastic tabs on the panel are in perfect alignment with the anchor holes. When the glass panel tabs are aligned with the holes, press the four corners of the glass panel evenly until it is fully inserted into the wall-mounting box. After fitting the glass panel, the buttons remain inoperative for about 10 seconds. An acoustic signal will then sound three times to indicate that the sensors have been re-calibrated, after which they resume normal operation. To remove the glass panel from the wall-mounting...
Open the catalog to page 9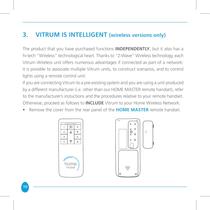
3. VITRUM IS INTELLIGENT (wireless versions only) The product that you have purchased functions INDEPENDENTLY, but it also has a hi-tech “Wireless” technological heart. Thanks to “Z-Wave” Wireless technology, each Vitrum Wireless unit offers numerous advantages if connected as part of a network: it is possible to associate multiple Vitrum units, to construct scenarios, and to control lights using a remote control unit. If you are connecting Vitrum to a pre-existing system and you are using a unit produced by a different manufacturer (i.e. other than our HOME MASTER remote handset), refer to the...
Open the catalog to page 10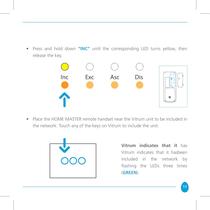
• Press and hold down “INC” until the corresponding LED turns yellow, then release the key. • Place the HOME MASTER remote handset near the Vitrum unit to be included in the network. Touch any of the keys on Vitrum to include the unit. Vitrum indicates that it has Vitrum indicates that it hasbeen included in the network by flashing the LEDs three times (green). 11
Open the catalog to page 11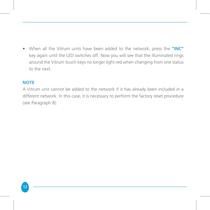
• When all the Vitrum units have been added to the network, press the “INC” key again until the LED switches off. Now you will see that the illuminated rings around the Vitrum touch keys no longer light red when changing from one status to the next. NOTE A Vitrum unit cannot be added to the network if it has already been included in a different network. In this case, it is necessary to perform the factory reset procedure (see Paragraph 8). 12
Open the catalog to page 12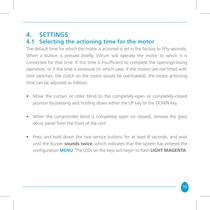
4. SETTINGS 4.1 Selecting the actioning time for the motor The default time for which the motor is actioned is set in the factory to fifty seconds. When a button is pressed briefly, Vitrum will operate the motor to which it is connected for that time. If this time is insufficient to complete the opening/closing operation, or if the time is excessive (in which case, if the motors are not fitted with limit switches, the clutch on the motor would be overloaded), the motor actioning time can be adjusted as follows: • Move the curtain or roller blind to the completely-open or completely-closed position...
Open the catalog to page 13All Vitrum Design catalogs and technical brochures
 Vitrum design
72 Pages
 Catalogue 2014
52 Pages
Archived catalogs
 Vitrum MAster On-Off Wireless
20 Pages
 Vitrum II DIN On-Off Wireless
11 Pages
 Vitrum Scene Control Panel
20 Pages
 Warnings
4 Pages
 Home Master Remote Handset
24 Pages
 Vitrum Dimmer Classic
24 Pages
 Vitrum Dimmer Wireless
32 Pages
 Vitrum Satellite Wireless
28 Pages
 Vitrum On-Off Classic
16 Pages
 Vitrum On-Off Wireless
24 Pages