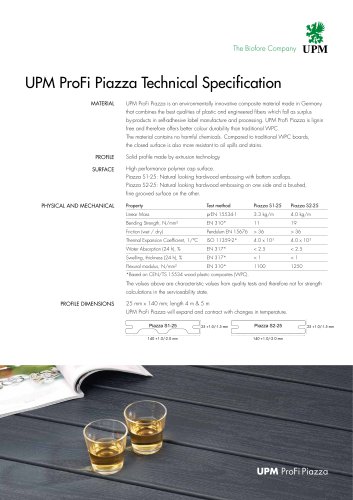
Catalog excerpts

UPM ProFi Decking Installation Instructions Part 2: Text 25 mm These instructions should be used in combination with UPM ProFi Decking Installation Instructions: Part 1: Diagrams. It is important to follow the instructions carefully. Failure to do so may lead to reduced product performance and will invalidate the manufacturer’s guarantee. The instructions should be seen as being in addition to and not a replacement of local and national building regulations which must always be followed. These installation instructions are for UPM ProFi Piazza Pro, UPM ProFi Piazza One, UPM ProFi Deck 150, UPM ProFi Deck 150 UV+, and UPM ProFi Terra 127 More detailed information concerning roof terrace, stair and pool edge installation can be found in UPM ProFi Decking Installation Instructions: Part 3 available on www.upmprofi.com If you are in doubt, please contact your UPM ProFi distributor’s representative and/or visit www.upmprofi.com for further information. 1. Planning See Deck Planner & Technical Data Sheets at www.upmprofi.com 1.1 UPM ProFi’s Deck Planner enables you to optimize the design of your deck, as well as create a list of all the materials needed. It will also show you where double support rails or joists are needed. 1.2 In addition to offering superior low maintenance properties compared to timber, composite decking has other different properties. The deck boards will expand and contract slightly along their length with changes in temperature (typically 6 mm for a 4 m board during a 40°Celsius temperature change). It is also normal that the relaxation of residual production stress may result in a small shortening of the deck boards in the first years after installation. Typical values are less than 0,5mm for Piazza Pro, approximately 1,5 mm for Piazza One & Deck 150 and up to 3 mm per m for Terra 127. 1.3 A detailed expansion table can be found in the Technical Data Sheet (downloadable from www.upmprofi.com ). Gaps can be minimized by planning the deck board direction 1.4 Plan your deck so as to minimize the number of board-end joints / expansion gaps e.g. by changing the board direction or using a framing board running at a 90° angle to the main area (for details see also 5.6). 2. Inclination,Drainage & Ventilation See section 1 in UPM ProFi Decking Installation Instructions: Part 1: Diagrams 2.1 As all UPM ProFi deck products have a very low rate of moisture absorption, they can be installed horizontally with no incline. However, installing the boards at a gradient (e.g. 1–1,5 %) results in faster deck drying and the run-off rainwater will help to wash away dust. 2.2 As with all decks, UPM ProFi decks must be well ventilated and installed on a sub-structure that enables a free flow of air under the deck and good drainage of rainwater. Please note local building regulations and generally accepted practices concerning for example, the minimum distance of the decking to the wall of the building, and the possible need for drainage channels between a house wall and the decking edge. 2.3 When using UPM ProFi Alu Rail and/or Rubber Strip, it is mandatory to create additional ventilation in the deck to ensure a free flow of air underneath the deck. For example, if the deck is installed alongside a wall, ventilation grills must be installed along the whole length of the wall before the first row of deck boards. If the edges of the deck which are not adjacent to a wall are closed, then sufficient ventilation grills must be added along the deck edge to enable the free flow of air under the deck. Failure to do so may result in distortion and weakening of the decking over time. Gap size is reduced when 90° framing boards are used
Open the catalog to page 1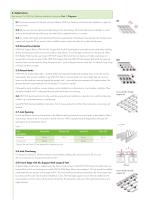
3. Substructure See section 2 in UPM ProFi Decking Installation Instructions: Part 1: Diagrams 3.1 To prevent movement of the deck during its lifetime, UPM ProFi Decking must always be installed on a rigid substructure frame. 3.2 Different sub-structure options exist depending on the deck design. The frame itself must be installed on a well draining hard load bearing surface e.g. concrete blocks, impacted stones, or concrete. 3.3 No matter what length, each deck board must be supported by at least three joists/support rails. Double joists/ support rails (spaced 40 mm apart) must be...
Open the catalog to page 2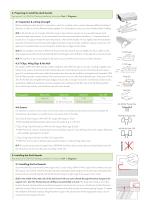
4. Preparing to install the deck boards See section 3 in UPM ProFi Decking Installation Instructions: Part 1: Diagrams 4.1 Inspection & cutting to length Before installing the deck boards it is important to check for possible colour variations between different batches. If they exist, it is best to mix the different batches together. If in doubt please contact your local dealer before installing. 4.2 As the boards are cut to length while still moving in the production process, to ensure perfect square ends and exact length requirements, it is recommended to trim the board ends before...
Open the catalog to page 3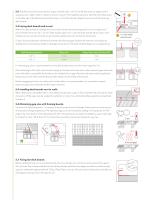
5.3 Slide the second deck board bottom tongue under the clips / rail. Ensure the deck ends are aligned and if necessary use a rubber mallet or clamps to ensure a close fit to the neighbouring board. Insert the direct fixing screw on the other side of the deck board and attach clips / rail to that side also. Repeat the process with the remaining deck boards. 5.4 Laying deck boards end to end Where two deck boards are installed end to end, each board end must be supported on its own support rail / joist and fixed with its own clip / alu rail. These double support rail / joists should be...
Open the catalog to page 4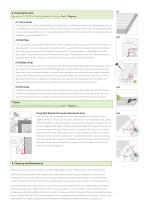
6. Finishing the deck See section 5 in UPM ProFi Decking Installation Instructions: Part 1: Diagrams Matching colour Cover Strips are available for finishing the sides of all UPM ProFi deck boards. Being flexible, they can be installed around curved deck surfaces. The Cover Strip is attached by screws into the frame. The spacing between the screws must not exceed 300 mm. A 3 mm gap should be left at the ends of cover strips to allow for expansion if they are installed at a temperature below 20 °C. 6.2 Rail Step For a robust and professional finish, UPM ProFi Rail Step is available in...
Open the catalog to page 5All UPM catalogs and technical brochures
-
UPM ProFi ®
12 Pages
-
BEST IN CLASS OUTDOOR LIVING
12 Pages
-
UPM ProFi Piazza
2 Pages
-
UPM ProFi® Deck
2 Pages
-
UPM ProFi® PRODUCT LIST 2020
17 Pages
-
UPM ProFi®
12 Pages
-
UPM ProFi
36 Pages
-
UPM ProFi® Patio
2 Pages
-
UPM ProFi DECKINGS
2 Pages
-
UPM PROFI® TERRA
2 Pages
-
UPM ProFi® Terra 127
2 Pages
-
UPM ProFiLifecycle S2-25
2 Pages
-
UPM ProFiLifecycle S1-21
2 Pages
-
UPM ProFi Piazza 2019
2 Pages
-
UPM ProFi Deck & Environment
2 Pages
Archived catalogs
-
UPM ProFi Quick Facts
2 Pages


