

UPM ProFi Deck Installation Instructions

UPM ProFi Deck Installation Instructions
Two foundation options are recommended for ProFi Deck: using ProFi Support Rails on a firm, flat surface with good drainage, or using durable timber joists as a solid load-bearing frame. The maximum spacing for Support Rails and timber joists is 400 mm from center to center, and they must be level.
The first Decking Board is fixed to the Support Rails or joists with screws through the bottom tongue of the outside edge. Ensure the edge is straight and screws are fixed at a 45-degree angle. Predrill oval holes for thermal expansion.
Fix the inside edge of the first Decking Board and both edges of subsequent Boards to the Support Rails with ProFi T-Clips and screws. Use a longshaft screwdriver bit and adjust drill torque to avoid twisting. Insert the next Board under the T-Clip lip using a rubber hammer.
For long decks, support and attach both ends of the Boards to the Support Rail or joist using two Support Rails and T-Clips for adequate support and expansion space.
Attach the inside edge of the last Board to the T-Clips and fix the outside edge to the Support Rails as with the first Board.
For decks built on UPM ProFi Support Rails, fix the Cover Strip around the deck's edges. Ensure the top of the Cover Strip is level with the Decking Boards and leave expansion gaps. Use mitre cuts for a perfect finish.
When using timber joists, finish the deck side with a Cover Strip and an additional Decking Board. Predrill oval holes for thermal expansion and fix the Cover Strip as described for decks on Support Rails.
Materials include Decking Boards, Support Rails or timber joists, Cover Strip, T-Clips, and rust-proof screws. Tools required are a power screwdriver, drill, saw, and rubber hammer.
Use normal woodworking tools to cut UPM ProFi. For a perfect finish, turn the section upside down when cutting and chamfer the top edge of the Decking Boards.
Leave a 6mm gap for expansion in normal length boards during construction in temperatures above 10°C. Use the UPM ProFi T-Clip as a spacer and leave gaps at both ends of every Deck Board, Cover Strip, and Support Rail.
Catalog excerpts

Installation Instructions Building a deck out of ProFi just like timber. However, beautiful classic deck or an exciting design, it is important achieve a perfect result. Expansion Gaps: Important to remember All composite decks expand and contract with changes in temperature. This must be taken into account in the deck design. Failure to do so may result in damage to the As an approximate guide, when a deck is being built during a normal European Spring or Summer (ie above 1 0 degrees Centigrade), it is recommended to leave a 6mm gap for expansion in normal length boards (ie 3m and longer). • The simplest way to achieve this is to use the UPM ProFi T-Clip as a spacer. • The expansion gaps must be left at both ends of every Deck Board, Cover Strip and Support Rail used. • Smaller gaps may be left between short pieces. For more detailed information about thermal expansion, see the data supplied in the UPM ProFi Deck Technical Specification leaflet. There are two recommended foundations • using the ProFi Support Rails (40mm x 60mm) on a firm flat surface with good drainage: eg concrete or stone • using durable timber joists (eg 45mm load bearing frame. (It is important to note that the Support Rails are not load bearing, and may never be used as part of a structural frame) • the maximum recommended spacing of the Support Rails and timber joists is 400 mm from centre to centre. • it is important that the ProFi Support Rails or joists are all on the same level. 2. Laying the first Decking Board The first Decking Board is fixed to the Support Rails or joists with screws tongue of the outside edge of the Board. Either side may be used for the deck • Care should be taken to ensure that the edge of the Board is absolutely • The screws should be fixed at a • It is recommended that oval holes which are slightly larger than the screw (wider along the length of the Board) are predrilled in the Board to allow for thermal expansion. 3. Subsequent Decking Boards The inside edge of the first Decking Board and both edges of the subsequent Boards are fixed to the Support Rails (or joists) with the ProFi T-Clips and screws • Fix the T-Clips along the whole length • Use a longshaft screwdriver bit with a 6 mm diameter that fits the screw. • The drill torque must be adjusted so that the T-Clips are fixed tightly but not • Then insert the next Board under the lip of the T-Clip, using a rubber hammer to lightly tap the Board into • Repeat the process until the last Board.
Open the catalog to page 1
5. 4. Materials Needed • Decking Boards (28mm x 150mm): 6.6 m for each 1 m2 6 mm 4. Laying Decking Boards end to end When making a long deck with Decking Boards being laid end to end, both ends must be supported and attached to the Support Rail or joist. Using two Support Rails and T-Clips ensures adequate support and space for expansion. • Support Rails: (40 x 60mm) or timber joists (45mm x 145mm or 50mm x 150mm) 5. Laying the Last Decking Board The inside edge of the last Board is attached to the T-Clips, as with the preceding Boards. The outside edge is fixed to the Support Rails in the same...
Open the catalog to page 2All UPM catalogs and technical brochures
 UPM ProFi Piazza
2 Pages
 UPM ProFi® Deck
2 Pages
 UPM ProFi® PRODUCT LIST 2020
17 Pages
 UPM ProFi®
12 Pages
 UPM ProFi
36 Pages
 UPM ProFi® Patio
2 Pages
 UPM ProFi DECKINGS
2 Pages
 UPM PROFI® TERRA
2 Pages
 UPM ProFiLifecycle S2-25
2 Pages
 UPM ProFiLifecycle S1-21
2 Pages

Archived catalogs
 UPM ProFi Deck & Environment
2 Pages
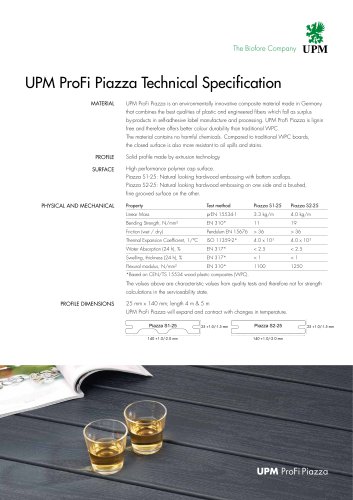 UPM ProFi Piazza 2019
2 Pages
 UPM ProFi® Terra 127
2 Pages
 BEST IN CLASS OUTDOOR LIVING
12 Pages
 UPM ProFi Quick Facts
2 Pages


- Industrial veneer
- Glue
- Industrial wood veneer
- Plywood panel
- Interior veneer
- Wood plywood panel
- Commercial plywood panel
- Construction plywood panel
- Wood look plywood panel
- Wood glue
- Building plywood panel
- FSC certified plywood panel
- Home plywood panel
- Smooth plywood panel
- Multilayer plywood panel
- Furniture plywood panel
- High-resistance plywood panel
- Lightweight plywood panel
- Formwork panel
- Interior glue