


SL-1000R / Direct Drive Turntable System

SL-1000R / Direct Drive Turntable System
The SL-1000R is a direct drive turntable system designed to enhance the emotional connection between people and music through advanced technology.
The turntable includes a coreless direct drive motor, a three-layer platter for stability, and a high-sensitivity tone arm. It features a five-layer anti-vibration cabinet and a special control unit to minimize noise interference.
Users should avoid moisture exposure, ensure proper ventilation, and handle the power supply carefully to prevent hazards. Repairs should be conducted by qualified personnel only.
Setup involves unpacking, assembling the turntable, and connecting to power and audio components, with detailed instructions provided.
Instructions cover adjusting pitch control, setting turntable speed, and using the control unit. Users can adjust torque and utilize the display dimmer setting.
Regular maintenance is recommended, with a troubleshooting guide for common issues.
Limited warranty information is provided for the U.S.A. and Canada, with encouragement to register the product online.
The SL-1000R is designed for audiophiles seeking high-quality sound and an emotional music connection.
Ensure proper alignment of rotor shafts and secure components carefully. Use a detachable handle for lifting the turntable.
Disconnect the AC mains lead before making connections. Ensure the unit is placed for easy plug removal and away from interference sources.
Adjust the tone arm balance and anti-skating control to match the stylus pressure.
Instructions for playing records include setting speed and using the tone arm lever for playback.
Adjust pitch using control unit buttons, with a range of ±16% of the current speed.
The turntable features a high-precision rotation motor system with a three-layer structure to minimize resonance and a high-sensitivity tonearm made of magnesium.
The system includes a five-layer cabinet with silicone rubber isolators to exclude external vibrations.
The system allows for additional tonearms with a separately sold base.
The control unit minimizes noise interference with separated power and control circuits.
Warnings include avoiding exposure to rain or moisture and ensuring proper ventilation.
Ensure voltage matches device requirements and handle the plug with dry hands.
Place the device on a flat surface away from direct sunlight and vibrations.
Proper disposal and recycling instructions are provided for EU countries.
Included accessories are listed with detailed assembly instructions.
Instructions for connecting and installing the device emphasize turning off all devices before making connections.
Detailed instructions on connecting components and ensuring proper grounding to reduce noise.
Important considerations for installation include avoiding direct sunlight and ensuring a stable surface.
Instructions for adjusting the tonearm height and balance, and setting the anti-skating control.
Instructions for playing records, adjusting speed, and using a record stabilizer if necessary.
Instructions for adjusting turntable speed and viewing current speed settings on the display.
Guidelines for cleaning the stylus and records, and handling the unit during transportation.
A guide for addressing common issues such as no power and sound problems.
Recommendations for using a record cleaner and consulting a dealer for optional products.
Catalog excerpts

Headquarter Address/Adresse du siège social : Panasonic Corporation Kadoma, Osaka, Japan Importer for Europe/Importateur pour l’Europe : Panasonic Marketing Europe GmbH Panasonic Testing Centre Winsbergring 15, 22525 Hamburg, Germany Panasonic Corporation of North America Two Riverfront Plaza, Newark, NJ 07102-5490 www.shop.panasonic.com For the United Kingdom and Ireland Direct Drive Turntable System Platine tourne-disque à entraînement direct Panasonic Corporation Platine vinyle à entraînement direct Giradischi ad azionamento diretto For Canada / Pour le Canada Sistema de accionamiento directo del plato giratorio Pladespiller med direkte drev 5770 Ambler Drive, Mississauga, Ontario, L4W 2T3 www.panasonic.com Platenspeler met directe aandrijving Skivspelare med direktdrivning En Cf Ge Fr Suoravetoinen levysoitinjärjestelmä Gramofon Direct Drive Operating Instructions Manuel d’utilisation Bedienungsanleitung Mode d’emploi Istruzioni per l’uso Instrucciones de funcionamiento Betjeningsvejledning Gebruiksaanwijzing Bruksanvisning Käyttöohjeet Ins
Open the catalog to page 1
Music is borderless and timeless, touching people’s hearts across cultures and generations. Each day the discovery of a truly emotive experience from an unencountered sound awaits. Let us take you on your journey to rediscover music. Delivering the Ultimate Emotive Musical Experience to All At Technics we understand that the listening experience is not purely about technology but the magical and emotional relationship between people and music. We want people to experience music as it was originally intended and enable them to feel the emotional impact that enthuses and delights them. Through...
Open the catalog to page 2
Thank you for purchasing this product. Please read these instructions carefully before using this product, and save this manual for future use. zz About descriptions in these operating instructions - Pages to be referred to are indicated as “( 00)”. - The illustrations shown may differ from your unit. If you have any questions, visit: U.S.A.: http://shop.panasonic.com/support Canada: www.panasonic.ca/english/support Register online at http://shop.panasonic.com/support (U.S. customers only) Sales and Support Information Customer Communications Centre zz For customers within the UK: 0333 222 8777...
Open the catalog to page 3
IMPORTANT SAFETY INSTRUCTIONS For the U.S.A. and Canada Warning Caution for AC Mains Lead Unit • To reduce the risk of fire, electric shock or product damage, - Do not expose this unit to rain, moisture, dripping or splashing. - Do not place objects filled with liquids, such as vases, on this unit. - Use only the recommended accessories. - Do not remove covers. - Do not repair this unit by yourself. Refer servicing to qualified service personnel. - Do not let metal objects fall inside this unit. - Do not place heavy items on this unit. AC mains lead • To reduce the risk of fire, electric shock...
Open the catalog to page 4
IMPORTANT SAFETY INSTRUCTIONS The following mark and symbols are located on THE FOLLOWING APPLIES ONLY IN THE U.S.A. TO REDUCE THE RISK OF ELECTRIC SHOCK, DO NOT REMOVE SCREWS. NO USER-SERVICEABLE PARTS INSIDE. REFER SERVICING TO QUALIFIED SERVICE PERSONNEL. The lightning flash with arrowhead symbol, within an equilateral triangle, is intended to alert the user to the presence of uninsulated “dangerous voltage” within the product’s enclosure that may be of sufficient magnitude to constitute a risk of electric shock to persons. The exclamation point within an equilateral triangle is intended to...
Open the catalog to page 5
Parts Name Arm clamp ( 20) Arm rest ( 20) Cue lever ( 20) Numbers such as ( 00) indicate reference pages. Main unit (Front) Stylus pressure control ( 20) Balance weight ( 15) Tone arm ( 15) Main unit (Back) Auxiliary weight mounting location ( 15) Output terminal ( 16) * onnect a commercially available PHONO cable. C Use a straight 5-pin PHONO cable. Control unit connection cable ( 16) Speed select buttons ( 24) Arm-height control ring ( 22) Control unit (Back) Control unit (Front) Terminal for connecting with the main unit ( 16) Turntable speed selector button 33/45/78 ( 27) Pitch adjust -/+...
Open the catalog to page 6
Unpacking and preparation Notes for taking out the goods from the package box and transporting Attention packing cushion, and turntable sheet. • Keep accessories out children’s reach. • he main unit, dust cover, and control unit T are wrapped in protective sheets. kPut your hands between the packing cushions (dotted line area of the package box top view) and slowly lift the main unit to take it out. Always perform this task using two or more people. • Be very careful when lifting the main unit. • Hold the main unit from the bottom to prevent it from slipping from your hands. • Perform the task...
Open the catalog to page 7
Putting the player together In order to prevent damage during shipping, some of the equipment has been disassembled. Put the player together in the following order. Attention zz Do not connect the AC mains lead until set up is complete. zz When fitting the turntable, prevent foreign material from getting in between the main unit and turntable. Tighten the detachable handle screws into the detachable handle mounting holes (two locations) on the turntable. Slowly lift the turntable and then lower it in such a way as to insert the center spindle into the hole in the center of the turntable. Attaching...
Open the catalog to page 8
Connections and installation Back of main unit zz Turn off all units and disconnect the AC mains lead from the socket before making any connections. zz Connect the AC mains lead only after all other connections are completed. zz Be sure to connect the PHONO earth lead. Otherwise mains hum may occur. zz Refer also to the instruction manual of the connected device. Connect a commercially available phono cable to the output terminal. Connect the control unit connection cable by inserting it until it clicks into place. Connect the AC mains lead. Connect the commercially available phono cable to the...
Open the catalog to page 9All Technics catalogs and technical brochures
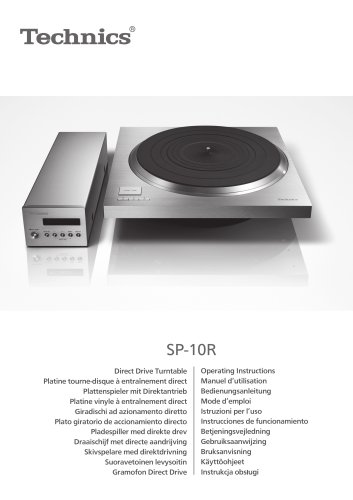 SP-10R / Direct Drive Turntable
272 Pages
 SB-R1 / Speaker System
128 Pages
 SE-R1 / Stereo Power Amplifier
36 Pages
Archived catalogs
 Hi-Fi Audio 2014/15
32 Pages
 SP-10R / Direct Drive Turntable
136 Pages
 SB-R1 / Speaker System
128 Pages
 SU-R1 / Network Audio Control Player
240 Pages
 SE-R1 / Stereo Power Amplifier
116 Pages
- Interior speaker
- Home speaker
- Black home theater
- Rectangular home theater
- White stereo speaker
- Multimedia speaker
- Amplifier
- Round speaker
- Wooden audio system
- Audio amplifier
- Built-in audio system
- Wooden speaker
- Built-in speaker
- Commercial speaker
- Bluetooth speaker
- Tower audio system
- Tower speaker
- Wireless speaker
- Living room speaker