


SE-R1 / Stereo Power Amplifier

SE-R1 / Stereo Power Amplifier
This document provides comprehensive operating instructions for the SE-R1 Stereo Power Amplifier, covering safety precautions, features, recommended devices, and detailed setup and operation procedures.
The SE-R1 is a fully digital amplifier equipped with a high-precision jitter reduction circuit and PWM conversion circuit to minimize distortion and noise. It includes LAPC (Load Adaptive Phase Calibration) for adaptive speaker impedance processing and a GaN-FET Driver for high-speed, lossless switching.
To prevent fire, electric shock, or damage, avoid exposing the unit to moisture, do not place liquid-filled objects on it, and use only recommended accessories. Ensure proper ventilation and avoid placing heavy objects on the unit.
Before connecting, turn off all equipment. The unit supports single and bi-wiring speaker connections. For digital audio input, use the system control connection with the SU-R1. For analogue audio, select the appropriate input using the selector switch.
Use the front panel controls to power the unit on/off, adjust brightness, and select input sources. The LAPC function optimizes audio output by measuring and correcting amplifier characteristics.
Common issues include interference from mobile phones and improper speaker connections. Ensure all cables are securely connected and settings are correctly configured.
The amplifier operates on AC 220 V to 240 V, 50/60 Hz with a power consumption of 210 W. It has an output power of 150 W at 8 ohms and 300 W at 4 ohms, with a frequency response from 1 Hz to 90 kHz. The dimensions are 480 mm x 241 mm x 567 mm, and it weighs approximately 54 kg.
Disconnect the AC mains lead before cleaning. Use a soft cloth for cleaning and avoid solvents that may damage the exterior.
For EU countries, dispose of old equipment at designated recycling points to prevent environmental harm.
Step-by-step instructions are provided for operating the amplifier, including turning on the unit, selecting input and speaker settings, and using the remote control for simultaneous operation with the SU-R1 unit.
Recommendations include using Technics devices for optimal audio quality and ensuring proper ventilation to prevent overheating. The document advises on troubleshooting common issues such as no sound output, humming noises, and automatic shutdowns.
Instructions are provided for connecting speakers using simple cable connections. It advises setting the speaker selection knob to [A] or [B] and ensuring the wires are securely fastened. For bi-wiring connections, the knob should be set to [A+B].
The device can accept digital audio signals and be controlled with the SU-R1 remote. It recommends using category 7 or higher LAN cables for peripheral connections and suggests cable lengths of 3 meters or less.
Instructions are provided for connecting and disconnecting the power cable. The device is not fully disconnected from the power supply even when the power switch is off, so it is advised to unplug the device if not used for an extended period.
The document describes how to measure and correct amplifier characteristics using the LAPC function.
The device can be controlled simultaneously with the SU-R1 using the SU-R1 remote.
The document lists the general specifications, including power supply, power consumption, dimensions, weight, operating temperature, and humidity range.
The unit should be placed on a flat surface, away from direct sunlight and excessive heat. It requires more than one person for moving due to its weight.
Catalog excerpts

Operating Instructions Stereo Power Amplifier Mode d’emploi Amplificatore di potenza stereo Amplificador de Potencia Estéreo Stereo effektforstærker Stereo Versterker Stereo Effektf
Open the catalog to page 1
Music is borderless and timeless, touching people’s hearts across cultures and generations. Each day the discovery of a truly emotive experience from an unencountered sound awaits. Let
Open the catalog to page 3
Thank you for purchasing this product. Please read these instructions carefully before using this product, and save this manual for future use. For the United Kingdom and Ireland customers Sales and Support Information Customer Communications Centre • For customers within the UK: 0333 222 8777 • For customers within Ireland: 01 447 5229 • Monday-Friday 9:00 am - 5:00 pm, (Excluding public holidays). • For further support on your product, please visit our website: www.technics.com/uk/ ■ Features of this unit This unit offers the following features: Full-digital amplifier with a high-precision...
Open the catalog to page 4
Safety precautions WARNING Caution for AC Mains Lead (For the AC mains plug of three pins) ≥ To reduce the risk of fire, electric shock or product damage, – Do not expose this unit to rain, moisture, dripping or splashing. – Do not place objects filled with liquids, such as vases, on this unit. – Use only the recommended accessories. – Do not remove covers. – Do not repair this unit by yourself. Refer servicing to qualified service personnel. – Do not let metal objects fall inside this unit. – Do not place heavy items on this unit. For your safety, please read the following text carefully. If...
Open the catalog to page 5
About descriptions in these operating instructions ≥ Pages to be referred to are indicated as “ ±±”. ≥ The illustrations shown may differ from your unit. Accessories ∏ 1 AC mains lead (K2CT2YY00109) ∏ 1 AC mains lead Except for Switzerland (K2CQ2YY00132) ∏ 1 AC mains lead For Switzerland (K2CS2YY00001) ≥ Product numbers provided in these operating instructions are correct as of November 2014. These may be subject to change. ≥ Do not use AC mains lead with other equipment. ≥ In Saudi Arabia, please use the moulded three pin mains plug. Unit care Pull out the AC mains lead from the outlet before...
Open the catalog to page 6
Control reference guide This unit ∫ Front 1 Unit on/off button [ ] Use this button to turn the unit on and off. [ ] (off): The unit is off. [ ] (on): The unit is on. ≥ The unit is still using a small amount of power in off mode. Off mode uses less power. ( 15) 2 Power indicator The colour of the indicator changes according to the status of this unit. Blue The unit is on. The unit is in standby mode. ≥ To turn on this unit from standby mode, press the unit on/off button on this unit to the [ ] position, and press it again to the [ ] position. 3 Peak power meter Display the output level. 4 LAPC...
Open the catalog to page 7
Getting started ≥ Turn off all equipment before connection and read the appropriate operating instructions. ≥ Do not connect the AC mains lead until all other connections are complete. ≥ Insert the plugs of the cables to be connected all the way in. ≥ Do not bend cables at sharp angles. Speaker connection ∫ Single wiring connection e.g., SB-R1 Speaker cable Speaker cable This unit (rear) ≥ When using single wiring connection, set the speaker selector knob to [A] or [B]. ( 1 Turn the knobs to loosen them, and inser
Open the catalog to page 8
∫ Bi-wiring connection e.g., This unit (rear) Speaker cable Speaker cable ≥ When making bi-wiring connections, set the speaker selector knob to [A+B]. ( ≥ When the connections are completed, pull the speaker cables lightly to check that they are connected firmly. ≥ Be careful not to cross (short-circuit) or reverse the polarity of the speaker wires as doing so may damage the amplifier. ≥ Wire the polarity (r/s) of the terminals correctly. Not doing so may adversely affect stereo effects or cause malfunction. ≥ For details, refer to
Open the catalog to page 9
System control connection to an SU-R1 ≥ You can input digital audio signals to this unit and play back music. ≥ You can operate this unit and the SU-R1 simultaneously with ease on the remote control of the SU-R1. ( This unit (rear) Cable for system control (not supplied) ≥ When using the system control function, set the input selector knob to [DIGITAL]. ( 13) ≥ Use category 7 or above straight LAN cables (STP) when connecting to peripheral devices. ≥ We recommend using cables with a length of 3 m or less. ≥ Do not connec
Open the catalog to page 10
Connecting to analogue audio output devices English You can input analogue audio signals to this unit and play back music. e.g., This unit (rear) Audio cable (not supplied) *1 Select [BALANCED] or [UNBALANCED]. Set the analogue audio input selector switch to a position that corresponds to the device you want to play. *2 We recommend using cables with a length of 3 m or less. ≥ When connecting to an analogue audio output device, set the input selector knob to [ANALOG]. ( Pull out the XLR cables while pres
Open the catalog to page 11
AC mains lead connection Connect only after all other connections are completed. This unit (rear) AC mains lead (supplied) To a household mains socket ∫ To disconnect the AC mains lead from this unit Pull out the AC mains lead while pressing the top and bottom sides of the connector. ≥ Although the AC power switch is in the [ ] position, the unit is not completely disconnected from the mains. Remove the plug from the main electrical outlet if you will not be using the unit for an extended period of time. Place the unit so the plug can be easily removed. NORSK ≥ Selv om hovedbryteren er i stilling...
Open the catalog to page 12
Select a playback device and gain value. • When the SU-R1 is connected via the system control function, you can operate using the SU-R1's remote control. • The output correction setting is applied separately to each speaker terminal option (A/B/A+B). • Depending on the type of the connected speakers, the effect of the output correction function may be minimal. • The corrected output remains in effect until you measure the characteristics again. When you use other speakers, redo the measurement.
Open the catalog to page 13All Technics catalogs and technical brochures
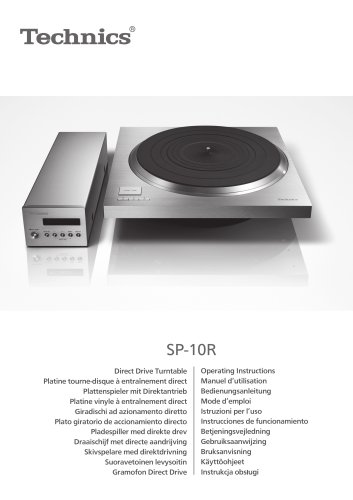 SP-10R / Direct Drive Turntable
272 Pages
 SB-R1 / Speaker System
128 Pages
 SE-R1 / Stereo Power Amplifier
36 Pages
Archived catalogs
 Hi-Fi Audio 2014/15
32 Pages
 SP-10R / Direct Drive Turntable
136 Pages
 SB-R1 / Speaker System
128 Pages
 SU-R1 / Network Audio Control Player
240 Pages

- Interior speaker
- Home speaker
- Black home theater
- Rectangular home theater
- White stereo speaker
- Multimedia speaker
- Round speaker
- Wooden audio system
- Audio amplifier
- Built-in audio system
- Wooden speaker
- Built-in speaker
- Commercial speaker
- Bluetooth speaker
- Tower audio system
- Tower speaker
- Wireless speaker
- Living room speaker
- Turntable