
- Catalogs
- Tapco Roofing Products
- Tapco Eaves Ventilation Kits Fixing Guide


Tapco Eaves Ventilation Kits Fixing Guide

Tapco Eaves Ventilation Kits Fixing Guide
1. Begin by nailing one end of the panel over the roof rafter.
2. The panel can easily fit onto rafters spaced at 400mm and 600mm centers.
3. By extending the panel, it can also be attached to rafters at 450mm centers.
4. Ensure subsequent panels overlap at the rafter fixing.
Overfascia Ventilators
5. Install the fascia board lower than usual to accommodate the ventilator: 15mm for the 10mm system and 27mm for the 25mm system.
6. Attach the ventilator to the top edge of the fascia board, ensuring each vent connects to the adjacent unit.
Felt Support Tray
7. Position the felt support tray over the fascia vent, aligning the nail guide groove with the slot in the fascia vent. Nail through the vent into the top edge of the board at approximately 400mm centers, or alternatively, fix to the rafters at the top edge of the tray.
10mm / 25mm Eaves Vent System – 6 metre pack
Notes:
- The underlay should overlap the felt support tray by 150mm.
- If a comb filler is specified, use the nail groove on the felt support tray to position nails through the fascia vent.
- The felt support tray is suitable for roof pitches of 17.5° and above. For pitches below 17.5°, consult Tapco Roofing Products’ Technical Department.
- The 10mm Eaves Vent System includes a 10mm over fascia vent strip, rafter roll, and felt support tray.
- The 25mm Eaves Vent System includes a 25mm over fascia vent strip and felt support tray.
Catalog excerpts
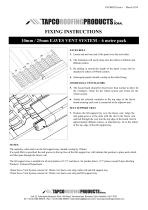
FIXING INSTRUCTIONS 10mm / 25mm EAVES VENT SYSTEM – 6 metre pack EAVES ROLL 1. Locate and nail one end of the panel over the roof rafter. 2. The formation will easily drop onto the rafters at 400mm and 600mm centres. 3. By pulling to extend the length of the panel it may also be attached to rafters at 450mm centres. 4. Subsequent panels should overlap on the rafter fixing. OVERFASCIA VENTILATORS 5. The fascia board should be fixed lower than normal to allow for the ventilator, 15mm for the 10mm system and 27mm for the 25mm system. 6. Attach the selected ventilator to the top edge of the fascia board ensuring each vent is connected to the adjacent unit. FELT SUPPORT TRAY 7. Position the felt support tray over the fascia vent. Align the nail guide groove at the ends with the slot in the fascia vent and nail through the vent into the top edge of the board. Nail at approximately 400mm centres, or alternatively, fix to the rafters at the top edge of the felt support tray. 7 NOTES: The underlay, when laid over the felt support tray, should overlap by 150mm. If a comb filler is specified, the nail groove in the top face of the felt support tray will indicate the position to place nails which will then pass through the fascia vent. The felt support tray is suitable for all roof pitches of 17.5° and above. for pitches below 17.5° please consult Tapco Roofing Products’ Technical Department. 10mm Eaves Vent System consists of: 10mm over fascia vent strip, rafter roll and felt support tray. 25mm Eaves Vent System consists of: 25mm over fascia vent strip and felt support tray. Unit 32, Tokenspire Business Park, Hull Road, Woodmansey, Beverley, East Yorkshire, HU17 0TB Tel: +44 (0)1482 880478 | Fax: +44 (0)1482 880678 | [email protected] | www.tapcoroofingproduct
Open the catalog to page 1All Tapco Roofing Products catalogs and technical brochures
 TapscoSlate Fixing Guide
26 Pages
 Dry verge fixing guide
1 Page
 Tapcoroofing Brochure
8 Pages
 Self-Build Homes Fact Sheet
2 Pages
 Re-Roof Your Home Fact Sheet
2 Pages
 Outdoor Living Fact Sheet
2 Pages
 Modular Homes Fact Sheet
2 Pages
 Conservatory Roof Fact Sheet
2 Pages
 40-year Warranty
2 Pages
 ISO 9001 Certificate
2 Pages
 Wunderlay
2 Pages
 VP300
VP3002 Pages


- Roof tile
- Profile
- Edge profile
- Black roof tile
- Sustainable roofing
- Drain connector
- Industrial roof vent
- Waterproof roofing
- Slate look roof tile
- Roof ridge tile
- Easy to install roofing sheet
- Colored roofing sheet
- Industrial closer
- Roof profile
- Traditional look roof tile
- Slate look roofing
- Lightweight roofing
- Ventilated covering element
- End roof tile