


AUTOCLIP M3 / AUTOCLIP M5

AUTOCLIP M3 / AUTOCLIP M5
This manual is a crucial component of the robotic lawn mower, providing essential information for authorized users. It emphasizes the importance of adhering to instructions to prevent health risks and economic damages. The manufacturer reserves the right to make changes without prior notice.
Identification of Manufacturer and Equipment
The nameplate on the appliance contains vital information for safe operation. For technical assistance, users should provide data from the identification plate, including the serial number and type of fault.
Safety Information
The manual highlights potential hazards and stresses the importance of caution. Key safety regulations include reading and understanding the manual before use, ensuring no one is in the working area, especially children and pets, and not tampering with safety devices. The robot should not be used in wet conditions or with damaged parts.
Technical Information
The manual provides technical specifications, including voltage, current, protection rating, mass, and cutting width. It also describes the appliance's main parts and their functions.
Installation
Instructions cover packing, unpacking, and planning the system installation. It includes setting up the perimeter wire, marking boundaries, and installing the charging station. Initial battery charging procedures are also detailed.
Adjustments
Recommendations for adjustments, including cutting height, are provided to optimize performance.
Use and Operation
Requirements for use, control panel descriptions, and menu navigation are explained. The manual covers setting up via a mobile app, programming modes, and safety features like automatic return to the charging station.
Maintenance
Routine and scheduled maintenance guidelines are provided, including cleaning and troubleshooting. Part replacement instructions, such as for batteries and blades, are included.
Disposal and Compliance
Instructions for robot disposal and an EC declaration of conformity are provided, ensuring compliance with safety standards.
Regularly inspect the robot to ensure the blade, mounting screws, and cutting mechanism are not worn or damaged. Tighten all nuts, bolts, and screws to maintain optimal working condition. Avoid using or charging the robot in explosive or flammable environments. Use only the manufacturer-supplied battery charger and power supply to prevent electric shocks or battery leakage.
Safety Devices
1. Obstacle Detector: Activates when the robot hits an object over 10 cm, causing it to reverse.
2. Inclinometer: Stops the blade if the robot exceeds slope limits or tips over.
3. Emergency Stop Switch: Instantly halts the robot and blade when pressed.
4. Over-current Protection: Monitors motor heat, reversing direction if overheating occurs, and stops if persistent.
5. No Signal Sensor: Stops the robot if no signal is detected.
Safety Signals
Read instructions carefully. Do not touch the blade or place hands/feet under the machine while running. Maintain a safe distance from the robot, especially for children and pets. Avoid spraying water on the machine.
Technical Specifications
Models: Autoclip M3 and M5. Maximum mowing surface: 300-500 m². Dimensions: 537x415x252 mm. Weight: 9.5 kg. Cutting height: 25-60 mm. Blade diameter: 220-250 mm. Cutting speed: 2400 RPM. Maximum slope: 45%. Operating temperature: -10°C to 50°C. Sound level: 57 dB(A). Water protection: IPx4.
Installation Guidelines
Plan installation to optimize charging station and perimeter wire placement. Position the charging station on level, stable ground with good drainage, away from sprinklers. Ensure a straight area of 200 cm in front of the station. Avoid metal barriers near the station. Install the power supply in a ventilated, protected area.
Perimeter Wire Setup
Check the lawn for obstacles and slopes before laying the perimeter wire. Ensure the lawn is even and free of obstacles. The robot can handle slopes up to 45% under certain conditions. Mark boundaries and secondary areas as needed, ensuring passages are at least 70 cm wide.
The document provides detailed instructions for installing and setting up a robotic lawn mower. Key steps include laying the perimeter wire, which can be buried or laid on the ground, ensuring it is in contact with the ground to prevent damage. The wire should be laid starting from the charging station, with specific distances from obstacles like pavements, metal objects, and water bodies to avoid interference and ensure proper functioning.
Perimeter Wire Installation
The perimeter wire should be laid in a clockwise direction, with pegs securing it at intervals of about 100 cm. For curved sections, ensure the wire curves smoothly with a radius of 20 cm. If obstacles are present, the wire should be laid at specified distances to prevent the robot from hitting them.
Charging Station Installation
The charging station should be positioned in a predefined area, with the power supply unit placed out of children's reach. The perimeter wire is connected to the charging station's terminals, and the station is secured to the ground with pegs or screw anchors.
Battery Charging and Initial Use
On first use, the robot's battery should be charged for at least 4 hours. The robot is placed in the charging station, and the AUTO LED should be off during charging. Once charged, the robot can be used or programmed for initial start-up.
Adjustments and Operation
Adjustments to the cutting height should be made with the robot safely off, using the provided key. The robot can operate in manual or automatic mode, with specific instructions for each. The document emphasizes the importance of following the manual's procedures and using protective gloves during adjustments.
Control Panel and Menu
The control panel includes buttons for stopping, starting, and pausing the robot, as well as enabling automatic operation. The robot can be controlled and programmed via a mobile app, which allows changes to working times, rain sensor settings, and other functions.
Mobile Application
The robot can be paired with a smartphone via Bluetooth using the "Stiga Remote" app. The app allows users to change settings, control the robot, and monitor its status and any errors.
The document provides a comprehensive guide on programming and maintaining a robotic lawn mower. It includes instructions on setting up the robot, programming its work schedules, handling secondary areas, and performing routine maintenance.
Specifications and Setup
The robot can be programmed via a smartphone application. Key functions include setting working times, enabling/disabling the rain sensor, and configuring secondary areas. The rain sensor can be set to either return the robot to the charging station during rain or allow it to continue mowing.
Programming Mode
- Work Schedules: Two work schedules can be set to optimize mowing frequency, especially in complex areas with secondary zones.
- Edge Cutting: This mode is recommended to be left at default settings for optimal performance.
- Secondary Areas: The robot can be programmed to mow secondary areas by setting the percentage of the area, distance, and direction from the charging station.
Safety and Maintenance
- Safety Stop: The robot can be stopped using the "OFF" key or "STOP" key for maintenance or in case of danger.
- Automatic Return: The robot returns to the charging station at the end of its work cycle, during rain, or when the battery needs charging.
- Prolonged Inactivity: Before storing the robot for long periods, it should be fully charged, cleaned, and stored in a dry place.
Operating Tips
Users are advised to simulate test maneuvers, mow frequently, and ensure the work area is clear of people and pets. The robot should not be used on grass higher than the cutting blade.
Routine Maintenance
Maintenance includes cleaning the robot, checking the blade, and ensuring the charging station is free of debris. Scheduled maintenance should be performed weekly, monthly, and annually.
Troubleshooting
The guide provides solutions for common issues such as abnormal vibrations, incorrect positioning, and incomplete mowing. Users are advised to safely stop the robot before attempting any troubleshooting.
This manual is an integral part of the machine, created by the manufacturer to provide necessary information to authorized personnel throughout the machine's lifespan. It is crucial to read and apply the information rigorously to ensure safety and avoid economic damage. The manual should be kept accessible for consultation when needed. The manufacturer reserves the right to make changes without prior notice.
Manufacturer and Equipment Identification
The nameplate on the machine provides essential references for safe operation. For technical assistance, contact the manufacturer's service or an authorized center, providing the data from the nameplate, approximate usage hours, and the type of defect.
Safety Information
The manufacturer emphasizes safety and health risks associated with the equipment. Users must pay attention to prevent risks. The product is equipped with a blade and is not a toy. It should be used only for its intended purpose, following all operational, maintenance, and repair instructions. Ensure no one is in the operational area during robot operation, especially children, elderly, or disabled individuals, and pets. Warning signs should be placed around the work area if used in public places.
Safety Standards
Operators must be familiar with the robot's specific characteristics and safety standards. Only original spare parts should be used, and the design should not be altered. The robot should not be used with damaged parts or in explosive or flammable environments. Only the provided battery charger should be used.
Safety Equipment
The robot includes obstacle sensors, an inclinometer, an emergency stop switch, overcurrent protection, and a signal absence sensor to ensure safe operation.
Technical Information
The manual provides detailed technical specifications, including model descriptions, dimensions, weight, cutting height, blade diameter, motor speed, maximum slope, operating temperature, sound pressure level, water protection degree, and electrical characteristics. The robot is designed for automatic lawn mowing and can be programmed to work on multiple areas. It operates within a perimeter defined by a boundary cable and changes direction upon encountering obstacles.
General Description of Equipment
The robot is designed for automatic lawn mowing in residential gardens or lawns at any time of day or night. It is compact, quiet, and easy to transport. The robot can be programmed to work on multiple areas, including a main area and several secondary areas, depending on the model's specifications. It recognizes taller or denser grass and can automatically switch to a spiral movement for a perfect finish.
Begin laying the perimeter cable from the charging station, leaving two meters for final adjustments. Ensure the cable is in contact with the ground to prevent damage from the lawnmower. Use the provided nails to secure the cable every 10 cm. For non-linear sections, ensure the cable curves smoothly with a 20 cm radius.
Buried Cable Installation
Dig a trench 2-3 cm deep and lay the cable clockwise along the path. Do not bury the cable deeper than 5 cm to maintain signal quality. Secure the cable with nails if necessary and cover it, ensuring it remains taut.
Perimeter Cable Jointing
Use original joints for connecting additional perimeter cables. Ensure cables are fully inserted into the joint and press the button with pliers. Only use original joints to ensure a secure and waterproof connection.
Charging Station and Power Supply Installation
Disconnect the main power before installation. Position the power supply out of children's reach, above 160 cm. The perimeter cable should not be less than 50m. Secure the charging station to the ground with nails and screws if necessary. Connect the perimeter cable to the transmitter's red and black terminals.
Battery Charging for First Use
Place the robot in the charging station, press "ON/OFF," and wait for it to power up. The battery LED will turn orange when the station is detected. Ensure the "AUTO" LED is off before programming the robot.
Settings and Recommendations
Follow the manual for all settings. Adjust the cutting height with the provided key, ensuring the robot is safely stopped. Gradually reduce the cutting height to avoid cutting grass taller than 1 cm above the blade.
Operation and Functionality
Read the manual thoroughly before first use. Avoid using the robot in adverse weather conditions. The control panel includes buttons for stopping, starting, and setting automatic or manual operation.
Startup Procedure
Ensure the grass height is suitable and the work area is clear of obstacles. Place the robot in the charging station, press "ON/OFF," and configure for automatic or manual operation. In manual mode, start the work cycle with "START/PAUSE." In automatic mode, the robot follows a preset schedule.
Accessing the Menu via App
Use the Bluetooth-enabled app to program and control the robot. Change the default PIN from "0000" for security. The app allows scheduling, rain sensor configuration, and more.
User Menu Configuration via Mobile App
Access the app to configure work schedules, rain sensor behavior, and secondary zones. Adjust work hours to optimize performance based on lawn complexity and robot capabilities.
The document provides guidelines for configuring robotic lawn mowers for different garden sizes and complexities. It includes a table suggesting initial configurations for models Autoclip M3 and M5, with specific operational times. It is recommended to set the robot to work every day for optimal performance.
For lawns with secondary areas, programming is necessary to guide the robot on how to reach and maintain these areas. The document outlines how to set the percentage of the secondary area relative to the total lawn size, the distance to reach it, and the direction of travel.
The document emphasizes the importance of stopping the robot safely using the "STOP" button for maintenance or in emergencies. It provides detailed steps for safely restarting the robot and returning it to the charging station after work or in case of rain or low battery.
Instructions are given for maintaining the robot during long periods of inactivity, including battery charging and storage conditions. Before reactivation, specific steps must be followed to ensure the robot functions correctly.
Charging procedures are outlined, with warnings against charging in explosive environments. The document details the steps for proper charging and storage to prevent battery self-discharge.
Recommendations include simulating maneuvers for first-time users, frequent mowing, and avoiding mowing wet or excessively tall grass. It advises programming the robot to avoid unnecessary wear and ensuring safety by keeping people and pets away during operation.
Regular maintenance tasks are listed, such as cleaning the blade and checking for wear. The document provides a maintenance schedule and emphasizes using protective gear during maintenance.
A troubleshooting section helps identify and resolve common issues, such as abnormal vibrations or incorrect positioning in the charging station. Solutions include checking cable positions and reconfiguring settings.
The document outlines common battery issues such as depletion and incomplete charging. It recommends using original replacement parts and cleaning contact points to prevent oxidation.
Secondary Zone Mowing Problems
Issues with incomplete mowing in secondary zones are attributed to poor programming. Proper programming instructions are provided.
Blade and Cutting Issues
Damaged or blocked blades require replacement or cleaning. Safety precautions, such as using gloves, are emphasized.
Perimeter Wire and Robot Positioning
Problems with the perimeter wire, such as incorrect connections or positioning, are addressed with solutions for proper installation and adjustments.
Component Replacement Recommendations
Guidelines for replacing components like batteries and blades are provided, emphasizing the use of original parts and safety measures.
End-of-Life Disposal
The document stresses the importance of proper disposal of the robot and its components, in compliance with local regulations to avoid environmental harm.
Declaration of Conformity
The product complies with various EU directives and standards related to safety, electromagnetic compatibility, and environmental protection.
It is recommended to program the robot to work every day to maximize its capabilities. The robot has two work periods, Arbeitszeit 1 and Arbeitszeit 2, which can be set for different times of the day. If the times overlap or are set incorrectly, the robot will signal an error and reset the values. For optimal performance, especially in complex gardens or those with additional areas, longer work times may be necessary.
Work Days and Edge Cutting
All days should be set as workdays to fully utilize the robot's capabilities. Edge cutting can be activated, and it is advised to keep the factory settings for frequency.
Programming Additional Areas
If the lawn includes additional areas, these must be programmed to guide the robot on how and how often to mow them. The size of the additional area can be set as a percentage of the total lawn area, with options ranging from 10% to 100%. The direction and distance to reach these areas can also be configured.
Safety Stop and Maintenance
The robot can be stopped safely using the "STOP" button, especially during maintenance or in emergencies. Regular maintenance includes cleaning the robot and checking for worn parts. The robot should be stored in a dry, protected area during long periods of inactivity, and the battery should be charged every five months.
Automatic Return to Charging Station
The robot will return to the charging station when the work time ends, it rains, or the battery is low. Before restarting after a long period of inactivity, certain steps must be followed to ensure proper functioning.
Battery Charging During Long Inactivity
The robot should not be charged in explosive or flammable environments. Ensure the contact plates are clean before charging.
Usage Recommendations
Familiarize yourself with the manual and perform test maneuvers initially. Regularly check the robot's components and avoid using it on grass taller than 1 cm above the blade. Program the robot to avoid unnecessary wear and ensure no people or pets are in the operating area during use.
Maintenance Recommendations
Use personal protective equipment during maintenance, especially when handling the blade. Regular cleaning and inspection of the robot's components are necessary to maintain efficiency.
Troubleshooting
Common issues include abnormal vibrations or noise, which may be due to a damaged blade or debris. Ensure the robot is stopped safely before inspection and remove any obstacles or debris.
- Nominal Voltage: 25.9V – 1x2.5 Ah
- Charger: 29.4 V DC - 2.0 A
- Average Charging Time: 1 hour 15 minutes
- Average Operating Time After Full Charge: 50 minutes (depending on grass conditions and area complexity)
- Robot Guide Transmitter Frequency Band: 500 - 60000 Hz
- Maximum Radio Frequency Power: < 10 dBm
- Bluetooth Frequency Band: 2402 - 2480 MHz
- Maximum Radio Frequency Power: < 14 dBm
- Managed Zones: 2 including the main zone
- Rain Sensor: Included
- Maximum Perimeter Wire Length: 800 meters (2624 feet)
The equipment is a robot designed for automatic lawn mowing in residential gardens at any time of day or night. It is compact, quiet, and easily transportable. The robot can be programmed to work on multiple areas, including a main area and several secondary areas, depending on the model specifications. It operates within a perimeter wire and changes direction randomly upon detecting the wire or obstacles.
- The robot is delivered well-packaged. During unpacking, handle with care and check component integrity.
- Keep plastic films and containers away from infants and small children to prevent suffocation.
- Retain packaging materials for future use.
- Plan the installation to determine the best location for the charging station and perimeter wire path.
- The charging station should be placed at the edge of the lawn, preferably in the largest area, and easily accessible to other lawn areas.
- Ensure the power supply is in a child-inaccessible area, preferably above 160 cm (63 inches).
- The electrical connection must comply with current laws and be equipped with a functioning ground system and an RCD with a maximum activation current of 30 mA.
- It is advisable to install the power unit in a lockable, well-ventilated cabinet.
- Check the entire lawn surface before installing the perimeter wire.
- Prepare and delimit work areas, install the perimeter wire, and set up the charging station and power supply.
- The perimeter wire should be installed clockwise and counterclockwise around flower beds.
- Ensure the lawn is uniform and free of holes, stones, or other obstacles.
- The robot can mow surfaces with a maximum slope of 45% under certain conditions.
- The perimeter wire should be laid on terrain with a slope not exceeding 20%.
- Check the entire lawn surface and determine if it needs to be divided into separate work areas.
- Identify secondary areas that are difficult to reach through random movement.
- The minimum passage width is 70 cm (27.56 inches) from perimeter wire to perimeter wire.
- Configure secondary area dimensions and direction during programming.
- Place the perimeter wire at least 5 cm (1.96 inches) from the edge of pavements at the same level as the lawn.
- For metallic surfaces, place the wire at least 30 cm (11.81 inches) away.
- For obstacles like walls or curbs, place the wire at least 35 cm (13.78 inches) away.
- For areas with pools, ponds, or public roads, place the wire at least 90 cm (35.43 inches) away.
- Always wear protective gloves to avoid hand injuries when handling the cutting blade.
- Ensure the robot is safely stopped before performing any maintenance (refer to "Safe Robot Shutdown").
- Blade Maintenance: Replace worn or damaged blades with original parts. Clean the blade regularly to prevent clogging from debris.
- Battery Maintenance: Replace batteries when they reach the end of their lifecycle with original replacements. Ensure battery contacts are clean to allow full charging.
- Slow Flashing Orange Light: Indicates a damaged or clogged blade. Stop the robot safely and clear any obstructions.
- Fast Flashing Orange Light: Indicates issues with the perimeter wire. Check connections and ensure proper installation.
- Solid Orange Light: Indicates an unrecoverable error. Restart the robot and contact authorized service if the issue persists.
- Follow manufacturer instructions for all replacements and repairs, or contact authorized service centers.
- Use only original parts for replacements to ensure compatibility and safety.
- The robot is classified as WEEE (Waste Electrical and Electronic Equipment) and must be disposed of according to local regulations.
- Separate and recycle electrical components at authorized collection centers.
- Dispose of packaging and batteries sustainably at designated collection points.
- The product complies with essential safety, health, and environmental protection requirements of EU directives, including machinery, electromagnetic compatibility, and WEEE directives.
- Sound power levels are within specified limits, ensuring compliance with noise emission standards.
This document serves as a comprehensive guide for the operation and maintenance of a robotic lawn mower. It is intended for authorized personnel and should be read thoroughly to prevent health risks and economic damage. The manual is originally in Italian and may be translated to meet legal or commercial requirements. It should be kept accessible throughout the device's lifespan.
Identification of Manufacturer and Device
The identification plate on the device provides essential references for safe use. For technical service requests, details from this plate, including the approximate working hours and type of defect, should be provided.
Safety Information
The manufacturer emphasizes safety and health risks associated with the equipment. Users are advised to read and understand the safety instructions to prevent any risks.
Safety Standards
The product is equipped with a blade and is not a toy. Users must adhere to the manufacturer's instructions for operation, maintenance, and repairs. The robot should not be used in the presence of people, especially children, the elderly, or pets. It is recommended to schedule the robot's operation when no one is present in the area.
Technical Information
The document provides detailed technical specifications, including model types, dimensions, weight, cutting height, motor speed, and environmental operating temperatures. It also outlines the electrical characteristics, battery type, and charging details.
Safety Equipment
The robot is equipped with various safety features, including obstacle sensors, an inclinometer, an emergency stop switch, overload protection, and a signal absence sensor.
Technical Specifications
The document includes detailed technical data for different models, such as maximum mowing area, dimensions, weight, cutting height, motor type, and speed. It also specifies the environmental conditions for operation and the protection level against water.
General Device Description
The device is a compact, quiet, and portable robot designed to automatically mow lawns at any time of day or night. It can be programmed to work in multiple zones based on the characteristics of the area to be mowed.
The robot mower operates within a designated perimeter using a boundary wire. It changes direction randomly upon encountering the wire or obstacles, ensuring it does not exceed half its length beyond the boundary. The robot can detect denser or taller grass and switch to a spiral mowing pattern for thorough coverage. The mowing area depends on factors like robot model, battery capacity, lawn characteristics, and blade condition.
Installation Guidelines:
The installation requires careful planning to determine the best location for the charging station and boundary wire. The charging station should be placed at the lawn's edge, preferably in the largest area, and accessible to all zones. The power unit should be installed in a secure, ventilated area, away from children and direct sunlight. Ensure the electrical connection complies with safety standards, including a functional grounding system and a residual current device.
Boundary Wire Setup:
Before installing the boundary wire, inspect the lawn for obstacles and uneven surfaces. The wire should be laid clockwise around the perimeter and counterclockwise around obstacles. The robot can handle slopes up to 45% under optimal conditions, but the boundary wire should not exceed a 20% slope. Ensure the wire is placed at appropriate distances from obstacles to prevent interference.
Work Zone Preparation:
Check the lawn for uniformity and remove obstacles where possible. Define work zones based on lawn layout, considering narrow passages as secondary zones if they are less than 200 cm wide. The robot can manage multiple secondary zones depending on its model.
Safety and Maintenance:
Maintain a minimum distance of 90 cm from hazards like pools or roads. For obstacles that can withstand impact, such as trees, the robot will change direction upon contact. For a quieter operation, consider marking all obstacles. Ensure the boundary wire is laid correctly to avoid interference and ensure optimal robot performance.
The document provides detailed instructions for configuring and operating robotic lawn mowers, specifically the Autoclip M3 and M5 models. It includes a table for initial configuration based on garden size and complexity, recommending programming the robot to work every day to maximize potential. Secondary zones require specific programming to guide the robot on how to reach and mow these areas, with percentage settings indicating the size of the secondary zone relative to the entire lawn.
Safe stopping of the robot is crucial for maintenance and repair. The robot should be stopped using the "OFF" button under normal conditions or the "STOP" button in emergencies. Regular maintenance includes cleaning, checking, and replacing worn parts like blades and brushes. The document emphasizes the importance of using personal protective equipment during maintenance.
The robot automatically returns to the charging station at the end of work hours, during rain, or when batteries need recharging. For long-term storage, the battery should be fully charged, and the robot should be stored in a dry, protected environment. Before reactivation, specific steps must be followed to ensure proper functioning.
Recommendations include frequent mowing to prevent excessive grass growth, programming the robot to avoid working during irrigation, and ensuring the terrain's slope does not exceed maximum values. The robot should be programmed to work only as necessary to avoid unnecessary wear and battery depletion.
The document provides a troubleshooting guide for common issues such as abnormal vibrations, incorrect positioning in the charging station, and incomplete mowing of work zones. Solutions include checking and replacing blades, adjusting work hours, and ensuring correct programming of secondary zones.
This document provides an overview of the programming functions available for a robotic lawnmower, with detailed descriptions following the flowchart. Some functions are model-specific, as indicated in the technical data table.
Programming Functions
- Operating Times: Two operating periods can be set for the robot's activation. Invalid times reset with an alert.
- Rain Sensor: Determines robot behavior in rain. Options include returning to the station or continuing to mow.
- Date and Time: Configuration of the current date and time.
- Secondary Areas: Configuration for secondary areas includes size, distance, and direction from the charging station.
Operating Schedules
It is recommended to program the robot to work daily. Two time slots can be set for each day, and adjustments may be necessary for complex lawns or those with secondary areas.
Safety and Maintenance
- Stopping the Robot: Use the "OFF" button for normal stops and "STOP" for emergencies or maintenance.
- Long-term Storage: Charge the battery fully before storage and recharge every five months. Maintenance by an authorized dealer is recommended.
- Cleaning: Regular cleaning of the robot and charging station is necessary to maintain functionality.
Troubleshooting
The document provides solutions for common issues such as abnormal vibrations or noise, often related to blade obstructions or damage.
Usage Tips
Recommendations include frequent mowing, avoiding use in high grass, and ensuring the robot is not used in unsafe conditions. Programming should consider seasonal grass growth to avoid unnecessary wear.
The document provides troubleshooting steps for a robotic lawnmower. It includes solutions for common issues such as motor defects, incorrect docking, and abnormal behavior around flower beds. Users are advised to check connections, adjust cutting heights, and ensure proper installation of boundary wires.
Guidelines for replacing parts like batteries and blades are detailed. It emphasizes using original spare parts and performing replacements at authorized service centers. Safety precautions, such as wearing gloves, are highlighted.
The document outlines the proper disposal of the robotic lawnmower as WEEE (Waste Electrical and Electronic Equipment). It stresses the importance of recycling and adhering to local regulations to prevent environmental harm.
The product complies with several EU directives, including the Machinery Directive, EMC Directive, and RoHS Directive. It meets harmonized standards for safety, electromagnetic fields, and emissions. The noise level is specified, and compliance documentation is maintained by the manufacturer.
Catalog excerpts

EN - Operator’s manual FR - Manuel d’utilisation DE - Gebruikershandleiding IT - Manuale di istruzioni NL - Gebruikershandleiding SV - Bruksanvisning DA - Brugsanvisning
Open the catalog to page 1
Reproduction, even partial, of this document without written permission by the manufacturer is strictly forbidden. The manufacturer assumes a policy of continual improvement and reserves the right to modify this document without prior notice on condition that the changes do not constitute health and safety risks. © 2008 - Text, illustrations and page layout by Tipolito La Zecca. The text may be reproduced, in whole or in part, on condition that the author is mentioned. MD-CT-RO-11-R1.1- STIGA - EN - 10-2018 1 User's manual
Open the catalog to page 3
GENERAL INFORMATION This manual forms an integral part of the appliance and was produced by the Manufacturer to provide the necessary information to people authorised to interact with it during its working life. Operators of the appliance must adopt correct working practices and must carefully read and follow all the instructions contained in this manual. This manual is written by the Manufacturer in the original language of Italian and may be translated into other languages to meet legal and/or commercial requirements. Carefully read the instructions contained in this manual to avoid any unnecessary...
Open the catalog to page 4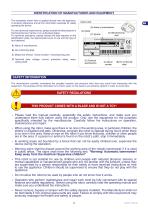
IDENTIFICATION OF MANUFACTURER AND EQUIPMENT The nameplate shown here is applied directly onto the appliance. It contains references and all the information essential for safely operating the device. For any technical requirements, please contact the Manufacturer’s Technical Service Centre or an authorised dealer. For technical assistance, please indicate the data reported on the identification plate, the approximate hours of use and the type of fault detected. DATA PLATE (A) Name of manufacturer (C) Model Manufactured by Xxxxxxxxxxxxxxxxxx, Xxxxxxxxxxxxxxxxx XXXXX Xxxxxxxxxxxxxxxxxxxxxxxx (XX)...
Open the catalog to page 5
• Check that there are no toys, tools, branches, clothing or other objects on the lawn which can damage the blades. Any objects on the lawn can also damage or prevent the correct functioning of the robot. EN • Never allow people to sit on the robot. Never lift the robot to inspect the blade or to carry it while it is running. Do not place hands and feet under the robot when it is in operation. • Do not use the robot when a sprinkler system is running. In this case, program the robot and the sprinkler system so that they do not operate at the same time. Do not wash the robot with high-pressure...
Open the catalog to page 6
A Read user instructions carefully - to understand meanings before j—t—u using the machine. Keep an adequate safe distance from the machine while it is running. Do not touch the rotary blade and do not place your hands or feet underneath the machine when it is running. Wait until the blade and rotating parts come to a complete stop before accessing. While the robot is working, make sure there are no people in the working area (especially children, elderly or disabled people) and pets. Keep children, pets and other people at a safe distance when the machine is functioning. To prevent that risk,...
Open the catalog to page 7
(*) Depends on the condition of the grass, lawn and the complexity of the mowing area. User's manual
Open the catalog to page 8
(*) Depends on the condition of the grass, lawn and the complexity of the mowing area. GENERAL DESCRIPTION OF THE APPLIANCE The appliance is a robot designed and built to automatically trim grass in gardens and house lawns at any time of the day or night. It is small, compact, silent and easy to transport. Depending on the characteristics of the surface to be trimmed, the robot can be programmed to work on more than one area: a primary area and secondary areas (according to the specifications of the various models). During operation, the robot trims the area marked off by the perimeter wire....
Open the catalog to page 9
MAIN PARTS Autoclip M3 Keyboard commands Rain sensor Cutting blade Perimeter wire coil Power cord for the power supply unit Power Supply unit Charging station User manual Key for adjusting the cutting height Joint for perimeter wire
Open the catalog to page 10
INSTALLATION PACKING AND UNPACKING The equipment is delivered suitably packaged. When unpacking, carefully remove and check the integrity of the parts. Warning – Caution Keep plastic wrapping and plastic containers away from infants and children: risk of suffocation! Important Keep the packaging materials for future use. PLANNING OF SYSTEM INSTALLATION The robot is not difficult to install, but requires some preliminary planning in order to find the best area for installing the charging station, power supply unit and for laying out the perimeter wire. The charging station must be positioned on...
Open the catalog to page 11
The charging station is connected to the power supply unit via a cord that must move away from the charging station on the outside of the cutting area. Position the power supply unit according to these rules: in a well-ventilated area protected against atmospheric agents and direct sunlight; preferably inside your home, a garage or shed; if positioned outdoors, the robot must not be exposed to direct sunlight and water. Therefore, it must be protected inside a ventilated box. Do not position in direct contact with the soil or humid environments; position it on the outside of the lawn and not...
Open the catalog to page 12
SETTING UP OF THE PERIMETER WIRE Before installing the perimeter wire, it is necessary to check the entire surface of the lawn. Make any necessary adjustments to the grassy surface during the laying of the perimeter wire in order to allow the robot to function correctly. 1. Preparation and defining of the work areas. track for laying the perimeter wire 2. Installation of the perimeter wire. 3. Installation of the charging station and power supply unit. When laying the perimeter wire, respect the installation direction (clockwise) and the rotation direction around the flowerbeds (counter-clockwise),...
Open the catalog to page 13
PREPARATION AND MARKING THE BOUNDARIES OF THE WORK AREAS Preparation of the lawn to be mowed EN 1. Make sure the lawn to be mowed is even and does not contain holes, stones or other obstacles. If necessary, prepare the lawn by filling in any holes and removing any obstacles. If some obstacles cannot be removed, it is necessary to properly mark these areas with the perimeter wire. 2. The robot can mow surfaces inside the working area with a maximum slope of 45% (45 cm per meter in length) on a regular dry lawn, with no risk of wheels slipping, based on the accessories installed. In the other cases...
Open the catalog to page 14All STIGA catalogs and technical brochures
 RANGE CATALOGUE 2020
154 Pages
 SPARE PARTS AND ACCESSOIRES 2020
80 Pages
 SCM 240 R SCM 440 FS
16 Pages
 EL 340 EL 380 EL 420
26 Pages
 EW 330 EW 370
26 Pages

- Electric lawn mower
- Walk-behind lawn mower
- Gasoline lawn mower
- Collecting lawn mower
- Ride-on lawn mower
- Large area lawn mower
- Brush cutter
- High pressure cleaner
- Industrial vacuum sweeper
- Chainsaw
- Gasoline brush cutter
- Hedge trimmer
- Blade brush cutter
- Commercial high pressure cleaner
- Leaf blower
- Battery-powered lawn mower
- Snowplow
- Electric hedge trimmer
- Portable brush cutter