

Lighting Indoor RTS

Lighting Indoor RTS
Catalog excerpts
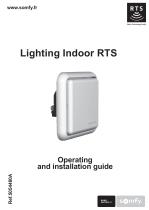
Operating and installation guide MOTION BY sOmfy.
Open the catalog to page 1
1. Brief overview of the Lighting Indoor RTS 3 2. Safety - Important information 3 3. Content of the kit and tools required 4 4. The Lighting Indoor RTS in detail 5 5. Mounting the Lighting Indoor RTS 6 5.1 Before mounting the Lighting Indoor RTS 6 5.3 Mounting and assembly on a surface 8 6. Programming the control point 9 6.1 Accessing the Lighting Indoor RTS PROG button 10 6.2 Identifying the control point 10 6.4 Point with Up/STOP/Down buttons 14 6.6 Situo control point 18 6.7 Telis 1 RTS/Telis Soliris RTS remote controls 19 6.8 Telis 4 RTS/Telis 4 Soliris RTS remote controls 21 7. Replacing...
Open the catalog to page 2
Somfy’s expertise delivers satisfaction guaranteed. Thank you for choosing a Somfy Lighting Indoor RTS. Before installing and using the Lighting Indoor RTS, please read this guide carefully. Somfy solutions animate your lights and entrances to bring your whole house alive. Somfy solutions are designed so that everyone can enjoy the benefits of the products in their home, based on their specific requirements. In this guide, the term ‘product' can include your awning, blind, curtain, garage door, gate, projection screen, roller shutter. Well thought-out and easy to use, Somfy solutions are one...
Open the catalog to page 3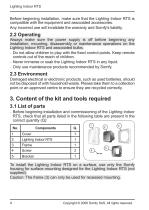
Before beginning installation, make sure that the Lighting Indoor RTS is compatible with the equipment and associated accessories. Any incorrect use will invalidate the warranty and Somfy's liability. 2.2 Operating Always make sure the power supply is off before beginning any installation, mounting, disassembly or maintenance operations on the Lighting Indoor RTS and associated bulbs. - Do not allow children to play with the fixed control points. Keep remote controls out of the reach of children. - Never immerse or soak the Lighting Indoor RTS in any liquid. - Only use maintenance products recommended...
Open the catalog to page 4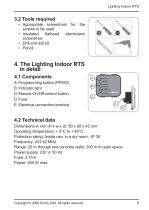
3.2 Tools required • Appropriate screwdriver for the screws to be used • Insulated flathead electricians screwdriver • Drill and drill bit • Pencil A. Programming button (PROG) C.Manual On/Off control button E. Electrical connection terminal. 4.2 Technical data Dimensions in mm (H x w x d): 80 x 80 x 45 mm Operating temperature: + 5°C to + 40°C Protection rating: Inside use, in a dry room - IP 30 Frequency: 433.42 MHz Range: 20 m through two concrete walls; 200 m in open space Power supply: 230 V; 50 Hz Fuse: 3.15 A Power: 500 W max. Copyright © 2008 Somfy SAS. All rights reserved. 5
Open the catalog to page 5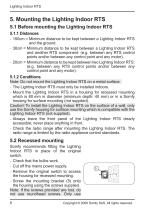
5. Mounting the Lighting Indoor RTS 5.1 Before mounting the Lighting Indoor RTS 5.1.1 Distances - 150cm = Minimum distance to be kept between a Lighting Indoor RTS and the ground. - 30cm = Minimum distance to be kept between a Lighting Indoor RTS and another RTS component: (e.g. between any RTS control points and/or between any control point and any motor). - 20cm = Minimum distance to be kept between two Lighting Indoor RTS: (e.g. between any RTS control points and/or between any control point and any motor). 5.1.2 Conditions Note: Do not mount the Lighting Indoor RTS on a metal surface. - The...
Open the catalog to page 6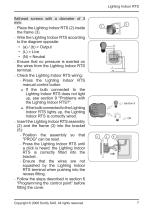
flathead screws with a diameter of 3 mm. - Place the Lighting Indoor RTS (2) inside the frame (3). - Wire the Lighting Indoor RTS according to the diagram opposite: • (a) / (b) = Output • (L) = Live • (n) = Neutral - Ensure that no pressure is exerted on the wires from the Lighting Indoor RTS terminal. - Check the Lighting Indoor RTS wiring: - Press the Lighting Indoor RTS manual control button. ► If the bulb connected to the Lighting Indoor RTS does not light up, see section 9 "Problems with the Lighting Indoor RTS?". ► If the bulb connected to the Lighting Indoor RTS lights up, the Lighting...
Open the catalog to page 7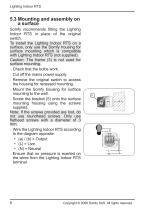
Somfy recommends fitting the Lighting Indoor RTS in place of the original switch. To install the Lighting Indoor RTS on a surface, only use the Somfy housing for surface mounting which is compatible with Lighting Indoor RTS (not supplied). Caution: The frame (3) is not used for surface mounting. - Check that the bulbs work. - Cut off the mains power supply. - Remove the original switch to access the housing for recessed mounting. - Mount the Somfy housing for surface mounting to the wall. - Screw the bracket (5) onto the surface mounting housing using the screws supplied. Note: If the screws...
Open the catalog to page 8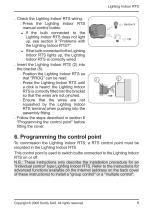
- Check the Lighting Indoor RTS wiring: - Press the Lighting Indoor RTS manual control button. ► If the bulb connected to the Lighting Indoor RTS does not light up, see section 9 "Problems with the Lighting Indoor RTS?". ► If the bulb connected to the Lighting Indoor RTS lights up, the Lighting Indoor RTS is correctly wired. - Insert the Lighting Indoor RTS (2) into the bracket (5). - Position the Lighting Indoor RTS so that "PROG" can be read. - Press the Lighting Indoor RTS until a click is heard: the Lighting Indoor RTS is correctly fitted into the bracket so that the wires are not pinched....
Open the catalog to page 9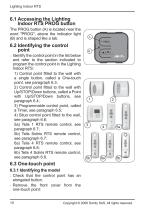
The PROG button (A) is located near the word "PROG", above the indicator light (B) and is shaped like a tab. 6.2 Identifying the control point - Identify the control point in the list below and refer to the section indicated to program the control point in the Lighting Indoor RTS: 1) Control point fitted to the wall with a single button, called a One-touch point, see paragraph 6.3; 2) Control point fitted to the wall with Up/STOP/Down buttons, called a Point with Up/STOP/Down buttons, see paragraph 6.4; 3) Programmable control point, called a Timer, see paragraph 6.5; 4) Situo control point fitted...
Open the catalog to page 10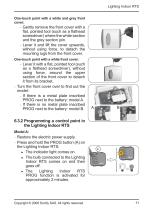
One-touch point with a white and grey front cover: - Gently remove the front cover with a flat, pointed tool (such as a flathead screwdriver) where the white section and the grey section join. - Lever it and lift the cover upwards, without using force, to detach the mounting lugs from the front cover. One-touch point with a white front cover: - Lever it with a flat, pointed tool (such as a flathead screwdriver), without using force, around the upper section of the front cover to detach it from its bracket. - Turn the front cover over to find out the model: - If there is a metal plate inscribed...
Open the catalog to page 11All SOMFY catalogs and technical brochures
 Situo io II
2 Pages
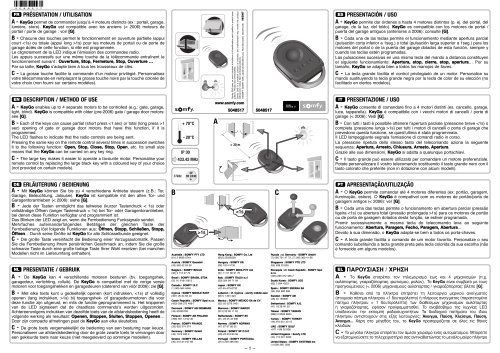 Keygo 4 RTS
2 Pages
 TaHoma® switch
12 Pages
Archived catalogs
 HOME ALARM PRODUCT SHEET
15 Pages
 Situo io II
2 Pages
 evohome-User-Guide
20 Pages
 DEXXO PRO 800 - 1000 RTS
13 Pages
 ROLLIXO RTS
4 Pages
 Irismo Wirefree User Manual
116 Pages
 GDK 700
68 Pages
 INDOOR PLUG PRODUCT SHEET
2 Pages
 Somfy Protect Camera + TaHoma
12 Pages
 Smart Home Brochure
12 Pages
 lightingoutdoor_rts
2 Pages
 Motorized blinds by somfy
8 Pages
 Dexxo Pro
8 Pages
 Sonesse 50
2 Pages
 Sunea Screen io
2 Pages
 LS 40
LS 402 Pages
 Sonesse 40 RTS 447 MHz
2 Pages
 Sonesse 40 RTS
2 Pages
 Sonesse 30
2 Pages
 Screen Up
2 Pages
 Screen Job 40
2 Pages
 LT 50
LT 502 Pages
 J4 WT
J4 WT2 Pages
 LV25 / LW25
2 Pages
 J4 HTM
2 Pages
 LT 28
LT 282 Pages
 J4 2TN
2 Pages
 J4 io
J4 io2 Pages
 J4 1TN
2 Pages
 J4 RTS
2 Pages
 Irismo
2 Pages
 Glydea
2 Pages
 Altus 50 RTS
2 Pages
 SOMFY CATALOG
25 Pages
 Awnings That Think Brochure
2 Pages
 Sunis Flyer
2 Pages
 Sonesse Range Brochure
8 Pages
 animeo IP Brochure
16 Pages
 WireFree Range Brochure
7 Pages
 ZRTSI Flyer
2 Pages
 TaHomA Brochure
28 Pages
 rts_brochure_2012
28 Pages
 enjoy_lifes_simple_pleasures
8 Pages
 2011_rts_pocket_guide_low
93 Pages
 WireFreeSolar Pack
2 Pages
 Awnings That Think
2 Pages
 DEXXO PRO
8 Pages
 Patios - The Somfy way
8 Pages
 Motorised blinds by Somfy
6 Pages




- Contemporary switch
- Recessed switch
- Industrial socket
- Square switch
- Contemporary socket
- Industrial plug socket
- Door intercom
- Push-button switch
- Surface-mounted detector
- Wall-mounted socket
- Recessed socket
- Security camera
- White switch
- White detector
- White socket
- Ventilation controller
- Wall-mounted ventilation controller
- Gate automation
- Surface-mounted security camera
- VirtualExpo Group
- Our Partners
- Careers
- Testimonials