- Catalogs
- SOLATUBE GLOBAL MARKETING INC
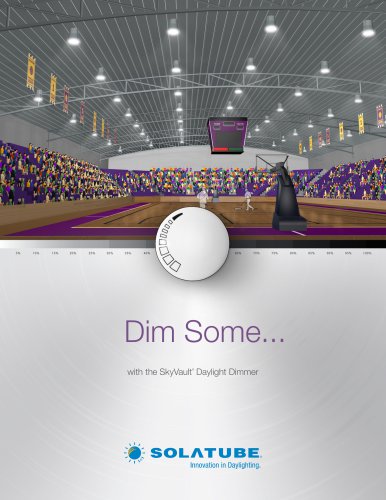
- Solatube® Daylight Dimmer Installation Instructions
Solatube® Daylight Dimmer Installation Instructions
1 /5Pages

Solatube® Daylight Dimmer Installation Instructions
1 /5Pages
Catalog excerpts
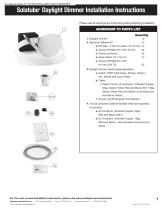
Please read all warnings and instructions before beginning installation. ADDENDUM TO PARTS LISTQuantity 1. Daylight Dimmer (1) a. Foil Tape - 2” (50 mm) wide x 72 (1.8 mm) (1) e. Screws (Phillips) #8 x 5/8” (16 mm) Drill Tip (2) 3. Daylight Dimmer Switch (sold separately). a. Switch: DPDT Momentary, Rocker, Snap-In (5V, 100mA with Cover Plate) b. Cable: i. Switch Circuit: (4) Conductor, Stranded Copper, 22ga, (Green, White, Red and Black) 30 ft. 18ga, (Green, White, Red and Black) not provided and sourced by others. c. Screws: (2) #6 Recessed Oval Slotted 4. Two (2) Conductor Cable for Multiple Units (sold separately, not pictured) a. (2) Conductor, Stranded Copper, 22ga, (Red and Black) 500 ft. b. (2) Conductor, Stranded Copper, 18ga, (Red and Black) - Not provided and sourced by others. For the most current Installation Instructions, please visit www.solatube.com/instructions Solatube International, Inc. | 2210 Oak Ridge Way | Vista, CA 92081-8341 | www.solatube.com | T:888.SOLATUBE
Open the catalog to page 1
WARNING Do not proceed with the installation until you have read the entire instructions, including these warnings. (Use of materials or methods not authorized by Solatube International will result in an invalid warranty.) Solatube International, Inc. (seller) assumes no responsibility or obligation whatsoever for the failure of an architect, contractor, installer, or building owner to comply with all applicable laws, ordinances, building codes, electrical codes, energy codes, fire and safety codes and requirements, roof warranties and adequate safety precautions. Installation of this product...
Open the catalog to page 2
Daylighting Systems Installation Tips (Continued) Allow at least 2-3 hours for the installation, particularly if this is your first installation. During the day, turn off all the lights in the room to see how much natural light comes in through the windows, and determine the best position for the Solatube Daylighting System. To light a specific area, place the system over the area, not in the center of the room. This will prevent the desired area from being shaded by tall objects in the room. Measure the distance between the roof and the ceiling. If you don’t have enough tubing, contact your...
Open the catalog to page 3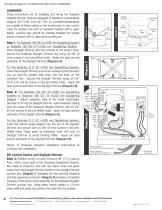
For the Solatube 21-C (21 in/530 mm Daylighting System), orient the Daylight Dimmer around the outside of the transition box so that the locator tabs drop into the slots on the transition box. Secure the Daylight Dimmer using (2) 5/8” (15.5 mm) drill tip screws in the pre-drilled holes. Apply foil tape around perimeter of the Daylight Dimmer (Diagram B). Step 2. For Solatube 160 DS (10 in/250 mm Daylighting System) or Solatube 290 DS (14 in/350 mm Daylighting System) - Adjust extension tube to the small notch/larger diameter to fit into the Daylight Dimmer. Insert extension tubing atop the inside...
Open the catalog to page 4
DC Control (Multiple Units/Daisy-Chain) Step 4. Controlling multiple (two or more) units from one master switch requires (2) conductor cable, black & red, wire stranded (not included). Connect each unit via terminals 1 to 1 (red to red) and 2 to 2 (black to black) (Diagram D). This will require (2) conductors per terminal. Notes for Controlling Multiple Units: 1.) The maximum number of units that can be controlled from one master switch is ten (10). 2.) Maximum distance from the wall switch to the first dimmer in the series cannot exceed: 25 feet for 22 AWG 100 feet for 18 AWG 3.) Maximum distance...
Open the catalog to page 5All SOLATUBE GLOBAL MARKETING INC catalogs and technical brochures
 Commercial Design Collection
17 Pages
 Commercial Product Guide
15 Pages
 Whole House Fan Brochure
5 Pages
 Tubular Skylight Brochure
5 Pages
 Solatube Company Folio
8 Pages
Archived catalogs
 Solatube® Smart LED Folio
2 Pages
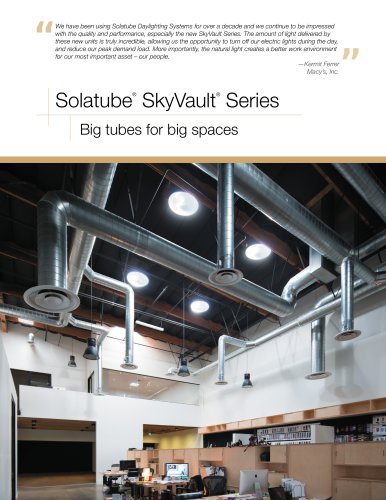
 Solatube® SkyVault® Series
8 Pages
 Solar Attic Fan Brochure
5 Pages
 Garage Fans Brochure
3 Pages
 Commercial Product Guide
9 Pages
 Solar Star® Brochure
5 Pages
 Sustainable Design Guide
5 Pages
 REDEFINE DAYLIGHTING
8 Pages
 Solatube Idea Book
14 Pages


- Light fixture
- Industrial LED light
- Contemporary light fixture
- Recessed light fixture
- Dimmable light fixture
- Linear light fixture
- White light fixture
- Surface-mounted light fixture
- Industrial insulation
- Round light fixture
- IP20 light fixture
- Single light fixture
- Home light fixture
- Panel insulation
- Thermal insulation
- Glass light fixture
- Recessed ceiling light fixture
- Synthetic insulation
- Metal fan
- Industrial solar panel