
- Catalogs
- Siemens Home Appliances
- 90006502641

90006502641

90006502641
Before loading, remove large food remnants. Place utensils securely with openings facing down, ensuring they do not obstruct spray arms. Avoid washing very small utensils in the machine. When unloading, start from the bottom to prevent water from dripping onto lower utensils. Allow hot utensils to cool before handling.
The upper basket can be adjusted in three stages to create more space. Ensure the basket is at the same height on both sides before reinserting.
Use tablets, powder, or liquid detergents, but not washing-up liquid. Follow the manufacturer's instructions for dosage. Combination detergents may require additional salt and rinse-aid for hard water.
Select a programme based on utensil type and soiling degree. Options include Intensive, Auto, Eco, Quick, Gentle, and Prerinse. Additional options like Express Wash, Half Load, Hygiene, Intensive Zone, and Extra Drying can be selected.
Turn on the tap and switch on the appliance. Select a programme and press start. The remaining time is displayed and can vary based on conditions. A timer can delay the start up to 24 hours.
The programme ends when the display shows 0:00. The appliance can be set to switch off automatically after 1 or 120 minutes. Switch off the appliance and turn off the tap after use.
Regular inspection and maintenance prevent faults. Check spray arms for deposits and clean the appliance with detergent if necessary.
Use appliance cleaners suitable for dishwashers. Regularly clean the door seal with a damp cloth. Avoid steam cleaners to prevent damage. Clean the front and fascia with water and mild detergent, avoiding abrasive materials. For stainless steel, avoid sponge cloths to prevent corrosion.
Regularly check and refill special salt and rinse aid as indicated.
The filter system includes a coarse filter, flat fine filter, and microfilter. Check and clean filters after each cycle to prevent blockages.
Check and clean spray arms regularly to prevent blockages from limescale and contaminants.
Common issues include appliance not starting, unusual noises, and detergent residue. Solutions involve checking power supply, water supply, and ensuring proper detergent use.
Follow installation instructions carefully, ensuring correct electrical and water connections. Avoid installing near heat sources and ensure stability if installed under a worktop.
Weight: max. 45 kg, Voltage: 220–240 V, Connected load: 2.0–2.4 kW, Water pressure: 0.05–1 MPa, Inlet rate: min. 10 litres/minute, Water temperature: max. 60 °C.
Connect to an alternating current of 220 V to 240 V. Ensure the socket is accessible and use a residual current operated circuit-breaker.
Secure loose parts and drain the appliance before moving. Follow specific steps to ensure safe transportation.
Instructions for safely switching off and transporting the appliance emphasize turning off the tap and transporting the appliance upright to prevent water damage to the machine control.
If the appliance is located in a frost-prone area, it should be completely emptied. This involves turning off the tap, disconnecting the supply hose, and draining the water.
Highlights the importance of disposing of both new and old appliances responsibly. Encourages separating parts according to type and consulting local authorities for disposal methods. The appliance is marked according to the European guideline 2002/96/EC on waste electrical and electronic equipment (WEEE).
All plastic parts are identified with standardized abbreviations to facilitate sorting during disposal. Advises following safety instructions during delivery and disposal of the appliance.
Catalog excerpts
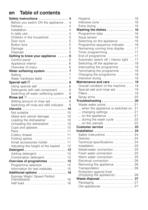
en Table of contents Safety instructions . . . . . . . . . . . . . . . . . 4 Before you switch ON the appliance . . 4 Delivery . . . . . . . . . . . . . . . . . . . . . . . . 4 Installation . . . . . . . . . . . . . . . . . . . . . . 4 In daily use . . . . . . . . . . . . . . . . . . . . . 4 Children in the household . . . . . . . . . . 5 Door lock . . . . . . . . . . . . . . . . . . . . . . 5 Button lock . . . . . . . . . . . . . . . . . . . . . 5 Damage . . . . . . . . . . . . . . . . . . . . . . . 5 Disposal . . . . . . . . . . . . . . . . . . . . . . . 5 Getting to know your appliance . ....
Open the catalog to page 3
en Safety instructions Before you switch ON the appliance Please read the operating and installation instructions carefully. They contain important information on how to install, use and maintain the appliance. Retain all documents for subsequent use or for the next owner. Delivery – Check the packaging and dishwasher immediately for damage caused in transit. Do not switch on a damaged appliance, but contact your supplier. – Please dispose of the packaging material in an environmentally friendly manner. – Do not let children play with packaging and its parts. There is a risk of suffocation from...
Open the catalog to page 4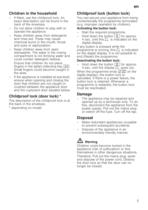
en Children in the household Childproof lock (button lock) – If fitted, use the childproof lock. An exact description can be found in the back of the envelope. – Do not allow children to play with or operate the appliance. – Keep children away from detergents and rinse aid. These may cause chemical burns in the mouth, throat and eyes or asphyxiation. – Keep children away from open dishwasher. The water in the rinsing compartment is not drinking water and could contain detergent residue. Ensure that children do not place fingers in the tablet collecting tray 1B. Small fingers could become caught...
Open the catalog to page 5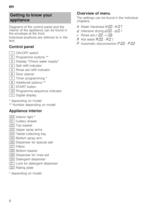
en Getting to know your appliance Diagrams of the control panel and the interior of the appliance can be found in the envelope at the front. Individual positions are referred to in the text. Control panel ( 0 8 @ H P X ` h )" )* ON/OFF switch Programme buttons ** Display “Check water supply” Salt refill indicator Rinse aid refill indicator Door opener Timer programming * Additional options ** START button Programme sequence indicator Digital display * depending on model ** Number depending on model Appliance interior 1" 1* 12 1: 1B 1J 1R 1Z 1b 1j 9" 9* 92 Interior light * Cutlery drawer Top basket...
Open the catalog to page 6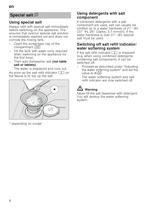
en Using detergents with salt component Special salt $ twtneop hcm ersialong D Using special salt Always refill with special salt immediately before switching on the appliance. This ensures that overrun special salt solution is immediately washed out and does not corrode the rinsing tank. – Open the screw-type cap of the compartment 1R. – Fill the tank with water (only required when switching on the appliance for the first time). – Then add dishwasher salt (not table salt or tablets). The water is displaced and runs out. As soon as the salt refill indicator @ on the fascia is lit, top up the...
Open the catalog to page 8
en Setting amount of rinse aid Rinse aid % As soon as the rinse-aid refill indicator H is lit on the fascia, there is still a rinse-aid reserve of 1 – 2 rinsing processes. Refill with rinse aid. The rinse aid is required for stain-free utensils and clear glasses. Use only rinse aid for domestic dishwashers. Combined detergents with rinse-aid component may be used up to a water hardness of 21° dH (37° fH, 26° Clarke, 3.7 mmol/l) only. If the water hardness is over 21° dH, rinse aid must be used. – Open the dispenser 1j by pressing and lifting the plate on the cover. – Carefully pour rinse aid...
Open the catalog to page 9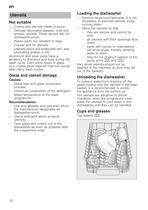
en Utensils Not suitable – Cutlery and utensils made of wood. – Delicate decorative glasses, craft and antique utensils. These decors are not dishwasher-proof. – Plastic parts not resistant to heat. – Copper and tin utensils. – Utensils which are soiled with ash, wax, lubricating grease or ink. Aluminium and silver parts have a tendency to discolour and fade during the wash cycle. Even some types of glass (e.g. crystal glass objects) may turn cloudy after many wash cycles. Glass and utensil damage Causes: – Glass type and glass production process. – Chemical composition of the detergent. – Water...
Open the catalog to page 10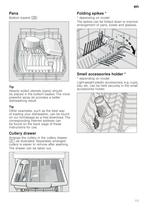
en Pans Bottom basket 1b Folding spikes * ndkosiFlgpe * depending on model The spikes can be folded down to improve arrangement of pans, bowls and glasses. Small accessories holder * Tip Heavily soiled utensils (pans) should be placed in the bottom basket. The more powerful spray jet provides a better dishwashing result. edSacisholmlr a * depending on model Light-weight plastic accessories, e.g. cups, lids, etc. can be held securely in the small accessories holder. Tip Other examples, such as the best way of loading your dishwasher, can be found on our homepage as a free download. The corresponding...
Open the catalog to page 11
en Adjusting the height of the basket The height of the upper utensils basket 12 can be adjusted in 3 stages to create more space either in the upper or lower basket. Appliance height 81.5 cm Top basket Setting 1 max. ø Setting 2 max. ø Setting 3 max. ø 14 cm 16 cm 19 cm Bottom basket 30 cm 28 cm 25 cm – Pull out the top basket 12 out. – To lower the basket, press in the left and then the right lever on the outside of the basket. In doing so, hold the sides of the basket along the upper edge to prevent it from suddenly dropping. Detergent You can use tablets as well as powder or liquid detergents...
Open the catalog to page 12
en Adding detergent – If the detergent dispenser 9" is still closed, press the lock 9* to open the detergent dispenser. Pour detergent into the dry detergent dispenser 9" only (insert tablet flat, not on its edge). Dosage: see manufacturer’s instructions on the packaging. The graduated detergent dispenser 9" helps you add the correct amount of powder or liquid detergent. Usually 20 ml–25 ml are adequate for normal soiling. If using tablets, one tablet is adequate. PO PO PO – Close the cover on the detergent dispenser by sliding it up until the lock engages without difficulty. Tip If the utensils...
Open the catalog to page 13All Siemens Home Appliances catalogs and technical brochures
 Freestanding Appliances
42 Pages
 EZ977KZY1E
3 Pages
 CM678G4S6B
3 Pages
 HB672GBS1B
3 Pages
 HB676GBS6B
3 Pages
 EC9A5SB90
3 Pages
 WM14XEH4GB
3 Pages
 ET875FCP1D
2 Pages
 ET651HE17E
3 Pages
 Built-in Appliances Brochure
111 Pages
 catalog 2016
79 Pages
 Ovens 2009
22 Pages
 Free-standing Appliances
46 Pages
 Built in brochure
74 Pages
 Freestanding Brochure
46 Pages

Archived catalogs
 EX807LX67E
7 Pages
 2014 Built-in Appliances
77 Pages
 2022 Built-in Appliances
109 Pages
 9000371475
24 Pages
 9000443031
14 Pages
 9000455265
148 Pages
 9000523431
32 Pages
 9000538106
31 Pages
 9000644314
36 Pages
 9000644401
40 Pages
 9000645988
24 Pages
 9000646020
24 Pages
 9000650983
8 Pages
 90005263871
140 Pages
 90007104181
40 Pages
 9000731775
23 Pages
 90005805756
30 Pages
 90006317281
28 Pages
 90006944392
30 Pages
 9000755818
64 Pages
 90004930205
36 Pages
 90004930197
32 Pages
 Freestanding Cooling 09
20 Pages
 Freestanding Dishwashers 09
14 Pages
 Freestanding Washing 09
10 Pages
 Hobs 2009
9 Pages
 Cooker Hoods 2009
18 Pages
 Built-in Cooling 2009
20 Pages
 Built-in Laundry 2009
7 Pages
 Built-in Dishwashers 2009
16 Pages
 Tumble Dryers 2009
7 Pages
 Smart Living 2009
16 Pages

- Siemens oven
- Siemens electric oven
- Siemens range hood
- Range hood with built-in lighting
- Siemens cooktop
- Industrial coffee machine
- Siemens single oven
- Siemens cooktop with front controls
- Siemens wall-mounted range hood
- Siemens built-in cooktop
- Convection oven
- Automatic coffee machine
- Siemens built-in oven
- Siemens single-chamber oven
- Siemens ducted range hood
- Industrial wine cellar
- Black coffee maker
- Cappuccino coffee machine
- Siemens induction cooktop