PILOT 3000
1 /116Pages

PILOT 3000
1 /116Pages
Catalog excerpts

LIGHTING CONSOLES
Open the catalog to page 1
Vi ringraziamo per aver acquistato un prodotto SGM. Per ottenere i migliori risultati dal suo utilizzo, vi preghiamo di leggere attentamente questo manuale di istruzioni. Al suo interno troverete le informazioni tecniche e le specifiche d’uso del prodotto. Nelle pagine in appendice troverete inoltre schemi e diagrammi destinati all’assistenza tecnica. Nell’ottica di qualità SGM, è possibile che l’Azienda apporti migliorie ai suoi prodotti, per cui consigliamo di allegare il manuale al prodotto stesso e di trascrivere il numero di serie nell’ultima pagina della copertina: utilizzando il presente...
Open the catalog to page 2
Symbols used This manual uses graphic symbols to emphasize any hazards during the operation work described. THIS SYMBOL INDICATES A GENERAL RISK THIS SYMBOL INDICATES ELECTRIC SHOCK RISK Changes to this manual SGM has an on-going product development policy, so the information printed in this manual may not be completely up to date. If any doubts arise regarding the topics covered in this manual or should any further help be required, our online services (internet-server www.sgm.it) are available 24 hours a day. In the FAQ section of the technical assistance zone, answers can be found to numerous...
Open the catalog to page 5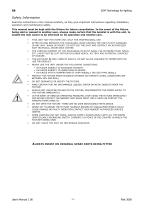
Safety Information Read the instructions in this manual carefully, as they give important instructions regarding installation, operation and maintenance safety. This manual must be kept with the fixture for future consultation. In the event of the fixture being sold or passed to another user, always make certain that the booklet is with the unit, to enable the new owner to be informed on its operation and relative care. THIS UNIT NOT FOR HOME USE; ONLY FOR PROFESSIONAL USE AFTER HAVING REMOVED THE PACKAGING, MAKE CERTAIN THE UNIT IS NOT DAMAGED IN ANY WAY. WHEN IN DOUBT, DO NOT USE THE UNIT AND...
Open the catalog to page 6
General Warranty Conditions The unit is guaranteed for 24 months from the date of purchase against manufacturing faults of the unit or the material it is made from Faults or breakdowns caused by inexperienced or incorrect use of the unit are not covered by the guarantee The guarantee will be considered null and void if the unit has been opened or tampered with by unauthorized personal The guarantee does not foresee the replacement of the unit External components such as handles, switches and removable parts are excluded from the guarantee Transport costs and consequent risks are the responsibility...
Open the catalog to page 7
1.1 System Characteristics Thank you for having chosen the SGM Pilot 3000 Pilot 3000 is a lighting Console dedicated to the control of both conventional and automated lighting fixture of any kind. By means of its two DMX-512 Universes, it is possible to control the timing and running modes of any kind of fixture available on the market thanks to a comprehensive fixture library that can be updated on an on-going basis. This manual describes all the Pilot 3000 features available with Software version1.0. Future software updates along with the relative documentation, can be downloaded from the web...
Open the catalog to page 8
1.4 Hardware layout The standard hardware features for Pilot 3000 consists of: 2 DMX Universes allowing 1024 DMX output channels Midi IN OUT THRU DMX IN SMPTE IN 20 Playback Registers 6 Registers for Playback Control 4 encoders used for handling attributes and Speed Jog-Ball for Pan and Tilt control USB Serial port Audio In Remote pedal IN 1.5 Terminology The following terms are used to indicate Pilot 3000 console functions: Cue: establishes the times and modes of an attribute status of connected fixtures. The concept of a cue is similar to other frequently used terms such as Scene or Memory...
Open the catalog to page 9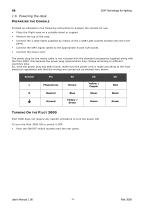
1.6 Powering the desk PREPARING Proceed as indicated in the following instructions to prepare the console for use. Place the Flight-case on a suitable stand or support. Remove the top of the case. Connect the 2 desk-lights supplied by means of the 2 USB-Light sockets located onto the front panel. Connect the DMX signal cables to the appropriate 5-pole XLR socket. Connect the power cord. The power plug for the mains cable is not included with the standard accessories supplied along with the Pilot 3000, this because the power plug requirements may change according to different countries laws. So,...
Open the catalog to page 10
QUICK START This chapter is intended for those users wanting a rapid effective approach to the console, in order to learn basic programming procedure in a short time Pilot 3000 allows programming maximum 999 Cues for each single Register (Cue-List). These Playback Registers are 20 for each single Page, and the total available Pages are 20. This chapter explains what to do by means of the following points: Quick Pilot 3000 setup Basic programming of a Cue. Preparing a Cue-list on Playback Registers Playback of a Cue-list 2.1 Setup Connect the DMX signal cables. Connect the console to the mains...
Open the catalog to page 11
2.2 Programming a Cue 1. Make sure the Grand Master is positioned at 100%. 2. Select the desired fixtures (e.g. the first 3) by pushing the related keys onto the touch panel. A bar inside the fixture key will shows the selection. When the bar is red coloured, then the fixture is selected. 3. Push the Locate key to bring the selected fixtures to the Home position. The Locate action allows finding the fixtures on stage since this command forces the Shutters and Dimmer channels to full open and maximum intensity. In addition, Homing the fixtures will bring Pan and Tilt channels to 50% of their range...
Open the catalog to page 12
2.4 Cue-list Playback IMPORTANT!! Before running a Cue or Cue-list, make sure the Live Editor doesn't still involve any fixtures. Push Ctrl all twice to close the Editor. Pushing the Register's key, will automatically run the related Cue. A repeated push of the Register's key will sequentially playback Cues of the related Cue-list. Each Cue can be run with preset times. The times that control a Cue are: 1. Delay time 2. Fade In time 3. Wait time 4. Fade Out time Allocating or changing the times is very easy: Push the Q List key to display all the Cues related to the Cue-list of the selected Register....
Open the catalog to page 13All SGM Light catalogs and technical brochures
 G·4 Wash-Beam
6 Pages
 i·5 RGBW POI
7 Pages
 i·5 UV POI
6 Pages
 Q·7 W POI
6 Pages
 Q-SERIES
26 Pages
 P-SERIES
24 Pages
 I-SERIES
24 Pages
 SGM SAFETY INFORMATION
8 Pages
 G‐WASH MOVING HEAD
68 Pages
Archived catalogs
 IDEA MOVING LED 300
22 Pages
 P-5
P-544 Pages
 Studio 12 scan control
62 Pages
 X-5 / XC-5 LED Strobe
28 Pages
- Light fixture
- Industrial LED light
- Commercial light fixture
- Dimmable light fixture
- Linear light fixture
- Surface-mounted light fixture
- Outdoor light fixture
- Plastic light fixture
- Outdoor projector
- LED floodlight
- Commercial floodlight
- IP65 light fixture
- Public space light fixture
- IP66 floodlight
- IP65 floodlight
- Flexible LED light strip
- Indoor projector
- Industrial management software
- Moving head spot
- Industrial strip light