- Catalogs
- SEVES GLASSBLOCK
- Photovoltaic BR – 11_6
- Company
- Products
- Catalogs
- News & Trends
- Exhibitions
Photovoltaic BR – 11_6
1 /2Pages

Photovoltaic BR – 11_6
1 /2Pages
Catalog excerpts
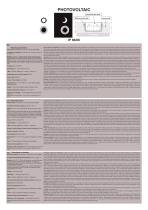
Solar panels 0.6 W±10% / 4 V (service life 25 years) STC* Temperature conditions for use from -20 °C to +60 °C (from -4 to +140 °F) Battery Li-Ion 3.7 V / 2 600 mAh (service life max 500 cycles) To prolong the life expectancy of the battery, a level of battery charge necessary for the photovoltaic to light up is electronically set. This could cause, in bad weather conditions that the photovoltaic does not function until the level of charge is reached (usually one day). Charging: 150 mA at STC Discharging: 8 – 10 mA (or up to 2.9 V) LED: 4 LED GW JDSRS1.EC, 16 400 – 21 000 mcd Operating time when fully charged: 200 hrs Service life: 50000 hrs Colour of illuminating: Cold white Dimensions Ø11.7 x 6 cm (Ø4-3/4” x 2-1/4”) (without plastic installation shell) Weight 1.2 kg (2.42 lb) (without plastic installation shell) Sudden temperature change ΔT = 30 °C (30 °F) Edge conditions for installation: the efficiency of illuminating of Photovoltaic glass blocks is very dependent on exterior environment and/or climatic and weather conditions. In European southern countries such as Spain, South Italy, Greece and Turkey the Photovoltaic glass block will work through the year with efficiency close to 100% (see Technical parameters). On the other hand, in northern countries the irradiation of sunlight is lesser, and integrated accumulator may not be fully charged during daytime. Likely, bad weather such as fog lowers the efficiency significantly. Here are some examples, which lower the efficiency of illuminating: northern countries (e.g. Scandinavia, Canada, north parts of Russia), bad weather (overcast, rain, and fog), winter months (short days, small irradiation). All of these aspects together can lower the efficiency to couple of percent, which may result in only few minutes of illumination per day. For maximum efficiency it is best to install the glass blocks into free areas where sun light may access the solar panel throughout the day. Installation: please note that all steps of installation should be performed with care. The Photovoltaic glass block can be installed freely into the soil, into the wood constructions, or into the constructions from different material. However, for maximum efficiency of strength characteristics it is recommended to install the Photovoltaic glass blocks into the concrete (mortar) bed. The installation steps are as following: A) Unpack the glass block from carton and put it outside of the plastic installation shell. B) Prepare the place where the glass block will be installed. First the plastic installation shell should be settled. Place it into the spot of your choice into the concrete bed. For the best performance the depth of concrete (fresh mixture) should be at least 15 mm under the placed plastic installation shell. Make sure that the space under the installation shell is well filled with concrete. If you expect the temperature below zero during winter, it is recommended to use frost-resistant concrete. Let the concrete dry 24 hrs. C) Insert a small magnet (included in the package) into a slot on the bottom of the Photovoltaic glass block, use a nonmagnetic tool to insert the magnet deep into the slot. Seal the slot of the Photovoltaic glass block. It is recommended to use a neutral silicone for exterior applications. D) Clean and dry the inner part of plastic installation shell. E) Place the Photovoltaic glass block into the plastic installation shell. F) Seal the joint between the edge of the Photovoltaic glass block and edge of plastic installation shell. It is recommended to use the neutral silicone for exterior applications. The depth of the silicone joint should be at least 5 mm. Since Seves Glassblock does not have any means of controlling installation and assembly condition, of whether competent persons do the work or the appropriate selection and correct use of the accessory materials, no guarantee can cover materials that prove defective after installation and/or assembly. For detailed information please contact Seves Glassblock technical department. Cleaning and Maintenance: do not use abrasive materials for cleaning the glass block. Scratches significantly lower the efficiency of integrated solar panel and therefore the functioning of the whole product. Do not use oily solvents, hydrofluoric acid or strong alkaline solutions (e.g. sodium carbonate) to clean Photovoltaic glass blocks. For changing of non-functioning product follow these steps: A) Cut the silicone seal between the Photovoltaic glass block and plastic installation shell. B) Use the glass holder for pulling of non-functioning Photovoltaic glass block from plastic installation shell. C) When placing the new Photovoltaic glass block, follow the steps from Installation point c). Ecology: during liquidation of product kindly follow the waste treatment regulations valid for your country. The product contains glass, plastics, electronics parts, solar cells and LiFePO4 accumulator. Do not put this product into your common waste bin and protect your environment. Harmonized standards: EN 1051-1: Glass in building – Glass blocks and glass pavers – Part 1: Definitions and description. EN 1051-2: Glass in building – Glass blocks and glass pavers – Part 2: Evaluation of conformity. EN 55015 - Limits and methods of measurement of radio disturbance characteristics of electrical lighting and similar equipment. EN 61000-3-2 - Electromagnetic compatibility (EMC) - Part 3: Limits – Section 2: Limits for harmonic current emissions (equipment input current up to and including 16 A per phase) EN 61000-3-3 - Electromagnetic compatibility (EMC) - Part 3: Limits - Section 3: Limitation of voltage changes, voltage fluctuations and flicker in low-voltage supply systems, for equipment with rated current <= 16 A per phase and not subject to conditional connection EN 61547 - Equipment for general lighting purposes - EMC immunity requirements EN 60529 - Degrees of protection provided by enclosures (IP code) Compressive strength > 100 kN (22500 lbf) (according to EN 1051-1) *STC (Standard Test Conditions – energy source 1 000 W/m2; AM1.5 a 25°C) Parametri tecnici Pannelli solari 0.6 W±10% / 4 V (vita utile 25 anni) STC* Condizioni termiche d’utilizzo da -20 °C a +60 °C Batteria Li-Ion 3.7 V / 2 600 mAh (durata di vita massima 500 cicli) Per prolungare la durata della batteria, viene impostato elettronicamente un livello minimo di carica necessario per l’accensione del fotovoltaico.Ciò potrebbe causare, in condizioni di maltempo, la non accensione dei led. Questo fino a quando non viene raggiunto il livello di carica sufficiente (di solito un giorno). Carica: 150 mA come da STC Illuminazione: 8 – 10 mA (o fino 2.9 V) LED: 4 LED GW JDSRS1.EC, 16 400 – 21 000 mcd Durata di funzionamento in stato di carica completa: 200 ore Durata di vita utile: 50000 ore Colore della luce: bianco freddo Dimensioni Ø11.7 x 6 cm (senza guscio di plastica per montaggio) Peso 1.2 kg (senza guscio di plastica per montaggio) Sbalzo termico repentino ΔT = 30 °C Condizioni limite per l’installazione: l’efficienza dei mattoni di vetro Photovoltaic dipende in larga misura dall’ambiente esterno e/o dalle condizioni meteorologiche e climatiche. In nazioni europee come Spagna, Italia meridionale, Grecia e Turchia, il prodotto funziona tutto l’anno con un’efficienza vicina al 100% (v. Parametri tecnici). Nelle nazioni del nord, tuttavia, l’irradiazione solare è inferiore e l’accumulatore integrato potrebbe non caricarsi completamente durante il giorno. Allo stesso modo, anche il cattivo tempo, come la nebbia, diminuisce notevolmente l’efficienza del prodotto. Riportiamo alcuni esempi di fattori che riducono l’efficienza dell’illuminazione: nazioni situate a nord (es. Scandinavia, Canada, regioni settentrionali della Russia), maltempo (nuvolosità, pioggia e nebbia), mesi invernali (ore di luce ridotte, irradiazione contenuta). Tutti questi aspetti insieme possono ridurre l’efficienza a pochi punti percentuali, con una conseguente durata dell’illuminazione di appena qualche minuto al giorno. Per avere la massima efficienza è meglio installare i mattoni di vetro in aree libere dove la luce solare può colpire il pannello tutto il giorno. Installazione: seguire con attenzione tutte le fasi di installazione. I mattoni di vetro Photovoltaic possono essere installati liberamente a terra, in strutture di legno o di materiale diverso. Per una massima efficienza e resistenza, tuttavia, si consiglia di installarli su un massetto di calcestruzzo (malta). Le fasi di installazione sono le seguenti: A) Togliere il mattone di vetro dalla confezione ed estrarlo dal guscio di plastica per l’installazione. B) Predisporre il posto in cui verrà installato. Inserire innanzitutto il guscio di plastica. Posizionarlo nel punto desiderato sul massetto di calcestruzzo. Per ottenere migliori prestazioni, la profondità del calcestruzzo (impasto fresco) deve essere inferiore di almeno 15 mm rispetto al guscio di plastica. Assicurarsi che lo spazio sottostante il guscio di plastica sia ben rivestito di calcestruzzo. Se si prevede che le temperature scendano sotto lo zero in inverno, si consiglia di usare calcestruzzo resistente al gelo. Lasciare asciugare il calcestruzzo per 24 ore. C) Inserire il piccolo magnete (incluso nella scatola) nel foro che si trova sotto al mattone di vetro Fotovoltaico. Per questa operazione utilizzare uno strumento non magnetico. Si consiglia, una volta inserito il magnete, di sigillare il foro con un silicone neutro per applicazioni esterne. D) Pulire e asciugare la parte interna del guscio di plastica. E) Posizionare il mattone di vetro all’interno del guscio. F) Sigillare i giunti tra il bordo del mattone di vetro e quello del guscio. Per le applicazioni all’esterno si consiglia di usare silicone neutro. La profondità del giunto di silicone deve essere di almeno 5 mm. Seves Glassblock non ha mezzi per verificare le condizioni di installazione e assemblaggio, se il lavoro è stato eseguito da personale competente o se sono stati scelti e impiegati in modo corretto i materiali accessori, di conseguenza non può fornire alcuna garanzia che copra i difetti dei materiali dopo l’installazione e/o l’assemblaggio. Per informazioni più dettagliate contattare l’assistenza tecnica Seves Glassblock. Pulizia e manutenzione: per la pulizia del mattone di vetro non usare prodotti abrasivi. I graffi, infatti, riducono notevolmente l’efficienza del pannello solare integrato e quindi anche il funzionamento dell’intero prodotto. Per la pulizia del mattone di vetro non impiegare solventi oleosi, acido fluoridrico o soluzioni alcaline aggressive (es. carbonato di sodio). Per la sostituzione di un prodotto non funzionante procedere come segue: A) Incidere lo strato sigillante di silicone tra il mattone di vetro e il guscio di plastica. B) Usare una ventosa per sollevamento vetro per estrarre il mattone non funzionante dal guscio di plastica. C) Per l’installazione del mattone di vetro Photovoltaic, seguire le istruzioni del punto c) (Installazione). Ecologia: nello smaltimento del prodotto seguire le normative di trattamento dei rifiuti in vigore nella propria nazione. Il prodotto contiene vetro, plastica, componenti elettronici, celle solari e un accumulatore LiFePO4. Non gettare il prodotto tra i rifiuti domestici. Proteggere l’ambiente. Norme armonizzate: EN 1051-1: Glass in building – Glass blocks and glass pavers – Part 1: Definitions and description. EN 1051-2: Glass in building – Glass blocks and glass pavers – Part 2: Evaluation of conformity. EN 55015 - Limits and methods of measurement of radio disturbance characteristics of electrical lighting and similar equipment. EN 61000-3-2 - Electromagnetic compatibility (EMC) - Part 3: Limits – Section 2: Limits for harmonic current emissions (equipment input current up to and including 16 A per phase) EN 61000-3-3 - Electromagnetic compatibility (EMC) - Part 3: Limits - Section 3: Limitation of voltage changes, voltage fluctuations and flicker in low-voltage supply systems, for equipment with rated current <= 16 A per phase and not subject to conditional connection EN 61547 - Equipment for general lighting purposes - EMC immunity requirements EN 60529 - Degrees of protection provided by enclosures (IP code) Resistenza alla compressione>100 kN (conforme a EN 1051-1) *STC (Standard Test Conditions - fonte di energia 1 000 W/m2; AM1.5 a 25°C) Paramètres techniques Panneaux solaires 0.6 W±10%/ 4 V(durée de vie 25 ans) STC* Conditions de température d’utilisation de -20 °C à +60 °C Batterie Li-Ion 3.7 V / 2 600 mAh (durée de vie maxi 500 cycles) Pour prolonger la durée de vie de la batterie, un niveau de charge de la batterie nécessaire à l’allumage du photovoltaïque est réglé électroniquement. Il se pourrait donc, par mauvais temps, que le photovoltaïque ne fonctionne pas jusqu’à ce que le niveau de charge soit atteint (généralement en un jour). Charge: 150 mA selon STC* Éclairage: 8 – 10 mA (ou jusqu’à 2,9 V) LED: 4 LED GW JDSRS1.EC, 16 400 – 21 000 mcd Durée de fonctionnement en charge complète: 200 heures Durée de vie: 50 000 heures Couleur d’éclairage: Blanc-froid Dimensions Ø11.7 x 6 cm (sans boîtier d’installation en plastique) Poids 1.2 kg (sans boîtier d’installation en plastique) Variation brusque de température ΔT = 30 °C Résistance à la compression > 100 kN (selon EN 1051-1) *STC(Standard Test Conditions-source d’énergie 1 000 W/m2; AM1.5 a 25°C) Conditions requises pour l’installation: L’efficacité de l’éclairage des briques de verre photovoltaïques dépend fortement de l’environnement extérieur et des conditions climatiques et météorologiques. Dans les pays situés dans le Sud de l’Europe comme l’Espagne, l’Italie du Sud, la Grèce et la Turquie, la brique de verre photovoltaïque fonctionnera toute l’année avec une efficacité proche de 100% (voir point 4. Paramètres techniques). En revanche, dans les pays plus au Nord, les rayons du soleil sont moins forts et la batterie est susceptible de ne pas se recharger totalement pendant la journée. De même, un mauvais temps comme le brouillard réduit considérablement l’efficacité. Voici quelques exemples de réduction de l’efficacité de l’éclairage : Pays du Nord (par ex. Scandinavie, Canada, zones situées au Nord de la Russie), le mauvais temps (ciel couvert, pluie et brouillard), mois d’hiver (jours plus courts, rayonnement faible). Tous ces aspects réunis peuvent réduire l’efficacité à 2 ou 3 % ce qui peut aboutir à seulement quelques minutes d’éclairage par jour. Pour un maximum d’efficacité, il est préférable de poser les briques de verre dans des zones libres où la lumière du soleil peut facilement accéder au panneau solaire pendant toute la journée. Installation: Veuillez noter que toutes les étapes de l’installation doivent être effectuées avec soin. La brique de verre photovoltaïque peut être installée librement dans la terre, dans les constructions en bois, ou dans les constructions à base de matériau différent. Néanmoins, pour une efficacité maximale des caractéristiques de résistance, il est recommandé d’installer les briques de verre photovoltaïques dans un lit de béton (mortier). Les étapes d’installation sont les suivantes: A) Déballez la brique de verre du carton et placez-la à l’extérieur du boîtier d’installation en plastique. B) Préparez l’emplacement d’installation de la brique de verre. Tout d’abord, mettez en place le boîtier d’installation en plastique. Placez-le à l’endroit de votre choix dans le lit de béton. Pour une performance optimale, la profondeur du béton (mélange frais) doit être d’au moins 15 mm sous le boîtier d’installation en plastique mis en place. Assurez-vous que l’espace situé sous le boîtier d’installation est bien rempli de béton. Si vous prévoyez des températures inférieures à zéro pendant l’hiver, il est recommandé d’utiliser un béton résistant au gel. Laissez le béton sécher pendant 24 heures. C) Insérez le petit aimant (inclus dans l’emballage) dans l’emplacement prévu sur l’arrière de la brique photovoltaïque, utilisez un outil non magnétique pour mettre en place correctement l’aimant. Scellez l’aimant à l’intérieur de l’emplacement. Nous conseillons l’utilisation d’un silicone neutre pour application à l’extérieur. D) Nettoyez et séchez l’intérieur du boîtier d’installation en plastique. E) Placez la brique de verre photovoltaïque dans le boîtier d’installation en plastique. F) Scellez le joint situé entre l’arête de la brique de verre photovoltaïque et l’arête du boîtier en plastique. Il est recommandé d’utiliser du silicone neutre conçu pour les applications extérieures. La profondeur du joint en silicone doit être d’au moins 5 mm. Seves Glassblock n’ayant aucune possibilité de contrôler les conditions de pose, les modalités d’exécution, de l’utilisation d’une main d’œuvre compétente lors de l’installation et de l’emploi correct des matériaux accessoires, Seves Glassblock ne peut donner aucune garantie du matériau après sa pose. Pour plus d’informations, veuillez contacter le département technique de Seves Glassblock. Nettoyage et maintenance: ne pas utiliser de produits abrasifs pour le nettoyage de la brique de verre. Des rayures réduisent considérablement l’efficacité du panneau solaire intégré et donc le fonctionnement du produit dans sa totalité. Ne pas utiliser de solvants huileux, d’acide fluorhydrique ou de solutions alcalines fortes (par ex. carbonate de sodium) pour nettoyer les briques de verre photovoltaïques. Pour le remplacement d’un produit défaillant, veuillez procéder comme suit: A) Coupez le joint en silicone situé entre la brique de verre photovoltaïque et le boîtier d’installation en plastique. B) Utilisez le support de verre pour tirer la brique de verre photovoltaïque et la sortir du boîtier d’installation en plastique. C) Lorsque vous remettez en place la nouvelle brique de verre photovoltaïque, suivez les étapes à partir du point c) (Installation). Écologie: lors de l’élimination du produit, veuillez suivre les réglementations en matière de traitement des déchets applicables dans votre pays. Le produit contient du verre, du plastique, des éléments électroniques, des cellules solaires et une batterie LiFePO4. Ne jetez pas ce produit dans votre poubelle à ordures ménagères et protégez votre environnement. Normes harmonisées: EN 1051-1: Glass in building – Glass blocks and glass pavers – Part 1: Definitions and description. EN 1051-2: Glass in building – Glass blocks and glass pavers – Part 2: Evaluation of conformity. EN 55015 - Limits and methods of measurement of radio disturbance characteristics of electrical lighting and similar equipment. EN 61000-3-2 - Electromagnetic compatibility (EMC) - Part 3: Limits – Section 2: Limits for harmonic current emissions (equipment input current up to and inc
Open the catalog to page 1All SEVES GLASSBLOCK catalogs and technical brochures
 Photovoltaic B-1111_6
2 Pages
 Energy Saving
11 Pages
 Home and Interiors
43 Pages
 Smart Home
56 Pages
 Smart Architecture
68 Pages
 Design-Technology
28 Pages
 Basic – Design
36 Pages
 New Colour Collection
44 Pages
 Mendini Collection
8 Pages
 Vetropieno
2 Pages
Archived catalogs
 SGB project jbook
55 Pages
 VetroPieno
2 Pages
 Photovoltaic
2 Pages
 SGB_Home&Interiors
48 Pages

- Roof tile
- Exterior paver
- Public space paver
- Pedestrian paver
- SEVES GLASS BLOCK glass brick
- Flat roof tile
- SEVES GLASS BLOCK square glass brick
- Textured paver
- SEVES GLASS BLOCK wall glass brick
- Small roof tile
- Portuguese roof tile
- SEVES GLASS BLOCK smooth glass brick
- Commercial paver
- SEVES GLASS BLOCK facade glass brick
- SEVES GLASS BLOCK sound insulation glass brick
- Home paver
- SEVES GLASS BLOCK high-resistance glass brick
- SEVES GLASS BLOCK colored glass brick
- Interior paver