
- Catalogs
- SAS PREFABRICADOS DE HORMIGON SA
- Placement Recommendations for SAS Walling


- Company
- Products
- Catalogs
- News & Trends
- Exhibitions
Placement Recommendations for SAS Walling
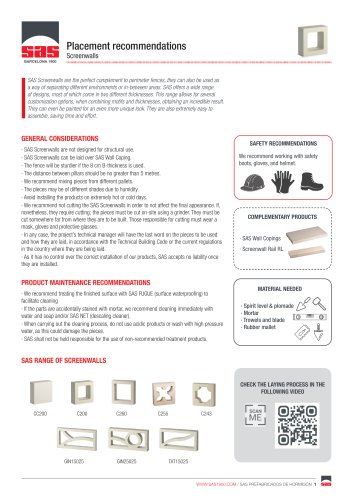
Placement Recommendations for SAS Walling
SAS Screenwalls are ideal for complementing perimeter fences and separating environments. They offer a variety of designs and thicknesses, allowing for customization and easy assembly. They can be painted for a unique appearance.
Safety Recommendations
Use safety boots, gloves, and helmets during installation.
General Considerations
- Not designed for structural use.
- Can be laid over SAS Wall Coping.
- Use 8 cm thickness for sturdier fences.
- Distance between pillars should not exceed 5 meters.
- Mix pieces from different pallets to avoid shade differences.
- Avoid installation in extreme temperatures.
- Cutting should be done on-site with proper safety gear.
- Installation should comply with local regulations.
- SAS is not liable for incorrect installation.
Product Maintenance Recommendations
- Treat surfaces with SAS FUGUE for waterproofing.
- Clean mortar stains immediately with water and soap or SAS NET.
- Avoid acidic products and high-pressure washing.
Complementary Products
- SAS Wall Copings
- Screenwall Rail RL
Material Needed
- Spirit level & plumb line
- Mortar
- Trowels and blade
- Rubber mallet
Preparation
Finish masonry with SAS Wall Coping, soak Screenwalls, and let them drain before installation.
Rails
Use RLA Rail for 5-cm Screenwall and RLB Rail for 8-cm Screenwall. For stability, embed a 4-mm rod every 3 rows.
Laying
Build in rows, ensuring level and plumb alignment. Use mortar carefully to avoid staining.
Wet the Wall
Wet the wall after 8 hours and repeat for 2 days. Allow to dry for 48 hours.
Joints
Leave 3-5 mm joints with spacers, clean immediately if stained.
Surface Treatment
Once dry, treat with SAS FUGUE for easier cleaning.
Laying with Cement-Based Adhesive
Flexible cement-based adhesive can be used without pre-moistening. Ensure no gaps between pieces.
Laying Screenwalls on Large Areas
- Reinforce with rods for areas larger than 2x2 meters.
- Use forged steel and frame with Screenwall Rail for interior courtyards.
- Use expansion joints for large surfaces.
Design Ideas
Combine different designs and thicknesses for creative layouts. Perform a dry lay before final installation. Overlap pieces for relief effects.
Catalog excerpts

Placement recommendations Screenwalls SAS Screenwalls are the perfect complement to perimeter fences, they can also be used as a way of separating different environments or in-between areas. SAS offers a wide range of designs, most of which come in two different thicknesses. This range allows for several customisation options, when combining motifs and thicknesses, obtaining an incredible result. They can even be painted for an even more unique look. They are also extremely easy to assemble, saving time and effort. GENERAL CONSIDERATIONS · SAS Screenwalls are not designed for structural use. · SAS Screenwalls can be laid over SAS Wall Coping. · The fence will be sturdier if the 8 cm B-thickness is used. · The distance between pillars should be no greater than 5 metres. · We recommend mixing pieces from different pallets. · The pieces may be of different shades due to humidity. · Avoid installing the products on extremely hot or cold days. · We recommend not cutting the SAS Screenwalls in order to not affect the final appearance. If, nonetheless, they require cutting; the pieces must be cut on-site using a grinder. They must be cut somewhere far from where they are to be built. Those responsible for cutting must wear a mask, gloves and protective glasses. · In any case, the project’s technical manager will have the last word on the pieces to be used and how they are laid, in accordance with the Technical Building Code or the current regulations in the country where they are being laid. · As it has no control over the correct installation of our products, SAS accepts no liability once they are installed. PRODUCT MAINTENANCE RECOMMENDATIONS · We recommend treating the finished surface with SAS FUGUE (surface waterproofing) to facilitate cleaning · If the parts are accidentally stained with mortar, we recommend cleaning immediately with water and soap and/or SAS NET (descaling cleaner). · When carrying out the cleaning process, do not use acidic products or wash with high pressure water, as this could damage the pieces. · SAS shall not be held responsible for the use of non-recommended treatment products. SAFETY RECOMMENDATIONS We recommend working with safety boots, gloves, and helmet. COMPLEMENTARY PRODUCTS · SAS Wall Copings · Screenwall Rail RL MATERIAL NEEDED · Spirit level & plomade · Mortar · Trowels and blade · Rubber mallet SAS RANGE OF SCREENWALLS CHECK THE LAYING PROCESS IN THE FOLLOWING VIDEO
Open the catalog to page 1
preparation Finish off the masonry wall with SAS Wall Coping (see Wall Coping Installation Recommendations). Wait 24 hours before continuing. IMPORTANT: Before laying, wet the Wall Coping. Soak the Screenwalls in water and let them drain for 10 minutes. ^ LAYING Build the Screenwalls in rows, ensuring that they are level and plumb. Adhere the pieces using mortar that is not too wet, to prevent it from spilling over and staining the piece. ^ JOINTS Leave 3 mm to 5 mm joints between pieces with the plastic spacers. Clean the joints. Lay carefully in order not to stain the Screenwalls and Wall Copings....
Open the catalog to page 2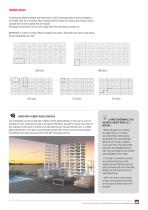
Combining the different designs and thicknesses of SAS Screenwalls allows numerous designs to be created. Here are a few layout ideas, starting with the creation of a module that makes it easy to calculate the number of pieces that are required. We always recommend a dry lay of the design before the final laying is carried out. IMPORTANT: In order to combine different sections and create a relief effect, the pieces must always be laid overlapping each other. LAYING SCREENWALLS ON AN AREA LARGER THAN 2X2 METRES • When the gaps to be covered are larger than 2 x 2 metres, we recommend reinforcing...
Open the catalog to page 3All SAS PREFABRICADOS DE HORMIGON SA catalogs and technical brochures
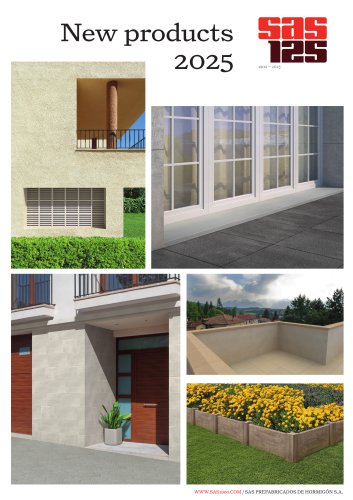 New Products 2025
2 Pages
 SAS General Catalogue
148 Pages



- Wash stand
- Contemporary wash basin
- White sink
- Rectangular sink
- Industrial planter
- Countertop sink
- Exterior planter
- Contemporary flower box
- Commercial planter
- Industrial rail
- Public space planter
- Flower pot
- 1-hole sink
- Outdoor railing
- Shower tray
- Rectangular planter
- Residential fence
- Contemporary fence
- Ventilation grill