s23ss sloped bollard
1 /5Pages
s23ss sloped bollard
1 /5Pages
Catalog excerpts
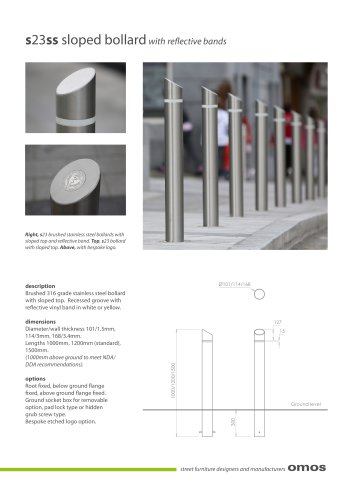
s23ss sloped bollard with reflective bands Right, s23 brushed stainless steel bollards with sloped top and reflective band. Top, s23 bollard with sloped top. Above, with bespoke logo. description Brushed 316 grade stainless steel bollard with sloped top. Recessed groove with reflective vinyl band in white or yellow. options Root fixed, below ground flange fixed, above ground flange fixed. Ground socket box for removable option, pad lock type or hidden grub screw type. Bespoke etched logo option. dimensions Diameter/wall thickness 101/1.5mm, 114/3mm, 168/3.4mm. Lengths 1000mm, 1200mm (standard), 1500mm. (1000mm above ground to meet NDA/ DDA recommendations). street furniture designers and manufacturers
Open the catalog to page 1
s23 AGFF Fixing Instructions (for areas already paved) 1 Ensure that the surface which the bollard is to be fixed to is of sufficient size and strength for this purpose. 2 Position the bollard in the desired location and mark hole positions. 3 Drill following fixing manufacturer’s instructions to suit the chosen fixing. Choose a fixing which will accept an M10 SS CSK bolt, either a mechanical anchor (such as Hilti HSC-IR M10*60) or an internally threaded fixing designed for chemical fixing (such as Hilti HIS-RN M10xL [length to suit]). IMPORTANT, the depth of the hole must be sufficient to allow...
Open the catalog to page 2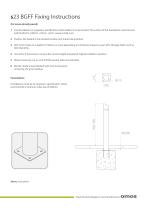
s23 BGFF Fixing Instructions (for areas already paved) 1 Cast foundation to engineers specification where bollard is to be located. The surface of the foundation must be level and finished to 100mm +10mm, -0mm. Leave to fully cure. 2 Position the bollard in the desired location and mark hole positions. 3 Drill 12mm holes to a depth of 150mm (or more depending on thickness of paver), insert M12 through bolts (such as Hilti HSA M12). 4 Use shims if necessary to ensure the correct height and plumb. Tighten bollard in position. 5 Where necessary cut or core drill the paving slabs and reinstate. 6...
Open the catalog to page 3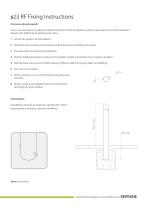
s23 RF Fixing Instructions (for areas already paved) note: as an alternative to setting the bollard directly into the foundation, a plastic pipe may be set in the foundation allowing the bollard to be fixed at a later date. 1 Set out the position of the bollard/s. 2 Where the area has been paved remove sufficient pavers to facilitate excavation. 3 Excavate holes to engineer’s specification. 4 Position bollard precisely ensuring correct position, height and plumb. Prop securely in position. 5 Back fill holes with concrete (35N20) leaving sufficient depth for paving slabs and bedding. 6 Once set...
Open the catalog to page 4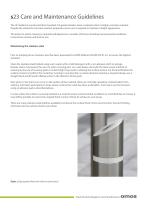
s23 Care and Maintenance Guidelines The s23 bollard is constructed from brushed 316 grade stainless steel, a material which is highly corrosion resistant. Despite the material’s corrosion resistant properties some care is required to maintain a bright appearance. The extent to which cleaning is required will depend on a number of factors including environmental conditions, construction activity and level of use. Maintaining the stainless steel Prior to shipping all our stainless steel has been passivated to ASTM A380 and ASTM 976 01-8.1 to ensure the highest standard. Clean the stainless steel...
Open the catalog to page 5All Omos Ltd. catalogs and technical brochures
 t3 seat
3 Pages
 s96w asym bench
6 Pages
 s83 bench
5 Pages
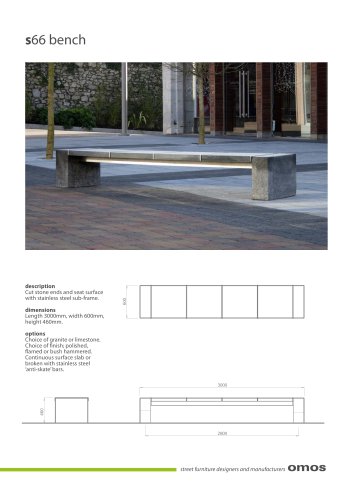 s66 bench
4 Pages
 s64 bench
4 Pages
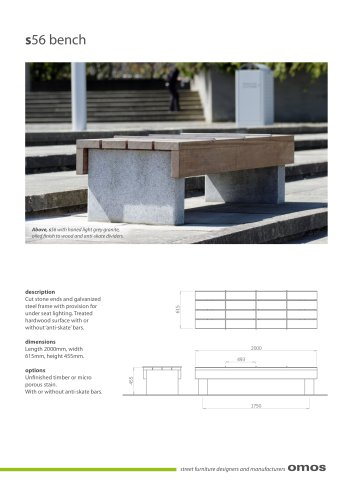 s56 bench
5 Pages
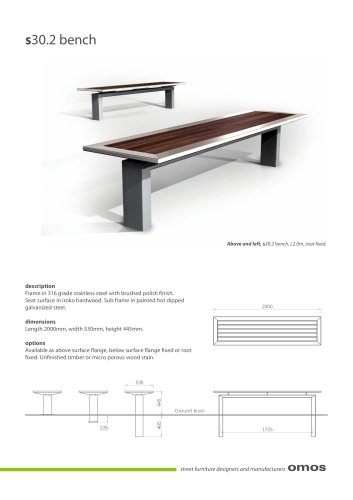 s30.2 bench
6 Pages
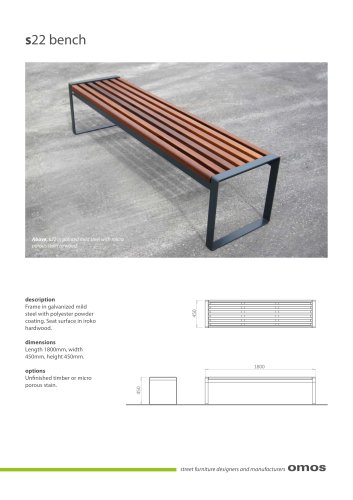 s22 bench
3 Pages
 s19ms bench
4 Pages
 t3 straight bench
3 Pages
 s06 bench
3 Pages
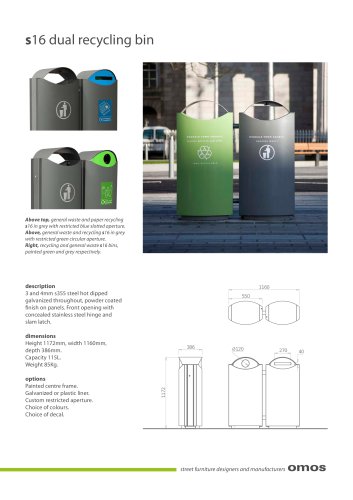 s16 dual recycling
3 Pages
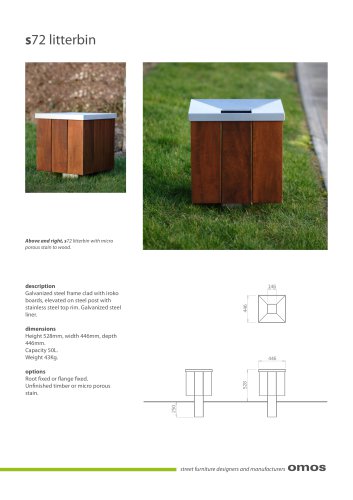 s72 litter bin
5 Pages
 s53 dog litter bin
3 Pages
 s41 litter bin
3 Pages
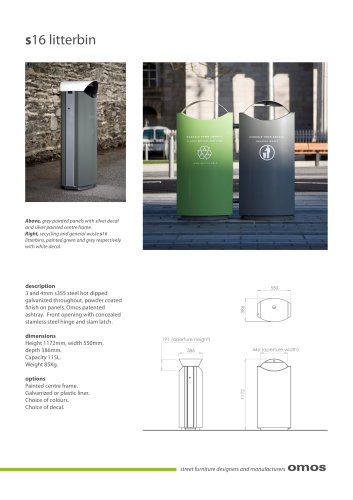 s16 litter bin
3 Pages
 s11.3 litter bin
3 Pages
 t1 litter bin
3 Pages
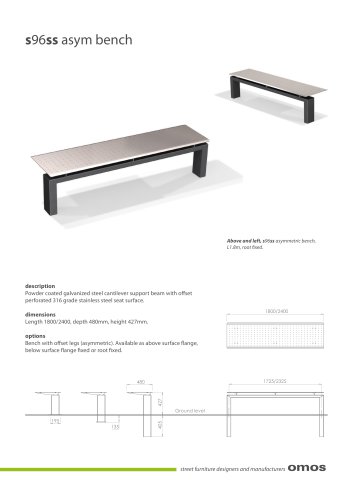 s96ss asym bench
5 Pages
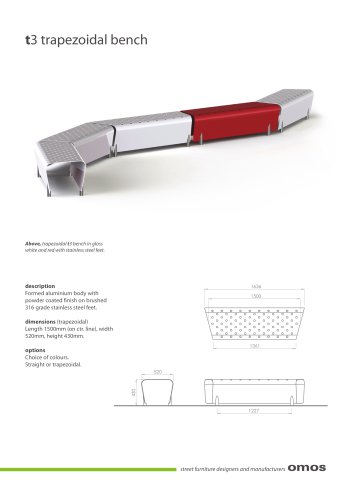 t3 trapezoidal bench
3 Pages
 s16 litterbin
3 Pages
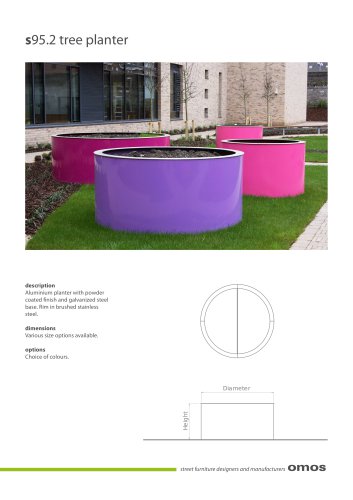 s95.2 tree planter
2 Pages


- Public bench
- Contemporary public bench
- Industrial dust-bin
- Contemporary litter bin
- Industrial planter
- Single trash can
- Metal bin
- Exterior planter
- Modern planter
- Public litter bin
- Wooden public bench
- Public bench with backrest
- Commercial planter
- Waste bin with lid
- Public space planter
- Cycle stand
- Outdoor bike rack
- Metal bike rack
- Commercial bike rack
- Public space bike rack