


Kalzip Installation Guideline

Kalzip Installation Guideline
This guideline provides essential instructions for installing Kalzip aluminium roof and wall systems, ensuring compliance with building regulations. It includes general notes, detailed instructions, and supplementary guidelines for special applications like solar power systems and roof lights. The guideline aligns with technical rules for lightweight metal construction and relevant standards and regulations.
Kalzip systems are designed for low-pitched roofs with a minimum slope of 1.5 degrees. The aluminium sheets are available in various shapes and are fixed with clips that allow for thermal expansion. The system is suitable for both ventilated and non-ventilated roofs, adaptable to different substructures, and designed to meet high thermal insulation requirements.
Guidelines for transporting, unloading, and storing Kalzip materials are provided to ensure material integrity. Special instructions are included for handling AluPlusZinc sheets.
Details on clip attachments and positioning are provided to ensure secure installation of the Kalzip sheets.
Instructions cover considerations for wind and weather, corrosion protection, and the zipping procedure. Guidelines for renovating existing roofs with Kalzip sheets are also included.
Detailed instructions for ridge, gable end, and eaves connections are provided to ensure proper sealing and structural integrity.
Guidelines for integrating skylights, vents, solar systems, and safety features like fall arrest systems are included.
Instructions for TIG welding, cutting, and bending of Kalzip materials are provided to ensure proper handling and installation.
Practical tips for installation, including the use of templates, preassembly, and protection during drilling, are provided.
A list of required tools and accessories for installation is included.
Details on various components and accessories, such as clips, rails, and barriers, are provided to support the installation process.
This document provides detailed technical specifications and installation guidelines for various Kalzip roofing systems, including Kalzip DuoPlus 100, Kalzip Duo 100, and Kalzip NatureRoof. It covers the materials, installation procedures, and specific requirements for different substrates such as steel, timber, concrete, and aerated concrete.
The document outlines the specifications for Kalzip systems, emphasizing the importance of proper vapor and convection barriers to prevent condensation. It also highlights the sound absorption properties and the non-combustible nature of the materials used, in compliance with DIN EN standards.
Detailed installation procedures are provided for each system, including the use of DuoPlus rails and clips, and the specific fasteners required for different substrates. The document stresses the importance of correct spacing and orientation of rails to ensure structural integrity and energy efficiency.
The Kalzip DuoPlus 100 system combines rigid insulation with the Kalzip roofing system, offering sound absorption and minimal cold-bridging. The Kalzip Duo 100 system is more cost-effective, using rigid insulation strips and soft insulation where sound insulation is not a priority.
This system allows for the integration of a vegetation layer for landscaping, using a draining mat and special substrate to support plant growth.
Designed for projects requiring high energy efficiency and condensation prevention, this system uses FOAMGLAS® slabs bonded to substructures, providing an airtight and moisture-impervious insulation layer.
Kalzip AF sheets are designed for installation above rigid support layers, offering thermal and acoustic insulation. The ProDach insulation system is recommended for enhanced sound reduction and minimizing thermal bridging.
The document emphasizes the importance of avoiding contact corrosion, ensuring proper ventilation, and adhering to energy-saving directives. It also provides guidance on the use of specific fasteners and installation techniques to maintain the integrity and performance of the roofing systems.
Kalzip AF systems are available with different insulation types, including FOAMGLAS®, common rafter insulation, and ProDach-insulation on timber rafters. The sound insulation rating is R’w 45 dB (A), which varies based on thickness and material qualities.
Kalzip sheets are typically transported by road. Access to the unloading point must be guaranteed, and delivery dates should be agreed upon with the supplier. Packages can weigh up to 3.5 tons, and crane capacity should be checked. Lifting gear arrangements should be made in advance. Special care is needed for pre-curved Kalzip during unloading, and pallets should be stored according to the direction of laying.
Packages should be stored inclined and protected from weather. Condensation must be avoided, and opened packages should be covered during assembly interruptions. Ensure the load-bearing capacity of the sub-structure when storing on the roof. Translucent sheets should be covered to prevent dirt and sunlight exposure.
Confirm any material and packaging deficiencies with the forwarder and notify the supplier immediately. Check that the number of packages and contents match delivery documents. Report any discrepancies within one week of arrival.
AluPlusZinc must be transported and stored dry and ventilated. Avoid open transportation in unsettled weather. Protective film should be removed within two weeks of delivery or immediately after zipping.
Kalzip clips are attached using stainless steel screws or aluminium bulbtite blind rivets. The number and positioning of fasteners are specified in the installation plan. Spacer caps can be used with Kalzip composite clips to compensate for height tolerances.
Kalzip sheets have a large wind uplift area, so caution is needed when storing open packages and lifting sheets onto the roof. Installation work should be discontinued in strong winds, and sheets should be fastened and zipped together immediately.
The document specifies the use of load distributing planks on wider spans or larger cover widths for Kalzip profile sheets, particularly stucco-embossed and color-coated types. It emphasizes the importance of rigid thermal insulation for visual appearance.
Various thicknesses (0.8 mm to 1.2 mm) and configurations (e.g., 65/305, 65/333) are listed with corresponding load capacities.
Detailed steps for installing Kalzip sheets are provided, including the use of aluminum blind rivets, gable end channels, and clips. The importance of following installation plans and ensuring proper alignment and spacing is highlighted.
The document advises avoiding contact corrosion when fitting aluminum to other materials.
Instructions on establishing fixed points to prevent slippage and accommodate thermal expansion are given. Each sheet should have only one fixed point.
The document outlines the necessity of mechanically zipping seams using a zipping machine to ensure load-carrying capacity and walkability.
Detailed instructions for ridge, gable end, and eaves connections are provided, including the use of specific tools and materials for sealing and securing components.
Guidelines for installing skylights, smoke extractors, vents, roof anchors, and solar systems are included. The importance of using original components and following manufacturer instructions is emphasized.
The document outlines the installation and maintenance procedures for Kalzip roofing systems. It emphasizes the importance of proper clamping and torque application, specifically mentioning that clamping screws should be tightened to 6 Nm only after accessory components are fitted. If seam clamps need repositioning, screws must be retightened.
TIG welding is recommended for aluminum, using SG-AISi5 as filler material. Sheets must be clean and dry, with coatings removed in a small area before welding. Overlapping sheets slightly is preferred over butt joints. Weather protection is advised in adverse conditions, and the site fire department should be informed prior to welding.
Suitability for cutting should be tested, and burrs removed post-cutting. Tools like hand-held circular saws and nibblers are recommended. Minimum radii for bending depend on material quality, with specific guidelines for different hardness levels.
Installation templates simplify clip installation, suitable for various roof types. Preassembly of clips on spacer profiles can be done in the factory. Long sheets should be stored with a slight slope to prevent water accumulation.
Guidelines for roof projections with and without clip bars are provided, including maximum allowable projections and installation requirements. Safety measures and fall arrest equipment are emphasized.
Warm water and detergents are generally sufficient for cleaning. High-pressure cleaners should be used cautiously to avoid water penetration. Specific cleaning agents should be ecologically compatible.
A list of special tools for installing Kalzip systems is provided, including zipping machines and various clips. The document details the specifications for different system components and accessories, such as seam clips and spacer profiles.
This document provides detailed specifications for various system components and accessories used in construction, particularly focusing on aluminium-based products. The components include expansion compensating ribbons, repair cover strips, omega profiles, and various jointing sheets, all primarily made from aluminium with specific dimensions and features.
- Expansion Compensating Ribbon: Aluminium vulcanized, dimensions 1.2 x 390 mm, length 6,000 mm.
- Repair Cover Strip: Stucco embossed aluminium, thickness 1 mm, not suitable for translucent sheets.
- Omega Profile: Extruded aluminium, thickness 1.5 mm, dimensions 3.0 x 80 x 6,000 mm.
- Kalzip Welding Backing Strip: Dimensions 2.0 x 100 mm, length 25,000 mm.
- Roof Exit: Aluminium, double layer construction with thermal insulation, height 300 mm.
- Snow Guard System: Includes aluminium snow guard brackets and pipes, with stainless steel screws.
- Roof Steps: Available in short and standing grid formats, made from aluminium with mounting brackets.
- Vapour Barriers: Elastomeric bitumen strips for steel and timber constructions, self-adhesive with seam overlap requirements.
- Roof Anchors: Suitable for Kalzip construction widths between 305 mm and 434 mm, with specific instructions for use.
The document lists various fixing elements such as composite clips, self-drilling screws, and blind rivets, specifying their dimensions, materials, and intended applications. These elements are crucial for securing the system components to different types of supporting constructions, including wood, steel, and metal.
The document emphasizes that the information provided is accurate as of the publication date but may change due to ongoing product innovation. Users are advised to refer to the latest editions available on the Kalzip website for the most current information.
Kalzip GmbH, part of Tata Steel Europe Ltd., provides contact details for further inquiries and directs users to their website for locating local sales offices.
Catalog excerpts

Kalzip® Installation Guideline Date 05/2011
Open the catalog to page 1
This Kalzip Installation Guideline provides the company with the "Installation Instructions" required by the building reg- ulations for installing the profiled sheets. It provides information, general notes and explanations, as well as detailed instruc- tions for installing Kalzip aluminium roof The present Guideline provides a basis for the correct, professional installation of Kalzip profiled sheets. It deals with the usual cases of processing and use. Supplementary guidelines are available for special applications, such as the installation of Kalzip solar power systems or the inclusion of...
Open the catalog to page 2
Overview of contents Introduction 1.0 The System 2.0 Transport · Storage · Inspection 3.0 Clip installation 4.0 Installing Kalzip · renovating with Kalzip 5.0 Connections 6.0 Installations 7.0 Welding · cutting · bending 8.0 Useful hints and advice 9.0 Special tools 10.0 10.0 System components and accessories 11.0 11.0
Open the catalog to page 3
Overview Page 2.1 Kalzip range of applications 10 2.1.1 Kalzip non-ventilated roof on trapezoidal steel deck 11 2.1.2 Kalzip non-ventilated roof on purlin with trapezoidal sheets inner skin 11 2.1.3 Kalzip non-ventilated roof on timber rafters with visible timber lining 12 2.1.4 Kalzip ventilated roof with common rafter insulation 12 2.2 Kalzip DuoPlus® 100 and Kalzip Duo® 100 13 2.2.3 Kalzip DuoPlus 100 or Kalzip Duo 100 on steel trapezoidal deck 15 2.2.4 Kalzip DuoPlus 100 or Kalzip Duo 100 on timber 16 2.2.5 Kalzip DuoPlus 100 or Kalzip Duo 100 on concrete 17 2.2.6 Kalzip DuoPlus 100 or Kalzip...
Open the catalog to page 4
Overview Page 5.0 Installing Kalzip • renovating with Kalzip 5.5 Fixed point design: Kalzip aluminium clip/Kalzip composite clip 38 5.7 Renovating existing roofs with Kalzip profiled sheets 42 6.1.4 Spacer section/sliding element 44 6.1.5 Ridge cover plate 44 6.2.3 Gable end support rail 46 6.2.4 Gable end profile 50/65 (option) only for flat roofs 46 6.3 Eaves closure and static edge reinforcement 48 7.3 Kalzip roof anchor 52 7.4 Fall arrest systems 52 7.7 Seam clamps (Cable clip, Seam clip stainless steel) 53
Open the catalog to page 5
Overview Page 8.0 Welding • cutting • bending 8.2 Welding backing strip 54 9.0 Useful hints and advice 9.1 Installation template for installing clips 56 9.2 Preassembly of the clips on top hat profiles 56 9.3 Storing long profiled sheets 56 9.4 Installation with several installation groups 57 9.5 Protection when drilling through U disc 57 9.6 Roof projections with clip bars 58 9.7 Roof projections without clip bars 59 9.8 Roof projections constructed from Kalzip profile sheets 60 11.0 System components and accessories Kalzip composite clip type E 63 Fixed point clip bar including fastening holes...
Open the catalog to page 6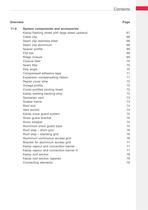
Overview Page 11.0 System components and accessories Kalzip flashing sheet with large sheet upstand 67 Seam clip stainless steel 68 Seam clip aluminium 68 Compressed adhesive tape 71 Expansion compensating ribbon 71 Repair cover strip 72 Comb-profiled jointing sheet 72 Kalzip welding backing strip 73 Kalzip snow guard system 75 Snow guard bracket 75 Aluminium snow guard pipe 75 Roof step - short grid 76 Roof step - standing grid 76 Aluminium continuous access grid 76 Bracket for aluminium access grid 77 Kalzip vapour and convection barrier 77 Kalzip vapour and convection barrier H 77 Kalzip roof...
Open the catalog to page 7
This Installation Guideline specifies the correct method for installing Kalzip pro- filed sheets, the fasteners and accesso- Installing the profiled sheets The profiled sheets may only be installed by skilled workers employed by the ma- nufacturer or by companies who have been properly instructed and authorized or whoever is responsible for laying the profiled sheets, must prepare installation instructions describing how the elements are to be laid, and must give them to the installation companies. In accordance with building regulations Kalzip can only be installed by companies approved and...
Open the catalog to page 8
The System 2.0 The System Kalzip is a system of aluminium sheets designed for low pitched roofs to a minimum of 1.5 degrees when running from ridge to eaves as well as for steeper pitches. Kalzip profiled sheets are available in a variety of construction widths and can be manufactured in different shapes such as straight, convex, concave, convex and concave curved, as well as XT freeform shapes to suit the roof geometry. The aluminium sheets are fixed with clips which are locked into the seam and concealed by the adjacent sheet. This means that the fixings are positioned beneath the roof covering....
Open the catalog to page 9
2.1 Kalzip range of applications The application determines the design Kalzip aluminium profiled sheets are suit- able both for non-ventilated and ventilat- ed roofs of any shape or pitch from 1.5° and with any type of substructure or The construction design depends on the individual application. It must take into account the likely effects of snow, wind, heat, humidity and weathering. High thermal insulation requirements can be easily fulfilled. The roof design can be adapted to suit the precise requirements of each individual building by selecting the appropriate thickness of thermal insulation....
Open the catalog to page 10
2.1.1 Kalzip non-ventilated roof on trapezoidal steel deck This very economical roof system is used both for industrial and residential build- ings. In order to make sure that there are no air cavities under the Kalzip roof skin, compressible thermal insulation is used. Incorporated within the roof system the insulation material is compressed by The loading on the top skin is not trans- ferred to the inner skin as an evenly dis- tributed load but rather at set points via the secret fixing clips. The design roof load must be increased by 15 % when dimensioning the trapezoidal steel sheets. The...
Open the catalog to page 11
2.1.3 Kalzip non-ventilated roof on timber rafters with visible timber lining In residential buildings the roof system is frequently built-up using wooden rafters with visible timber lining. This is advan- tageous, because: 1. there is a clear separation between the trades of carpenters, roofers etc. 2. a continuous flat vapour and convec- tion barrier can be installed. The clips can only be fixed directly in the timber lining if this has a minimum thickness of 23 mm. A minimum thick- ness of 19 mm applies for flat press boards, and 18 mm for OSBs. In both cases the fastener is visible from below....
Open the catalog to page 12All Kalzip catalogs and technical brochures
 Kalzip® Solar Systems
12 Pages
 Kalzip® systems
64 Pages
 Kalzip Walkway systems
4 Pages
 Kalzip-Nature-Roof
16 Pages
 Roof and Facade systems
12 Pages
 Kalzip® Liner roof systems
8 Pages
 Kalzip® FC facade system
88 Pages
 Kalzip® FC rainscreen
28 Pages
 BIPVco
2 Pages
 Kalzip FC rainscreen system
72 Pages
 Kalzip FC rainscreen system
20 Pages
 Kalzip FC Facade Systems
8 Pages
 Kalzip Luminaire Systems
8 Pages
 Kalzip® vapour layer FR
2 Pages
 Kalzip delivery lead times
2 Pages
 Kalzip Finishes and colours
8 Pages
 Kalzip Roof Anchors
2 Pages
 Kalzip Construction details
87 Pages
 Kalzip national case studies
52 Pages


Archived catalogs
 Colour your thinking
16 Pages
 Kalzip foldable aluminium
12 Pages
 Low - U - value systèm
4 Pages
 TitanSilver product
2 Pages
 Falzinc Roof & Facade Systems
12 Pages
 Kalzip Solar Solutions
16 Pages
 Kalzip wall systems product
4 Pages
 Kalzip perforated solutions
4 Pages
 Kalzip FC façade system
4 Pages
 Achieving goals
22 Pages
 Quality lasts
12 Pages
 TitanSilver product
2 Pages
 Kalzip Solar solutions
16 Pages
 Kalzip wall systems
4 Pages
 Kalzip XT
4 Pages
 Kalzip perforated solutions
2 Pages
 Kalzip perforated solutions
4 Pages
 Kalzip Systems
72 Pages


- Profiled sheet
- Steel sheet metal
- Industrial solar panel
- Building fastening system
- Metal fastening system
- Industrial photovoltaic module
- Metal roofing
- Monocrystalline solar panel
- Monocrystalline PV panel
- Stainless steel mounting clip
- Exterior mounting clip
- Roof sheet metal
- Patterned sheet metal
- Sheet sheet metal
- Facade
- Metal look roofing sheet
- Sound-absorbing underlay
- Pitched roofing sheet
- Semi-rigid PV solar panel