


X10C
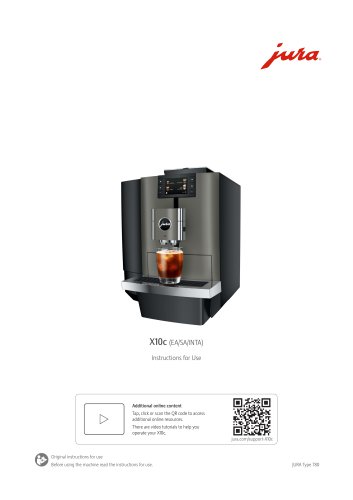
X10C
The X10c machine features essential control elements including an On/Off button, a bean container with an aroma preservation cover, multi-function buttons, a display, a height-adjustable dual spout, and a drip tray. These components are crucial for effective operation.
Users must read and adhere to safety instructions to prevent injuries or damage. The machine is suitable for trained staff or non-professionals in commercial settings. Children under 8 should be kept away, and those over 8 should use the machine under supervision. Damaged machines should not be used, and repairs must be conducted by authorized JURA service centers.
Initial setup involves filling the bean container, determining water hardness, and connecting the milk system. The JURA Cockpit assists in managing machine settings.
The machine allows preselection of specialty coffees like espresso, cappuccino, and cold brew. Users can adjust grinder and product settings for a customized coffee experience.
Daily tasks include switching the machine on and off and performing maintenance actions to ensure optimal performance. Regular maintenance includes rinsing, cleaning the milk system, changing filters, and descaling.
The machine provides display messages for troubleshooting and maintenance guidance.
Guidelines for transporting the machine and environmentally friendly disposal are provided to ensure compliance with safety and environmental standards.
Technical specifications include frequency band, transmission power, model type, and water connection details.
The machine should be turned off using the On/Off button and cleaned with a damp cloth. It is not suitable for installation where water jets are used. Users should avoid touching the spouts during operation.
Installation requires a residual current device (RCD) and a main switch for power interruption. The water connection must have a shut-off valve and comply with technical data.
Place the X10c on a horizontal, water-resistant surface with proper ventilation. Fill the bean container with untreated coffee beans only. Determine water hardness using the Aquadur® test strip.
The X10c can be managed via the JURA Cockpit. It prepares various coffee specialties, and users can adjust coffee strength, amount, and temperature. Regular maintenance includes cleaning the milk system and emptying the drip tray and coffee grounds container.
Regular maintenance is crucial for optimal coffee quality. Daily tasks include cleaning the milk system and wiping the machine's surface. Weekly tasks involve cleaning the water tank and drip tray. The milk pipe and spout should be changed every three months.
The X10c displays maintenance messages with red backgrounds in the cockpit. Users should press the corresponding button to access the maintenance programme.
Users can manually start the coffee system rinsing. Daily cleaning is required for the milk system using original JURA maintenance products. The dual spout should be dismantled and rinsed weekly.
Replace the filter cartridge with a CLARIS Pro Smart+ filter cartridge when exhausted. The machine prompts for descaling based on water hardness.
Common issues include insufficient foam, coffee dripping, and loud grinder noise. Solutions involve cleaning, adjusting settings, or contacting customer support.
The machine complies with various directives, and the EU Declaration of Conformity is available online. Contact details for JURA and additional support information are provided.
Catalog excerpts
Additional online content Tap, click or scan the QR code to access additional online resources. There are video tutorials to help you operate your X10c. jura.com/support-X10c Original instructions for use Before using the machine read the instructions for use.
Open the catalog to page 1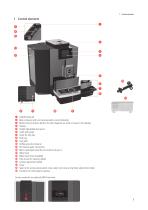
Control elements w Bean container with aroma preservation cover (lockable) e Multi-function buttons (button function depends on what is shown in the display) @ Height-adjustable dual spout z Insert with panel o Insert for drip tray © Drip tray P Coffee grounds container a Permanent water connection © Mains cable (permanently connected or plug-in) f Water tank cover (lockable) © Filler funnel for cleaning tablet h Grinder adjustment wheel j Cover © Spanner for aroma preservation cover, water tank cover and grinder adjustment wheel 1 Container for milk system cleaning
Open the catalog to page 3
Before using the machine, read these instructions for use thoroughly and completely and comply with the instructions they contain. Keep these instructions for use close to the machine and pass them on to the next user. Failure to observe the instructions for use may result in serious injuries or damage to property. Safety information is therefore indicated as follows: J WARNING Indicates circumstances that may result in serious injuries or death. J CAUTION Indicates circumstances that may result in minor injuries. CAUTION Indicates circumstances that may result in damage to property. This machine...
Open the catalog to page 4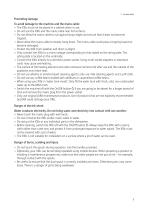
Preventing damage To avoid damage to the machine and the mains cable: ■ The X10c must not be placed in a cabinet when in use. ■ Do not use the X10c and the mains cable near hot surfaces. ■ Do not allow the mains cable to rub against sharp edges and ensure that it does not become trapped. ■ Never allow the mains cable to loosely hang down. The mains cable could pose a tripping hazard or become damaged. ■ Protect the X10c from weather and direct sunlight. ■ Only connect the X10c to a mains voltage corresponding to that stated on the rating plate. The rating plate is located on the underside. ■...
Open the catalog to page 5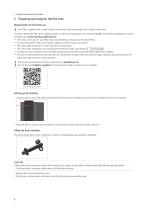
Preparing and using for the first time Preparing and using for the first time Requirements for first-time use EE Your X10c is supplied with a metal hose for connecting to the water supply, and a residual water hose. In order to enable the X10c to be installed properly on site, some preparations are necessary on site. The following preparations must be carried out by a professionally qualified person: UU The mains connection for your X10c must be protected by a residual current device (RCD). UU It must be possible to interrupt the power supply to the X10c using a main switch. UU The mains water...
Open the catalog to page 6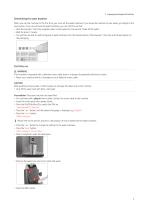
Preparing and using for the first time Determining the water hardness When you use the machine for the first time, you must set the water hardness. If you know the hardness of your water, go straight to the next section. If you do not know the water hardness, you can find this out first: T Hold the Aquadur® test strip supplied under running water for one second. Shake off the water. T Wait for about 1 minute. T You will then be able to read the degree of water hardness from the discolouration of the Aquadur® test strip and the description on the packaging. If the machine is operated with a defective...
Open the catalog to page 7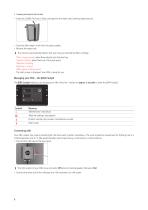
t Insert the CLARIS Pro Smart+ filter cartridge into the water tank, exerting slight pressure. t Close the filter holder. It will click into place audibly. t Reinsert the water tank. i The machine automatically detects that you have just inserted the filter cartridge. ‘Filter is being rinsed’, water flows directly into the drip tray. ‘System is filling’, water flows out of the dual spout. ‘Milk system is being rinsed’ The start screen is displayed. Your X10c is ready for use. The JURA Cockpit allows you to manage your X10c. Press the > button for approx. 2 seconds to enter the JURA Cockpit. Symbol...
Open the catalog to page 8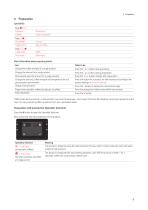
‘Espresso’ ‘Americano’ ‘Coffee’ ‘Latte macchiato’ ‘Flat White’ ‘Lungo’ ‘Hot water’ ‘Milk foam’ Change the coffee strength of a single product Press the 9 or > button during grinding Change the amount for a sing|e product Press the 9 or > button during preparation Permanently save the amount for a single product Press the ‘Save’ button straight after preparation Change the amount, coffee strength and temperature for any Press the button for a product for two seconds and configure the given product permanently desired settings in ‘Product settings’ Display more products Press the > button to display...
Open the catalog to page 9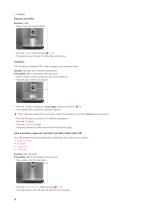
- Press the ‘Coffee’ button (on page # O O). The preset amount of water for coffee flows into the cup. The ‘Cold Brew’ preselection d is used to prepare a cold speciality coffee. Example: Flat white with ‘Cold Brew’ preselection Precondition: Milk is connected to the dual spout. - Add ice cubes to a glass according to your own preferences. - Place the glass under the dual spout. - Press the > button to display the second page of the start screen (O • O). - Press the ~ button to open the Speciality Selection. i If the ‘Cold Brew’ preselection is not shown, adjust the consistency of grind to coarser...
Open the catalog to page 10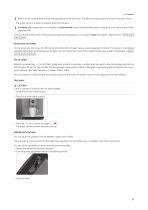
EE There is a short interval while the hot milk separates from the milk foam. This allows the typical layers of a latte macchiato to form. The preset amount of water for espresso flows into the glass. EE 15 minutes after preparation, the milk system is automatically rinsed. Therefore always place a receptacle under the dual spout after preparing milk. To ensure that the milk system in the dual spout always works properly, you must clean it daily (see chapter 7 ‘Maintenance – Cleaning the milk system’). Americano and lungo For the americano and lungo, the X10c blends the coffee with hot water...
Open the catalog to page 11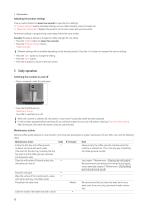
Press a product button for about two seconds to view the list of settings: ■ ‘Product settings’: Specify individual settings such as coffee strength, amount of water, etc. ■ ‘Reposition the product’: Replace the products on the start screen with your favourites. Permanent settings in programming mode always follow the same model. Example: Proceed as follows to change the coffee strength for one coffee. - Press the ‘Coffee’ button for about two seconds. - Press the ‘Product settings’ button. ‘Coffee strength’ i Different settings will be available depending on the selected product: Press the 1...
Open the catalog to page 12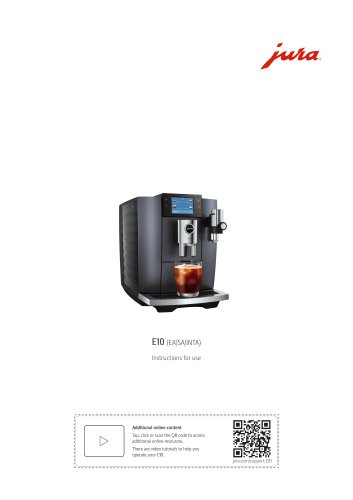
Archived catalogs
 COOL CONTROL 600ML
9 Pages
 E8/E80
44 Pages
 S8/S80
48 Pages
 Z6
Z652 Pages
 X8
X848 Pages
 GIGA X8c Professional
60 Pages
 X6
X62 Pages
 Z8
Z852 Pages
 ENA 8
ENA 831 Pages
 GIGA X3c
60 Pages
 MANUAL_ENA4_COFFEE MACHINE
30 Pages
 J6/J600
48 Pages
 AUTOMATIC MILK FROTHER
9 Pages
 MANUAL_JOE_ANDRIOD
13 Pages
 MANUAL_JOE_IOS
14 Pages
 GIGA X9c Professional
60 Pages
 ENA Micro 90
29 Pages
 GIGA X7 Professional
2 Pages
 IMPRESSA X9 Win
2 Pages
 GIGA X9 Professional
2 Pages
 Coffee to Go - Options
1 Page
 IMPRESSA X9 Platinum
2 Pages
 IMPRESSA Xf50 Classic
2 Pages
- Industrial coffee machine
- Commercial coffee brewer
- Industrial espresso machine
- Automatic coffee machine
- Cutlery
- Hot water coffee maker
- Black coffee maker
- Milk coffee machine
- Cappuccino coffee machine
- Food dispenser
- Commercial food dispenser
- Silver-colored coffee machine
- Stainless steel cutlery
- 2-group coffee machine
- 2-cup coffee machine
- 1-cup coffee machine
- Coffee machine with touch screen
- Pump coffee machine
- Industrial management software