
- Catalogs
- Ice-O-Matic
- GEMU090 Series


GEMU090 Series

GEMU090 Series
The manual provides guidance on the installation, operation, and maintenance of the GEMU090 residential ice machine, which produces Ice-O-Matic's Pearl Ice for home use.
Mile High Equipment LLC offers a limited warranty for defects in materials and workmanship. Coverage varies: cube ice machines and remote condensers are covered for 36 months, while ice storage bins and flake ice machines are covered for 24 months. Specific components like evaporator plates and compressors have additional warranties. Unauthorized parts or alterations void the warranty.
The GEMU090 is suitable for indoor or controlled outdoor use, featuring an ice-making and storage system. It operates continuously, producing ice when levels are low and stopping when full.
The machine measures 14 7/8 inches wide and 33 3/8 to 34 3/8 inches high. It requires a potable water supply with specific conductivity and pressure, operates best within certain temperature ranges, and needs a dedicated electrical circuit.
The machine can be built into a cabinet with proper ventilation. It comes in gravity drain and pump models, each with specific installation requirements. Avoid exposure to freezing temperatures or direct sunlight.
Connection to a potable water supply with at least 10 microSiemens/cm conductivity is necessary. Optimal performance occurs at water temperatures between 50-60°F and air temperatures between 60-80°F.
Potable water is required, and water quality affects maintenance frequency. Water filters can reduce mineral buildup, but additional treatment may be needed.
The unit requires a 115 volt, 60 Hz, 15 amp circuit and should not use extension cords.
Warranty claims must be submitted within 60 days of service, including model and serial numbers and proof of installation if needed. Defective parts may need to be returned for validation.
The warranty is governed by Delaware, USA laws, excluding conflicts of law principles.
The door can be adjusted to open from either side by removing and reattaching hinges and screws.
For models with an internal drain pump, route the drain tube to the connection point, which can be up to 10 feet above the machine. An air gap may be required by local codes.
Ensure the gravity drain tubing is vented, kink-free, and slopes to the building drain. Follow specific steps for connecting the drain tube.
Use ¼ inch OD copper tubing or alternatives like stainless steel flex. Install an accessible shut-off valve and connect using a compression fitting.
Connect to a 115 volt, 15 amp circuit. Position the unit, connect the water supply, and test the drain pump. Ensure the unit is leveled and all packing materials are removed.
Turn on the water supply, switch on electrical power, and start the machine using the On/Off switch. Ice production begins within 10 minutes, taking about 6-7 hours to fill the storage bin.
An ultrasonic sensor automatically manages ice production based on the storage area's ice level.
Take the required amount of ice; the machine will replenish it. Avoid storing non-ice items in the bin to prevent contamination and blockages.
Regular maintenance is crucial to prevent mineral scale build-up. Suggested maintenance includes scale removal, water seal checks, and condenser cleaning every 6 months.
Follow specific steps to clean and prepare the machine for winter, including draining water and adding RV antifreeze to the drain.
Use a diluted scale remover solution to clean the ice-making system. Follow detailed steps to add the solution, operate the machine, and rinse the system.
Check for water leaks and inspect the top bearing for wear. Regularly clean the ice scoop and sanitize the ice chute and bin interior.
Catalog excerpts

Installation Manual GEMU090 Series Ice-O-Matic 11100 East 45th Ave Denver, Colorado 80239 Part Number 9081430-01 / 17-3371-01 P tN b 9081430 01 17 3371 01 Date 9/11 D t
Open the catalog to page 1
Ice-O-Matic Parts and Labor Domestic & International Limited Warranty Mile High Equipment LLC (the “Company”) warrants Ice-O-Matic brand ice machines, ice dispensers, remote condensers, water filters, and ice storage bins to the end customer against defects in material and factory workmanship for the following: Cube ice machines, compressed ice machines and remote condensers. - Thirty-six (36) months parts and labor Flake ice machines, GEMD Maker Dispensers, and GEMU Undercounter compressed ice machines - Twenty-four (24) months parts and labor CD model dispensers - Thirty-six (36) months parts...
Open the catalog to page 2
GEMU090 Installation and Use Introduction This manual includes information for the installation, operation and maintenance of the GEMU090 residential ice machine. The GEMU090 was developed to offer fans of Ice-O-Matic’s Pearl Ice form the ability to have that ice in their homes. Previously pearl Ice was only available in commercial establishments, where it developed a strong following because of the chewable nature of the ice. This machine makes authentic pearl ice, using the same process as the larger commercial machines. Table of Contents Product Description: . . . . . . . . . . . . . . . ....
Open the catalog to page 3
GEMU090 Installation and Use Product Description: This ice machine is designed to be used indoors, in Water Quality a controlled environment or outdoors within certain limits. The water to the machine must be potable, or fit for human consumption. Beyond that, water supplies The GEMU090 is made up of two major systems: vary in the degree of mineral content. As this ice the ice making system and the ice storage system. machine makes ice, all the water that flows into the The ice making system is a continuous flow type machine is changed into ice. That includes any ice machine, it makes ice when...
Open the catalog to page 4
GEMU090 Installation and Use Cabinet Dimensions FLOOR DRAIN ACCESS HOLE 3 7/8" 20 3/4" 2 3/4" 1/4" O.D. COPPER WATER INLET COMPRESSION FITTING PROVIDED 3/4" 1 5/8" HANDLE 22 3/8" 14 7/8" 5 1/8" 33 3/8" MIN. 34 3/8" MAX. 29 1/2" 3 7/8" 2 1/2" 3 1/4" 115V POWER CORD 7 1/2" AIR OUT 1" LEG ADJUSTMENT (4) PLACES AIR IN LEFT SIDE SVC. ACCESS PANEL 11 5/8" DRAIN ACCESS - FLEXIBLE TUBING 3/8" I.D. PUMP MODEL (INCLUDED) 5/8" I.D. GRAVITY MODEL (NOT INCLUDED) Ice-O-Matic Ice Systems are designed and manufactured with the highest regard for safety and performance. They meet or exceed the standards of agencies...
Open the catalog to page 5
GEMU090 Installation and Use Location Recommendations: The machine can be built into a cabinet. It is an air cooled refrigeration system and so air flows in and out of it through the grill at the bottom front. The grill must not be blocked by any covering door or other obstruction. Drain Conversion: A gravity drain model can be converted to a drain pump model by installing a drain pump kit. The drain pump kit consists of a drain pump, wiring harness and associated tubing. The part number is KPU090. Installation Notes Built In Situations: If a finished floor is to be installed in the area after...
Open the catalog to page 6
GEMU090 Installation and Use Familiarization The control panel is visible when the door is opened. It has three indicator lights and two switches. Ice Making Check Water Time to Clean Clean Reset Control Panel The model and serial number plate is located on the bottom of the control panel box. The Bin Light and Ice Level Sensor are also visible from that angle, as is the Ice Chute. Ice Making Check Water Time to Clean Clean Reset Serial Plate Ice Level Control Sensor Serial Number Plate The Scoop Holder is located on the right side of the ice storage bin. The normal ice level is about level with...
Open the catalog to page 7
GEMU090 Installation and Use l Door Swing The door can be attached to open with hinges on the left or right. Retain all screws for re-use. 6. Remove original bottom hinge. To change: 1. Remove top hinge pin from hinge. 7. Remove two plugs or screws from upper cabinet bracket. 8. Attach bottom hinge to upper cabinet bracket using the original screws. 9. Place the door on bottom hinge, tip up to slide under top hinge. 2. Tilt top of door away from cabinet and lift door off bottom hinge. 10. Insert hinge pin into top hinge and door. 11. Tighten hinge pin. 12. Replace screws or plugs into holes left...
Open the catalog to page 8
GEMU090 Installation and Use Plumbing - Pump Model Drains Water Supply There are two types of ice machine models, one that drains by gravity and one that has an internal drain pump. The recommended water supply tubing is ¼ inch OD copper. Stainless steel flex or reinforced PCV tube may also be used. Install an easily accessible shut-off valve between the supply and the unit. This shut-off valve should not be installed behind the unit. Drain Pump Model drain installation 1. Locate the coil of 3/8” ID plastic drain tubing secured to the back of the unit. 2. Route the plastic drain tube from the...
Open the catalog to page 9
GEMU090 Installation and Use Plumbing: Gravity Drain Model clamp. Leave the other end of the tube lying on the floor of the base pan until the unit is positioned over the floor drain. Caution: Restrictions in the drain system to the machine will cause water to back up into the ice storage bin and melt the ice. Gravity drain tubing must be vented, have no kinks and slope to the building drain. Air gaps are typically required by local code. 1. Place the ice machine in front of the installation opening. Adjust leveling legs to the approximate height. 6. Route the drain tube. Either a) Insert the...
Open the catalog to page 10
GEMU090 Installation and Use Electrical and Start Up The ice machine is supplied with a power cord. Do not remove the grounding pin from the cord’s plug. Do not use extension cords. Follow all codes. Connect the machine to its own 115 volt, 15 amp circuit. Installation check list: 1. Has the unit been connected to the proper water supply? 2. Has the water supply been checked for leaks? 1. If the electrical outlet for the ice maker is behind the unit, plug in the unit. 3. Has the unit been connected to a drain? 4. Has the drain been tested for flow and leaks? 2. Position the unit in the installation...
Open the catalog to page 11All Ice-O-Matic catalogs and technical brochures
 CIM0530/0535
2 Pages
 CIM0430/0436/0435
2 Pages
 CIM0330/0335
2 Pages
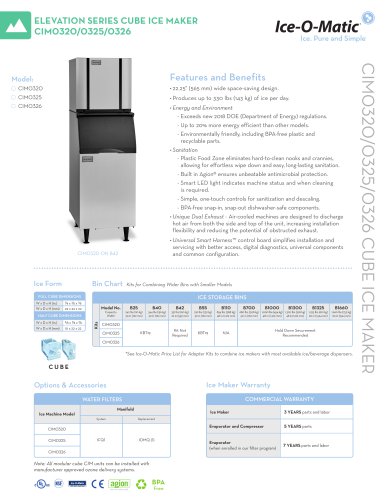 CIM0320/0325/0326
2 Pages
 CIM2046/2047
2 Pages
 GEM0450
2 Pages
 GEM0650/0655
2 Pages
 MFI1256/1255
2 Pages
 GEM2006
2 Pages
 Ec03 IceTM
2 Pages
 The Elevation series
2 Pages
 B110 SLOPE-FRONT BIN
1 Page
 ICEU86
2 Pages
 GEM0956/0955
2 Pages
 ICEU106
2 Pages
 ICE1806/1807
2 Pages
 Elevation Series
2 Pages
 ICEU46
2 Pages
 ICEU36
2 Pages
 ICEU56
2 Pages
 ICEU186
2 Pages
 ICEF155
2 Pages
 GEM1306
2 Pages
 Full Line
20 Pages
 ICE0726 / ICE0926
2 Pages
 EC1807 - B2 Series Cuber
102 Pages
 CD40030 Dispenser
21 Pages
 ICE0726
2 Pages
 MFI0800/0805
2 Pages
 IOD200
2 Pages
 IOD250
2 Pages
 IOD150
2 Pages
 WATER FILTERS
2 Pages
 Full-Line Product Brochure
20 Pages
 MFI1256/1255-Flake Ice Maker
2 Pages
 MFI0800/805-Flake Ice Maker
2 Pages
 MFI0500-Flake Ice Maker
2 Pages
 Storage Bins
2 Pages
 Cube Ice Brochure
8 Pages


Archived catalogs
 GEM-MFI Series
68 Pages
 Series 250 through 2306
20 Pages
 MODEL-GEMD270A
28 Pages
 B, EC and ECP Séries
102 Pages
 MFI2406-Flake Ice Maker
2 Pages
 MFI0805
30 Pages
 HIS Line
2 Pages
 MFI1506
2 Pages
 GEM-MFI Series
30 Pages
 B100 Storage Bin - Parts Manual
13 Pages
 Ice-O-Matic Full Line Brochure
24 Pages


- Cold water dispenser
- Ice cube maker
- Commercial water dispenser
- Commercial ice cube maker
- Air cooling ice cube maker
- Cube ice cube maker
- Professional water filter
- Water cooling ice cube maker
- Restaurant ice cube maker
- Modular ice cube maker
- Vertical evaporator ice cube maker
- Hospital water dispenser
- Commercial ice bin
- Ice flaker
- Commercial ice flaker