Installation information
1 /8Pages

Installation information
1 /8Pages
Catalog excerpts

INSTALLATION INFORMATION Installation Information for Hakwood flooring products Duoplank® 20mm (¾”) and 15mm (⅝”) Hakwood is the inventor of the Duoplank®, the current standard for wide width, long length engineered flooring. The wood top layer is adhered to the highest grade multi-ply birch plywood to produce a dimensionally stable product. That is why Hakwood flooring offers the look of solid wood flooring, combined with the installation flexibility of an engineered floor. Important information before you start: It is EXTREMELY IMPORTANT that you read and understand this information completely prior to starting, since improper installation can void the warranties. Installer/Owner responsibility Goods should be brought inside the building and Inspected before installation for completeness of order. Hakwood flooring installation shall be the last step of any construction or renovation project. Warranties do not cover materials damaged during transport and or with visible defects once they are installed, whereby natural characteristics of wood cause variations in wood grain, figure, character marks, texture or color and are not covered under warranties. Transport damages should be reported on the delivery document directly during signing for delivery when possible and when not accepted as it, returned to the transporter. Provisions must be made to prevent the product from sliding or falling. The installer assumes all responsibility for the final inspection of product quality. This inspection of all flooring should be done prior to installation. Depending on availability, deliveries may contain non-standard lengths and non-standard packaging size. Carefully examine flooring for quality, finish and color before installing it. The installer must use reasonable selectivity and hold out or cut off pieces with deficiencies, whatever the cause. If material is doubtful as to grade, manufacture or factory finish, do not install it and contact your supplier immediately. The use of stain, filler or putty stick for the correction of minor defects during installation should be accepted as normal procedure. Even though our products are inspected many times, some grading deficiencies may occur (in up to 5% of the floor area). When flooring is ordered, at least 5% must be added to the actual quantity needed for cutting and grading allowance. Tools & accessories needed All installations* Dust mask, broom or vacuum, chalk line & chalk, (electric power) saw, eye protection, hammer, hand saw or jamb saw, moisture meter (wood, concrete or both), Hakwood power cleanser, square, tape measure, utility knife, pry bar. *When installing site finished products sanding equipment may be applicable. Pre-installation & Jobsite Conditions The installer/owner is responsible for determining if the job site subfloor and job site conditions are structurally and environmentally acceptable for installation. The manufacturer declines any responsibility for floor failure resulting from or connected with subfloor, subsurface, job site damage, jobsite environmental deficiencies or deficiencies after hardwood flooring has been installed. All substrates must be dry, clean, structurally
Open the catalog to page 1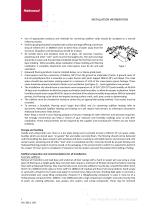
INSTALLATION INFORMATION Use of appropriate products and methods for correcting subfloor voids should be accepted as a normal industry practice. Exterior grading should be complete with surface drainage offering a minimum drop of 150mm (6”) in 3000mm (10’) to direct flow of water away from the structure. All gutters and downspouts should be in place. All outside doors and windows must be in place. All concrete, masonry, plastering and other “wet” work must be thoroughly dry. The wall coverings should be in place and the painting completed except for the final coat on the base molding. When...
Open the catalog to page 2
INSTALLATION INFORMATION chemically or mechanically, but do not use solvent based strippers under any circumstances. Residual solvents can prohibit the satisfactory bonding of flooring adhesives. It is important to ensure a proper bond between the adhesive and the concrete and the planks. Hakwood Duoplank products may be installed on grade, above grade, as well as below grade where moisture conditions do not exist. To ensure a long lasting bond, make sure that the perimeter of the foundation has adequate drainage and vapor barrier. Lightweight concrete Lightweight concrete that has a dry density...
Open the catalog to page 3
INSTALLATION INFORMATION removal of these floors. Radiant heated subfloors and subfloor cooling Use of an in floor temperature sensor as well as a separate thermostat for the individual room is required. For more detailed information and instructions refer to Hakwood Subfloor Heating & Cooling. Preparation Remove all transitions and wall-base and undercut all door casings with a hand or power jam saw using a scrap piece of Duoplank as a height guide. Racking the floor Whether you choose to install the floor by the glue down method or floating, start by cutting four to five planks in random lengths,...
Open the catalog to page 4
INSTALLATION INFORMATION Installation below grade guideline NOTE: A concrete slab is considered below grade when any part of the slab is below ground level, for example, walk-out basements are below grade! Treat with an approved moisture retarder compatible with the adhesive manufacturer's installation instructions. Step 1 – Layout the job Select a starter wall. It is recommended to start on the longer wall in the room, but check for squareness and make adjustments as necessary. Where possible, lay the flooring at 90° angle to the floor joists. Measure out from the wall the width of two planks...
Open the catalog to page 5
INSTALLATION INFORMATION Floating installation guideline, applicable for both 15mm (5/8") & 20mm (3/4") Additional tools & material needed: PVAC wood glue. Wood or plastic spacers 15mm (5/8”), Moisture barrier of 30/30/30 laminated craft paper or 15lb felt paper for wood subfloors or 6-8 mil Polyethylene for concrete subfloors, (0.15mm (6-8 mil), Resilient underlayment optional), Terry Cloth towels, 6 Mil Poly Plastic Sheeting, Foam underlayment, Tapping Block & Spacers Step 1 - Subfloor preparation: As part of your subfloor preparation, remove any existing base, shoe mold, or doorway thresholds....
Open the catalog to page 6All Hakwood catalogs and technical brochures
 HERITAGE
3 Pages
 BOULDER
3 Pages
 DESTIN
3 Pages
 BONNEVAL
3 Pages
 WORTHY BRUSHED 2022
3 Pages
 RAUF
RAUF3 Pages
 VANNA
VANNA3 Pages
 SIVA
SIVA2 Pages
 RUPA
RUPA3 Pages
 RUBY
RUBY3 Pages
 Hakwood corporate brochure
80 Pages
 Hakwood product brochure
40 Pages
 COCO
COCO3 Pages
 ORIGINAL
3 Pages
 MONTGUYON
3 Pages
 RADIANCE
2 Pages
 COMMERCIAL
2 Pages
 RETAIL
2 Pages
 RESIDENTIAL
2 Pages
 HOSPITALITY
2 Pages
 AURA
AURA3 Pages
 AUBER
AUBER3 Pages
 ASTEN
ASTEN3 Pages
 AFFAIR
3 Pages
 ABSOLUTE
3 Pages
Archived catalogs
 WORTHY BRUSHED
3 Pages
- Industrial wood floor
- Glued wood floor
- Engineered parquet flooring
- Oak parquet floor
- Strip parquet floor
- Floating parquet floor
- Oiled parquet floor
- Home parquet floor
- Living room wood floor
- Brushed parquet floor
- Commercial parquet floor
- FSC certified parquet floor
- Grooved parquet floor
- Varnished parquet floor
- Matte parquet floor
- Chevron parquet flooring
- Lacquered parquet flooring
- Tertiary parquet floor
- Kitchen parquet floor
- Natural oil parquet floor