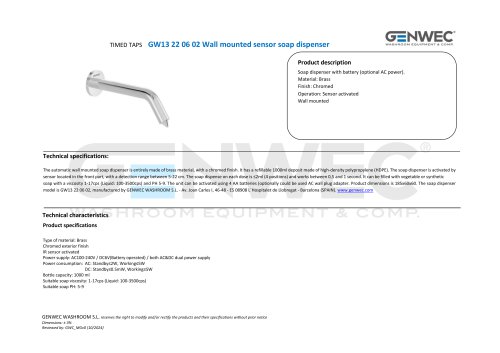
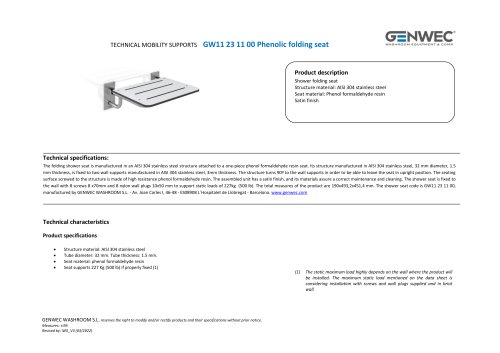
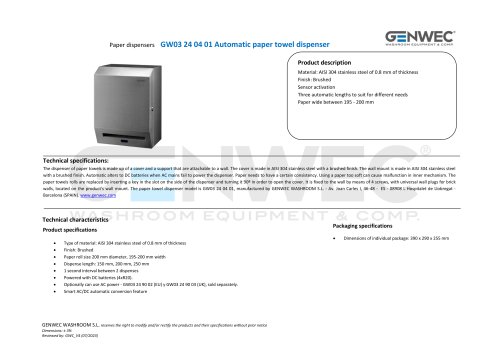
GW13 20 04 01
1 /12Pages
GW13 20 04 01
1 /12Pages
Catalog excerpts

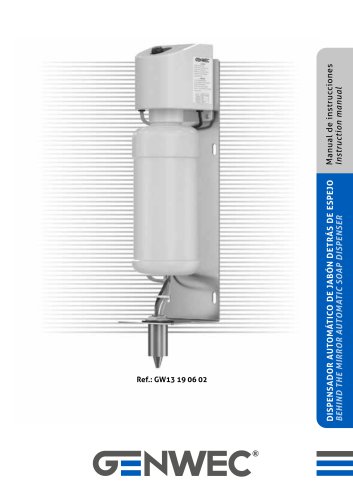
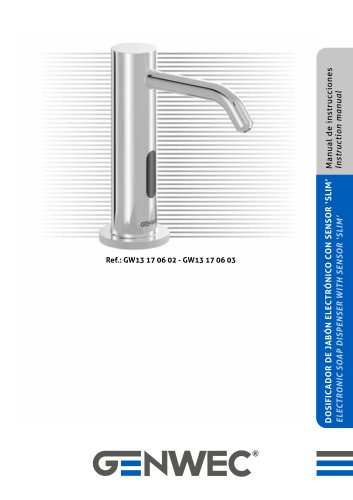
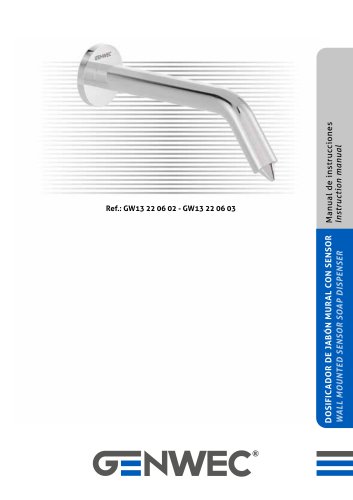
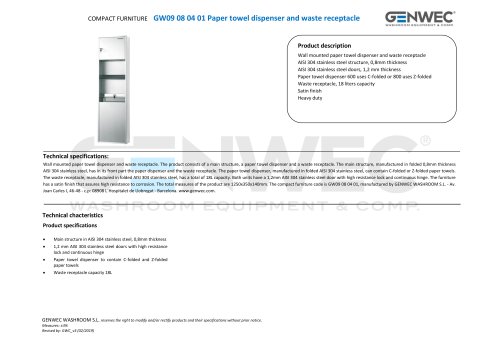
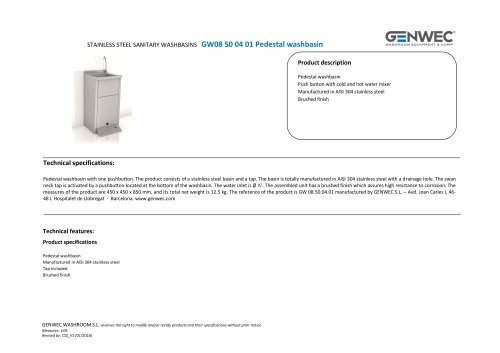
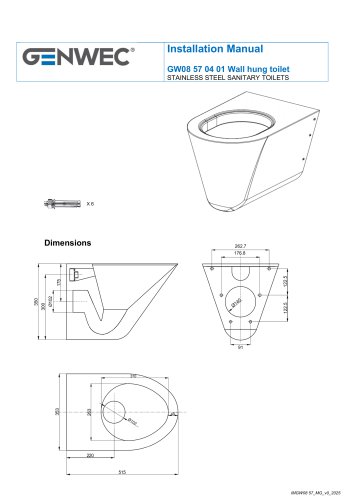
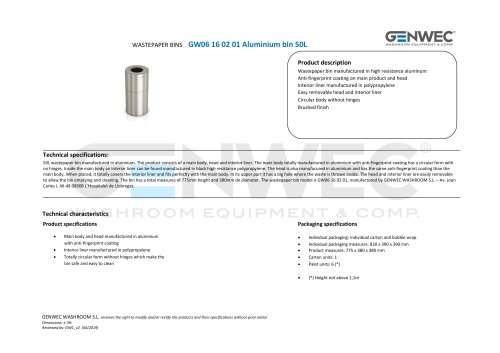
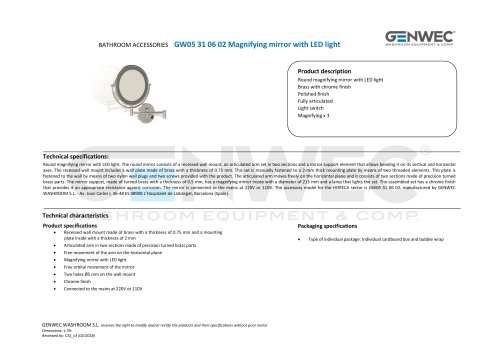
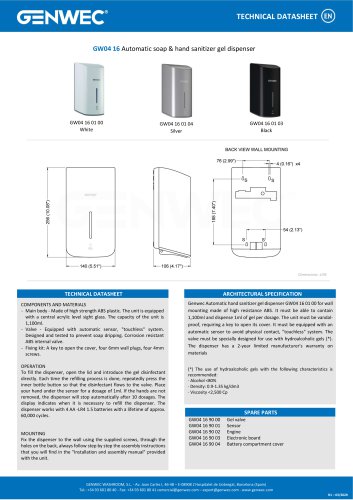
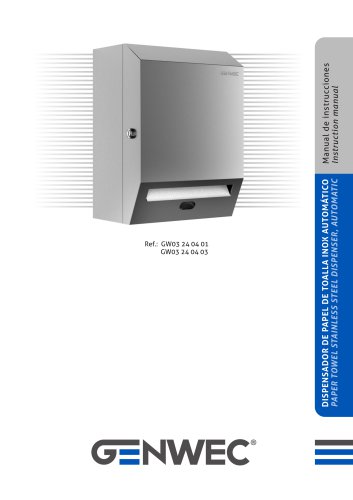
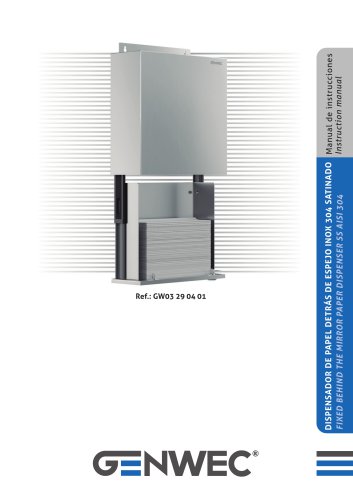
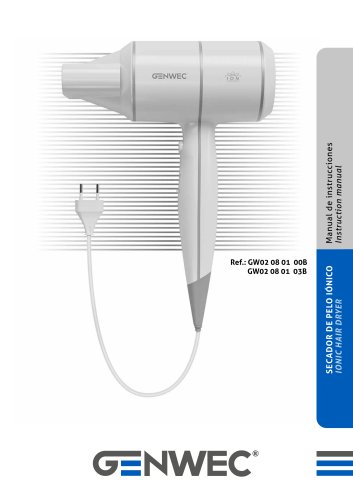
DISPENSADOR AUTOMÁTICO DE JABÓN DETRÁS DE ESPEJO Manual de instrucciones Instruction manual BEHIND MIRROR AUTOMATIC LIQUID SOAP DISPENSER
Open the catalog to page 1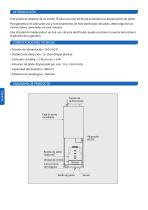
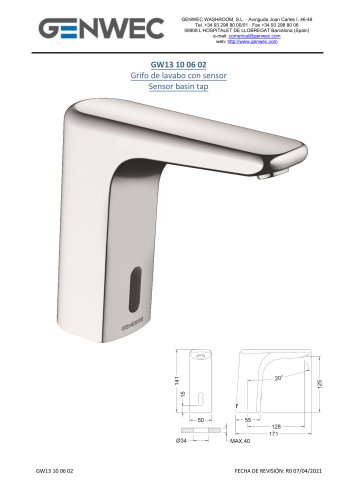
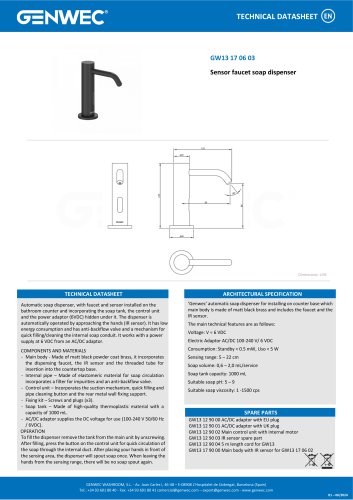
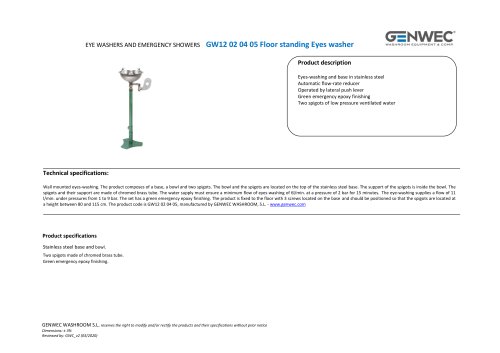
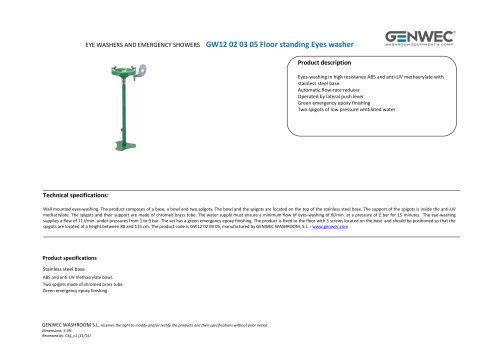
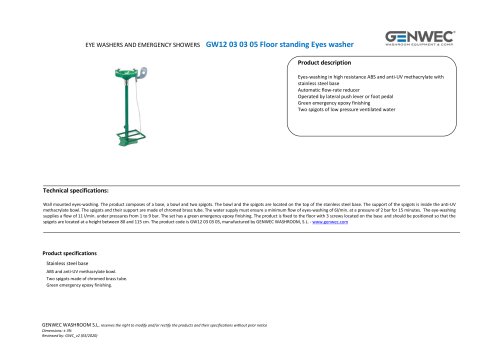
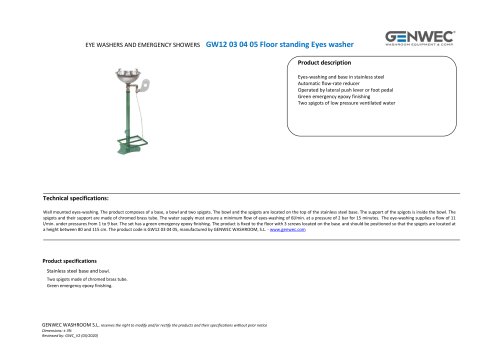
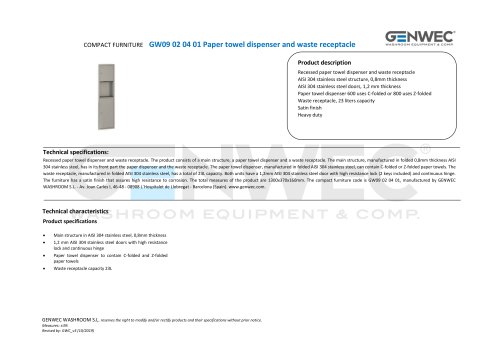
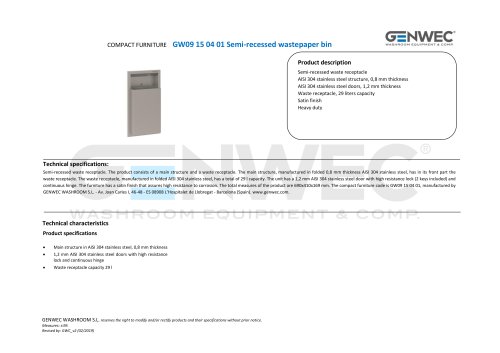
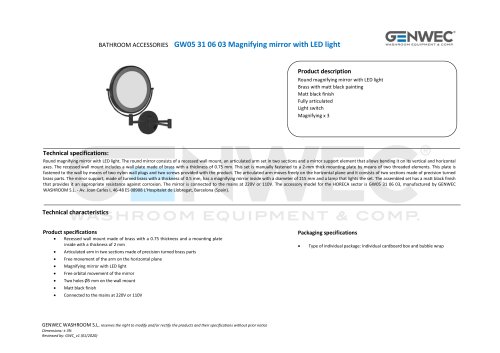
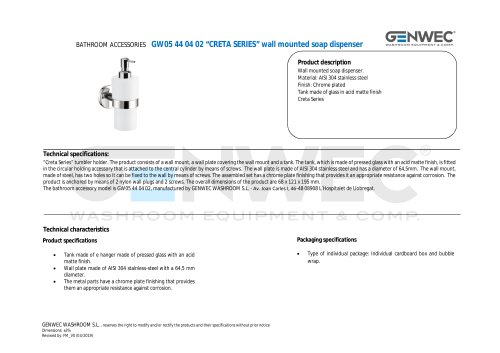
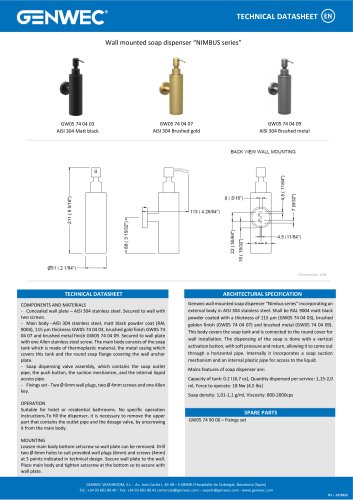
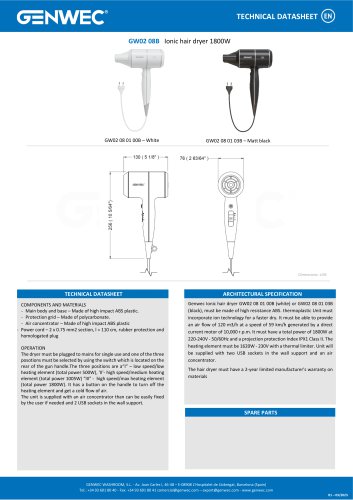
INTRODUCCIÓN Este producto dispone de un sensor IR para accionar de forma automática la dispensación de jabón. Para garantizar el adecuado uso y funcionamiento de este dosificador de jabón, debe seguirse las instrucciones contenidas en este manual. Una instalación inadecuada o un mal uso de este dosificador puede ocasionar la avería del mismo o la pérdida de la garantía. ESPECIFICACIONES TECNICAS • Tensión de alimentación: 220-240 V • Distancia de detección: 14-16cm (Papel blanco) • Consumo: standby < 2 W, en uso < 4 W • Volumen de jabón dispensado por uso: : 0.5-1.0ml /ciclo • Capacidad del...
Open the catalog to page 2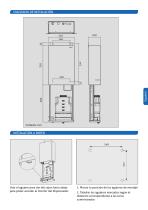
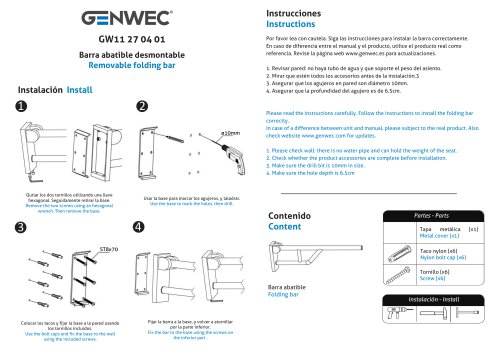
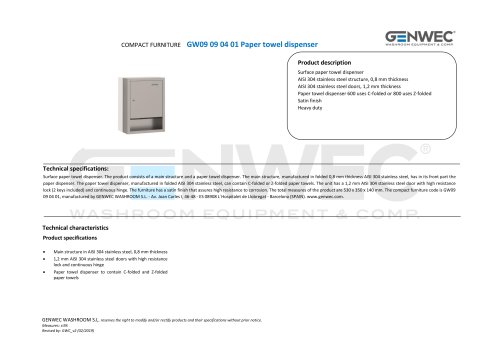
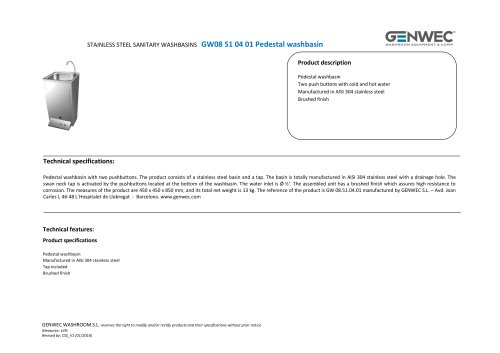
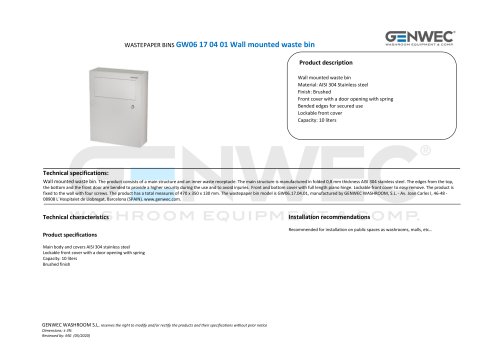
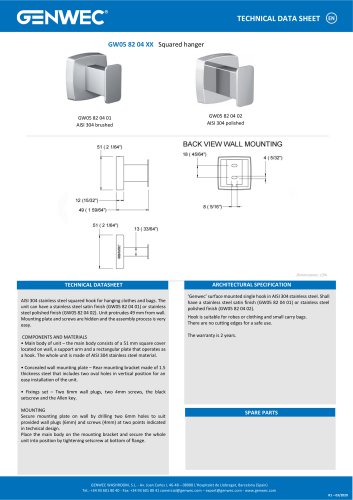
Usar el agujero para tiar del cajon hacia abajo para poder acceder al interior del dispensador. 1. Marcar la posición de los agujeros de montaje 2. Taladrar los agujeros marcados según el diámetro correspondiente a los tacos suministrad
Open the catalog to page 3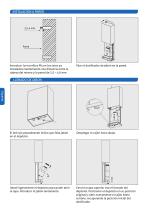
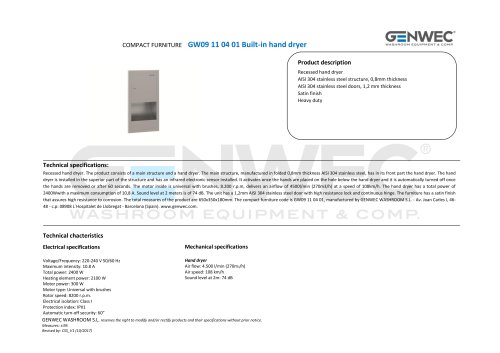
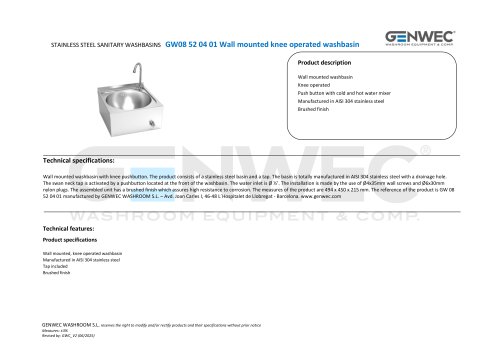
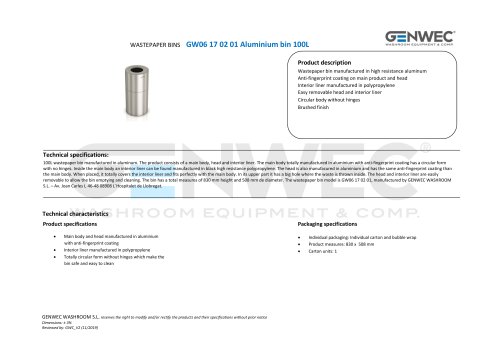
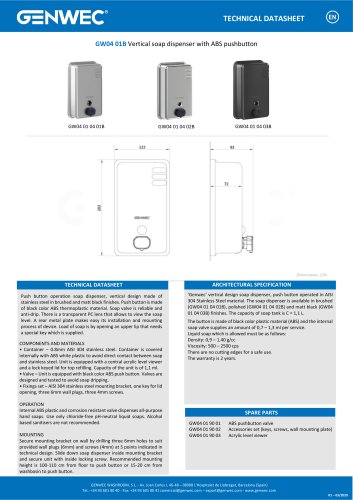
Introducir los tornillos M4 en los tacos ya instalados manteniendo una distancia entre la cabeza del mismo y la pared de 3.5 – 4.0 mm Fijar el dosificador de jabón en la pared. Español El led rojo parpadeando indica que falta jabón en el depósito. Desplegar el cajón hacia abajo. Abatir ligeramente el depósito para poder abrir la tapa. Introducir el jabón lentamente. Cerrar la tapa superior tras el llenado del depósito. Posicionar el depósito en su posición original y subir nuevamente el cajón hasta cerrarlo, recuperando la posición inicial del d
Open the catalog to page 4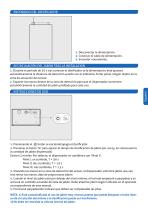
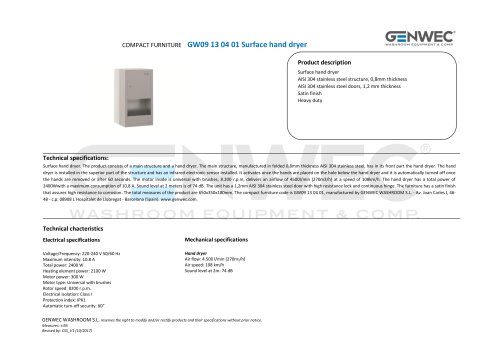
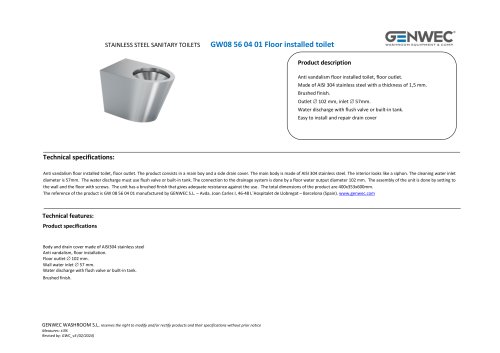
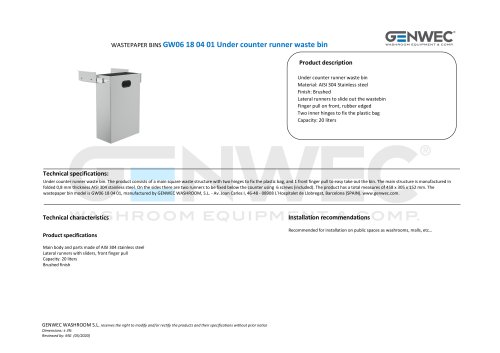
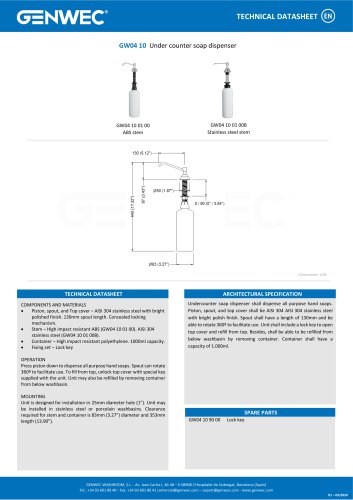
1. Desconectar la alimentación. 2. Conectar el cable de alimentación. 3. Encender nuevamente. RECIRCULACIÓN DEL JABON TRAS LA INSTALACION 1. Durante el período de 20 s tras conectar el dosificador sa la alimentación, éste ajustará automáticamente la distancia de detección acorde con el ambiente. Evitar poner ningún objeto en la zona de actuación del sensor. 2. Exponer las manos dentro de la zona de detección para que el dispensador suministre automáticamente la cantidad de jabón prefijada para cada uso. Español 1. Presionando el botón se enciende/apaga el dosificador. 2. Presionar el botón ‘SL’...
Open the catalog to page 5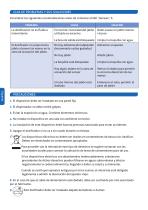
GUIA DE PROBLEMAS Y SUS SOLUCIONES Considerar las siguientes recomendaciones antes de contactar al SAC ‘Genwec’, A PROBLEMA La dosificacion no es fluida o intermitente El dosificador no proporciona jabón al poner las manos en la zona de actuación del jabón. El nivel de viscosidad del jabón utilizado es excesivo Debe usarse un jabón menos viscoso La boca de salida está bloqueada Limpiar la boquilla con agua No hay alimentación (adpatador desconetado o pilas gastadas) Añadir jabón La boquilla está bloqueada Limpiar la boquilla con agua Hay algún objeto en la zona de actuación del sensor Retirar...
Open the catalog to page 6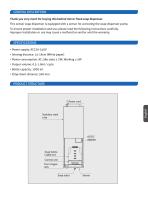
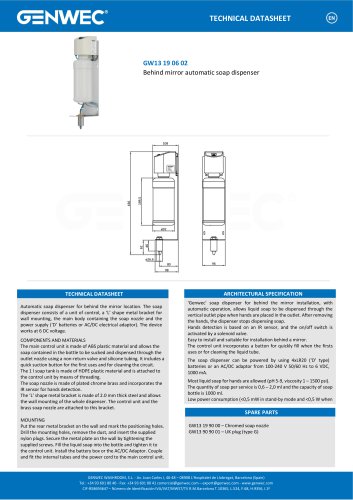
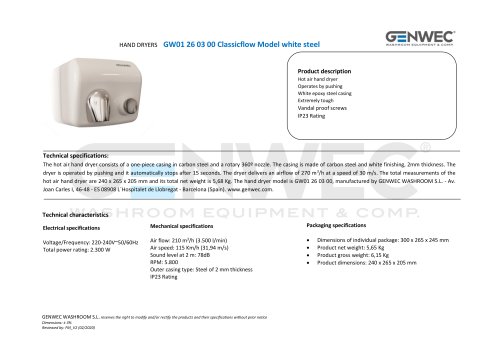
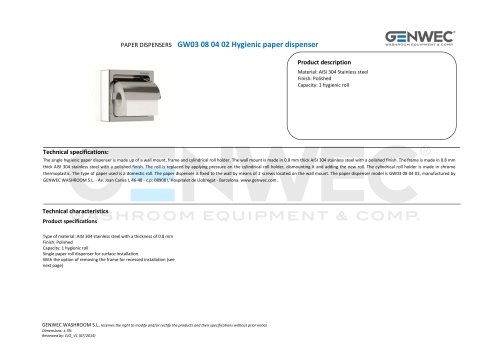
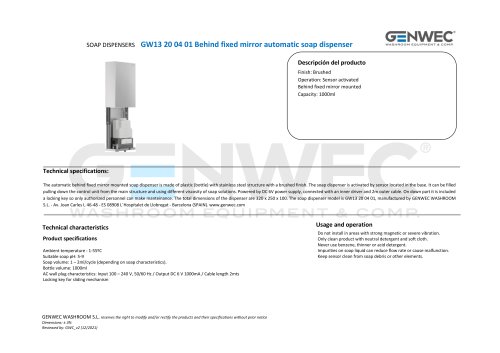
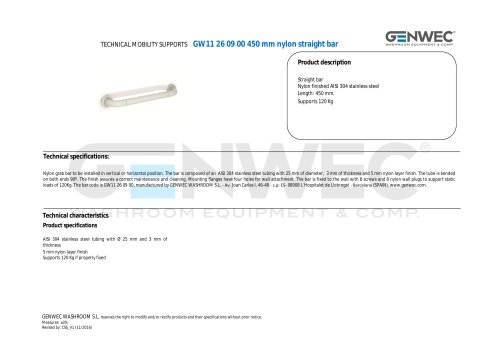
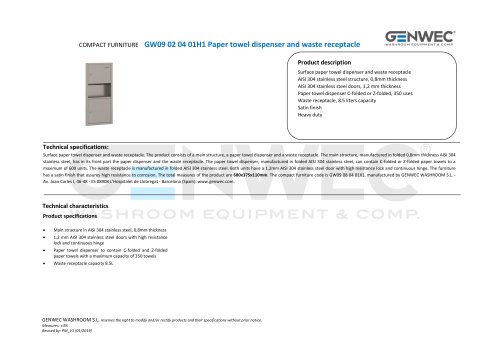
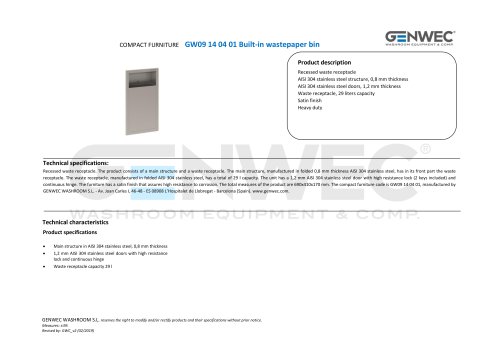
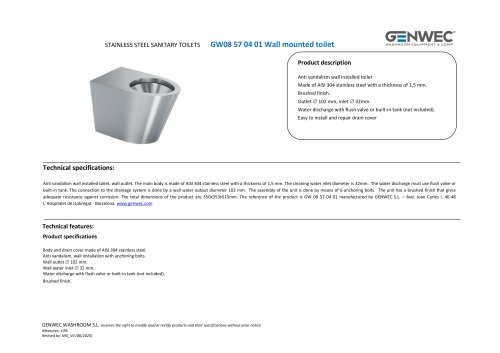
GENERAL DESCRIPTION Thank you very much for buying this behind mirror fixed soap dispenser. This sensor soap dispenser is equipped with a sensor for activating the soap dispenser pump. To ensure proper installation and use, please read the following instructions carefully. Improper installation or use may cause a malfunction and/or void the warranty. SPECIFICATIONS • Power supply: AC220-240V • Sensing distance: 14-16cm (White paper) • Power consumption: AC: Idle state ≤ 2W; Working ≤ 4W • Output volume: 0.5-1.0ml / cycle • Bottle capacity: 1000 ml. • Drop-down distance: 300 mm. PRODUCT STRUCTURE...
Open the catalog to page 7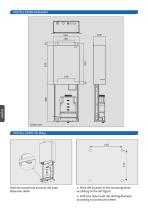
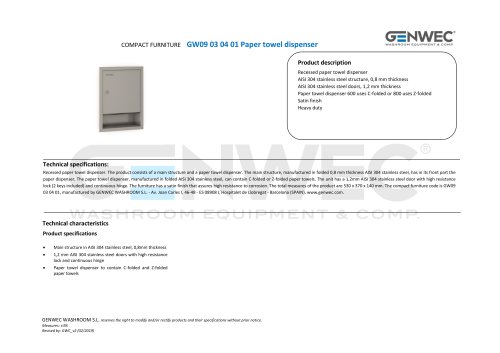
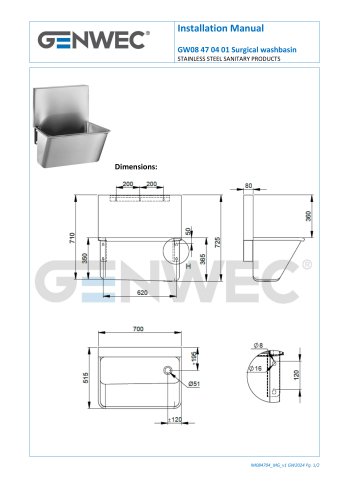
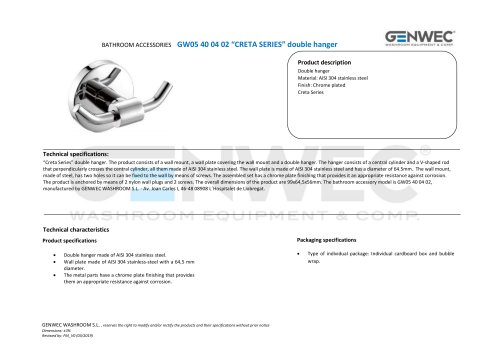
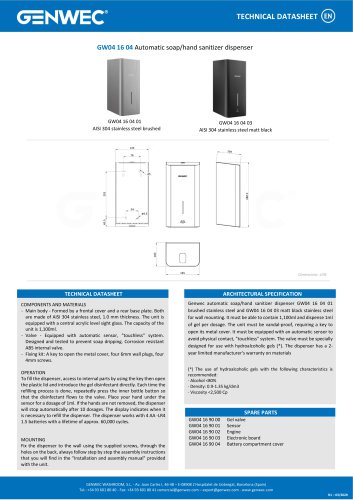
INSTALLATION DIAGRAM English Unit: mm. Units: mm. Hold the round hole and pull the soap dispenser down 1. Mark the location of the mounting holes according to the left figure. 2. Drill four holes with the drilling diameter according to constructor needs
Open the catalog to page 8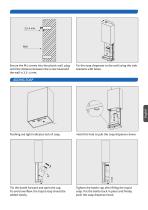
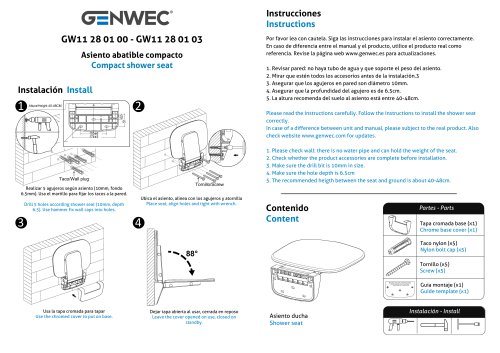
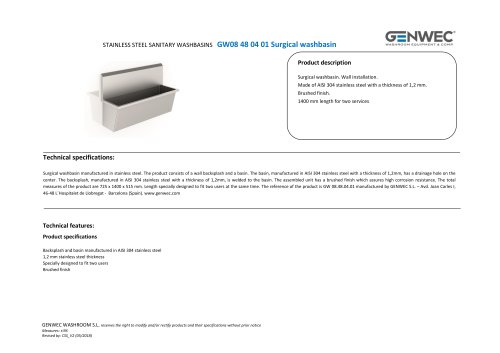
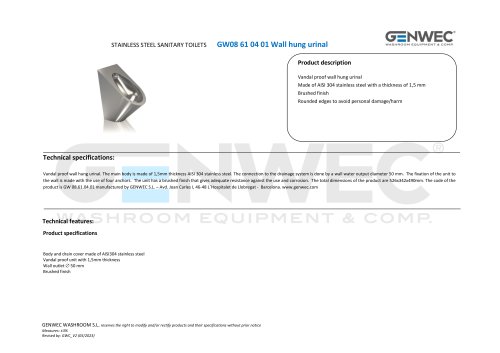
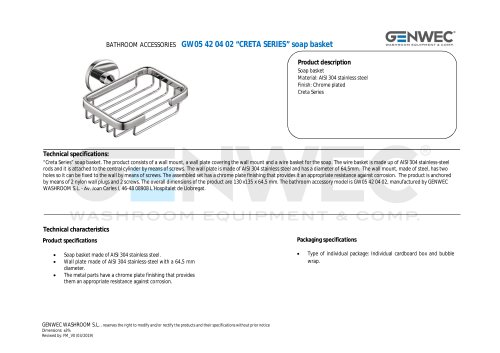
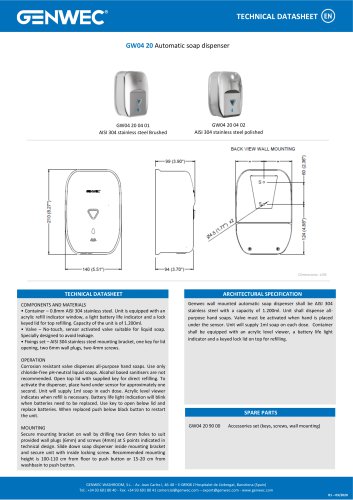
Secure the M4 screws into the plastic wall plug until the distance between the screw head and the wall is 3.5 -4 mm. Fix the soap dispenser to the wall using the side brackets with holes. ADDING SOAP Flashing red light indicates lack of soap. Hold this hole to pull the soap dispenser down. Tilt the bottle forward and open the cap. To avoid overflow, the liquid soap should be added slowly. Tighten the bottle cap after filling the liquid soap. Put the bottle back in place and finally push the soap dispenser back.
Open the catalog to page 9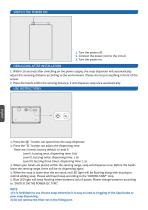
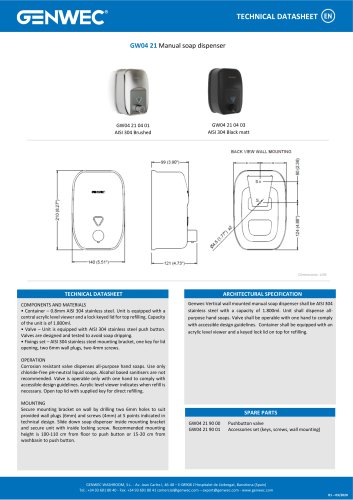
1. Turn the power off. 2. Connect the power cord to the circuit. 3. Turn the power on. DEBUGGING AFTER INSTALLATION 1. Within 20 seconds after switching on the power supply, the soap dispenser will automatically adjust the senseing distance according to the environment. Please do not put anything in front of the sensor. 2. Place the hands within the sensing distance, it will dispense soap once automatically. 1. Press the ” button can open/close the soap dispenser. 2. Press the “SL” button can adjust the dispensing time. There are 3 levels, factory default is Level II. Level I, buzzing once, dispensing...
Open the catalog to page 10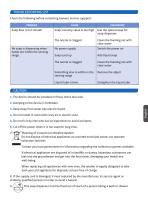
Check the following before contacting Genwec service suppport: 1. The device should be installed on fixed, shock less wall. 2. Bumping to the device is forbidden. 3. Keep away from water like electric liquid. 4. Do not install in room with rusty air or electric dust. 5. Do not fix it by man who has no experience to avoid accidents. 6. Cut off the power when it is not used for long time.. Meaning of crossed-out wheeled dustbin: Do not dispose of electrical appliances as unsorted municipal waste, use separate collection facilities. Contact you local government for information regarding the collection...
Open the catalog to page 11
WASHROOM WASHROOM EQUIPMENT EQUIPMENT & COMP & COMP . . Av. Av. Joan Joan Carles Carles I, 46-48 I, 46-48 08908 08908 L´Hospitalet L´Hospitalet de de Llobregat Llobregat - Barcelona - Barcelona - (SPAIN) - (SPAIN) www.genwec.com www.genwec.co
Open the catalog to page 12All Genwec catalogs and technical brochures
 CATALOG 4.0
198 Pages
 BATHROOM ACCESORIES BROCHURE
24 Pages
 GW13 01 06 02
1 Page
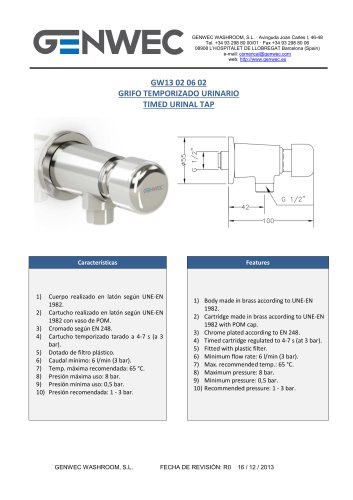 GW13 02 06 02
1 Page
 GW13 03 06 02
1 Page
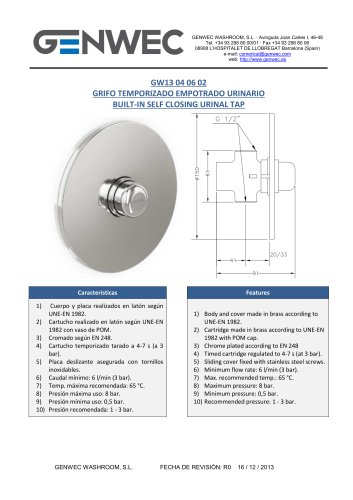 GW13 04 06 02
1 Page
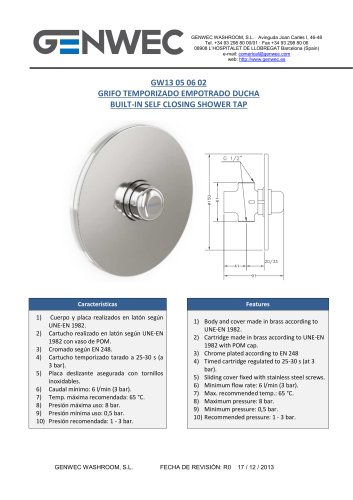 GW13 05 06 02
1 Page
 GW13 06 06 02
1 Page
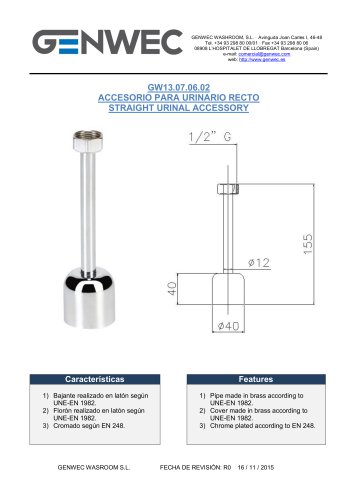
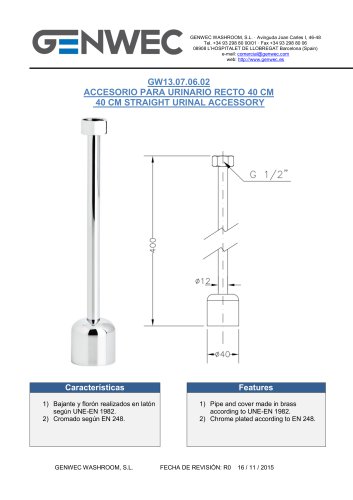 GW13 07 06 02
1 Page
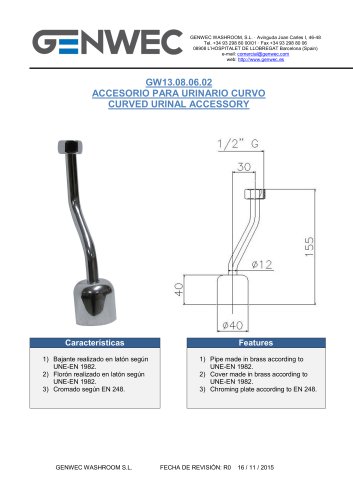 GW13 08 06 02
1 Page
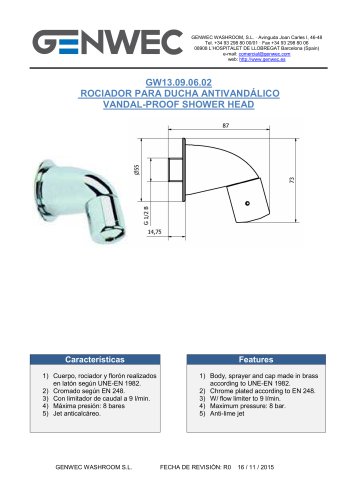 GW13 09 06 02
1 Page
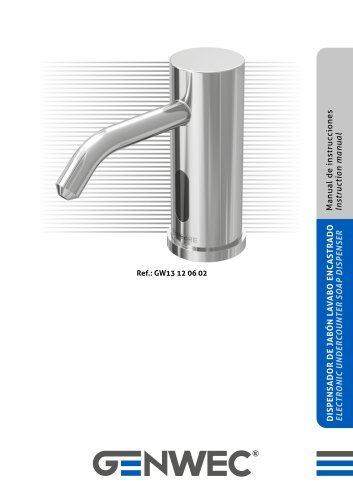 GW13 12 06 02
16 Pages
 GW13 10 06 02
5 Pages
 GW13 11 06 02
7 Pages
 GW13 16 06 03
6 Pages
 GW13 17 06 02
1 Page
 GW13 16 06 02
6 Pages
 GW13 17 06 03
1 Page
 GW13 18 06 02
5 Pages
 nstruction manual GW13 19 06 02
12 Pages
 GW13 19 06 02
1 Page
 GW13 20 06 02
8 Pages
 GW13 21 06 02
6 Pages
 GW13 21 06 03
6 Pages
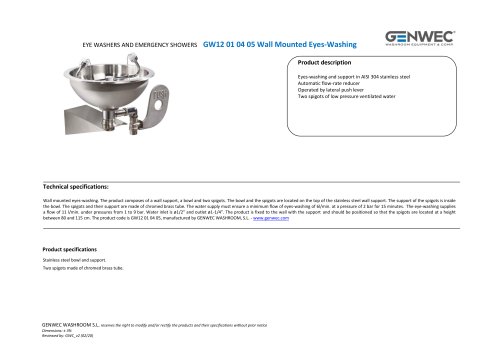
 GW12 01 04 05
8 Pages
 GW12 02 04 05
8 Pages
 GW12 02 03 05
8 Pages
 GW12 03 03 05
8 Pages
 GW12 03 04 05
8 Pages
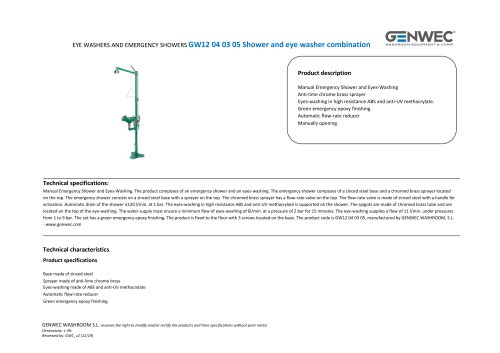
 GW12 04 03 05
12 Pages
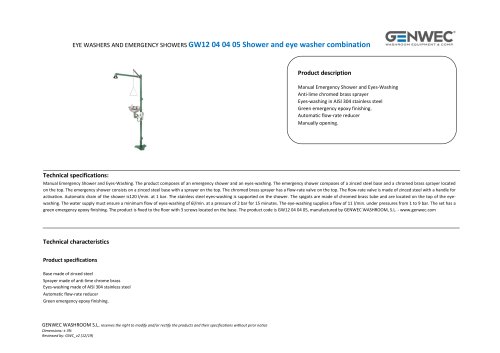
 GW12 04 04 05
12 Pages
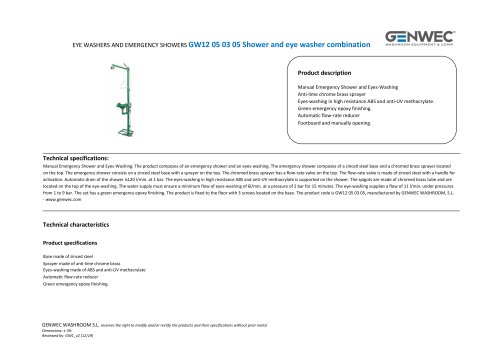
 GW12 05 03 05
12 Pages
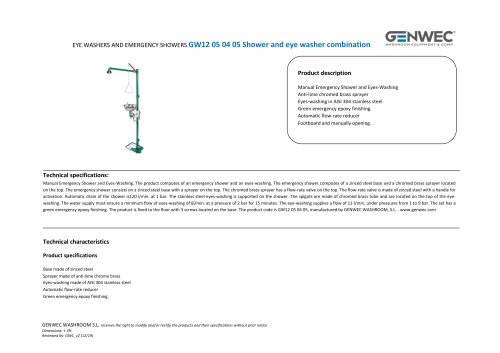
 nstruction manual GW12 05 04 05
12 Pages
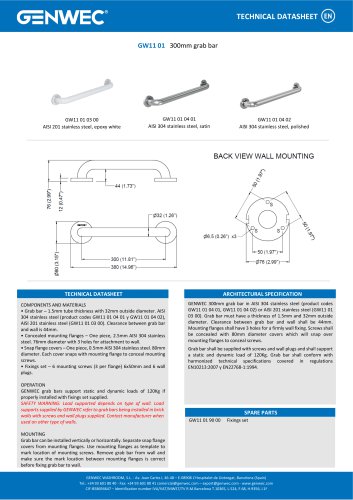 GW11 01 300mm grab bar
1 Page
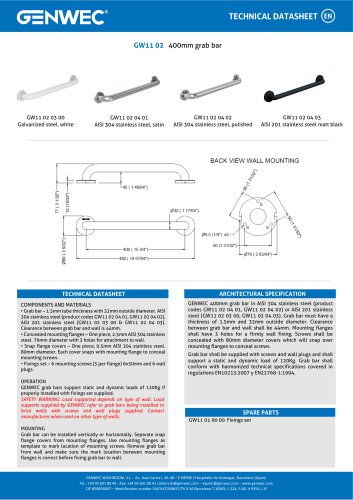 GW11 02 400mm grab bar
1 Page
 GW11 04 04 03
1 Page
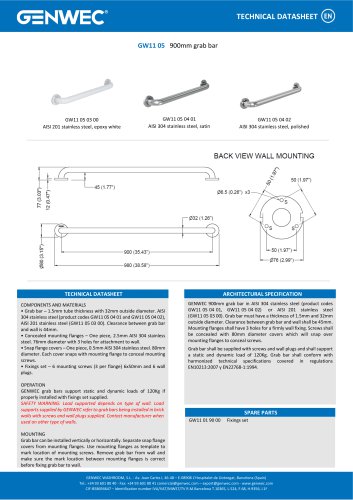 GW11 05 900mm grab bar
1 Page
 GW11 06 03 00
1 Page
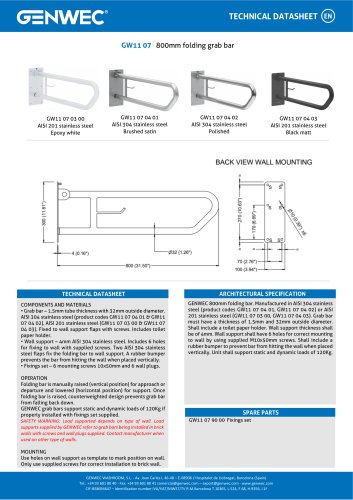 GW11 07 04 02
1 Page
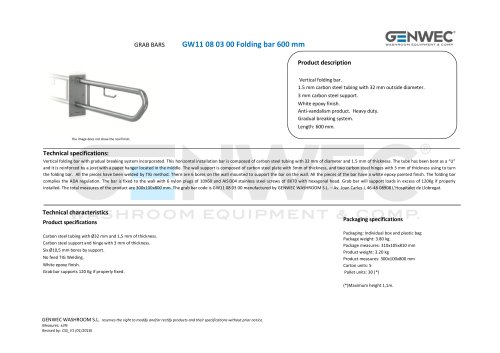 GW11 08 03 00
3 Pages
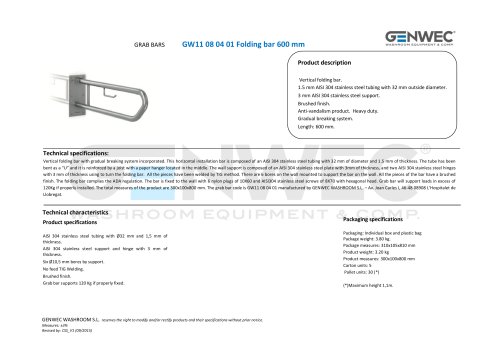 GW11 08 04 01
3 Pages
 GW11 08 04 02
3 Pages
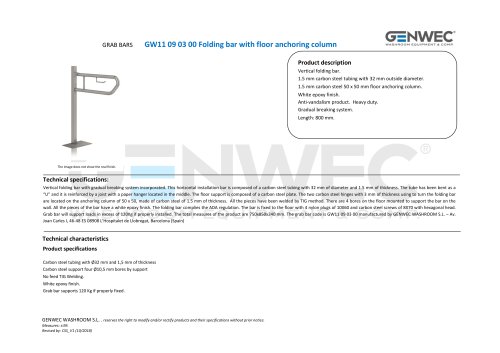 GW11 09 03 00
3 Pages
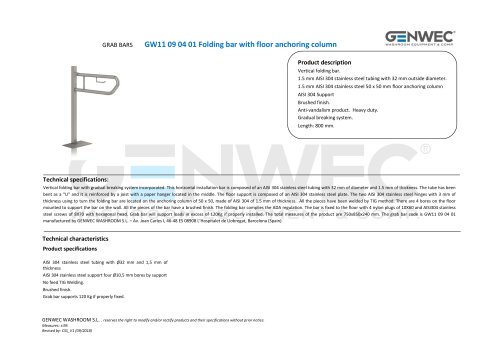 GW11 09 04 01
3 Pages
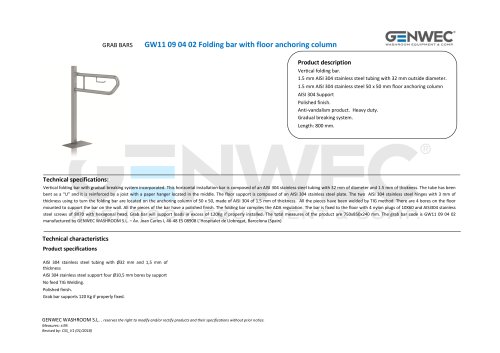 GW11 09 04 02
3 Pages
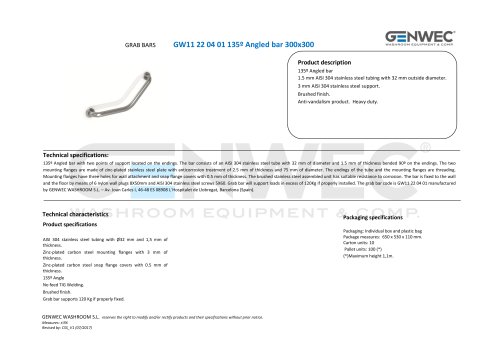 GW11 22 04 01
2 Pages
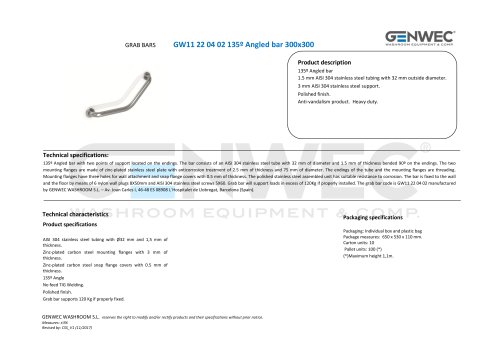 GW11 22 04 02
2 Pages
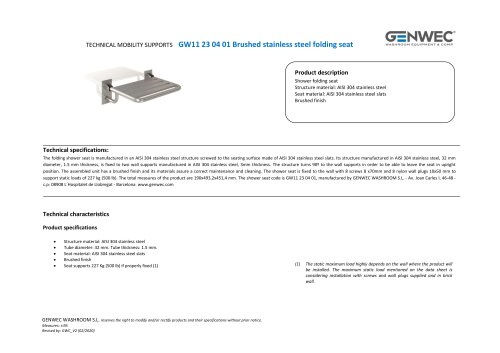 GW11 23 04 01
3 Pages
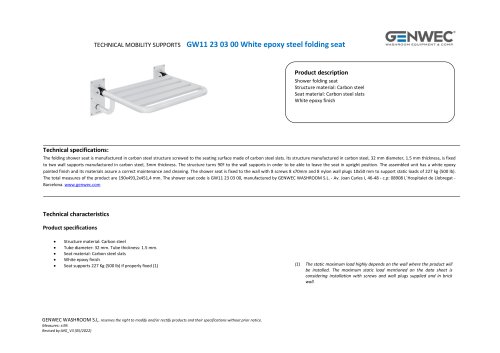 GW11 23 03 00
3 Pages
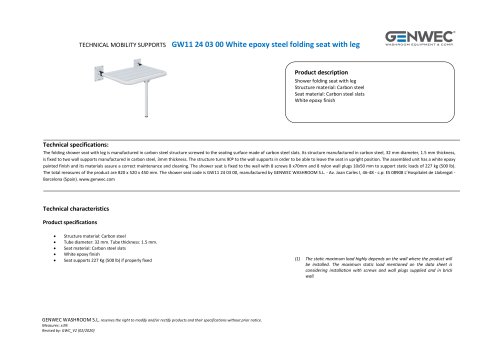 GW11 24 03 00
3 Pages
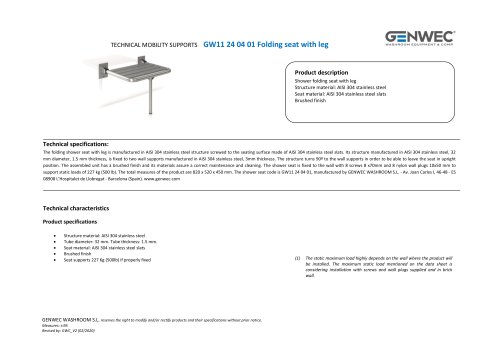 GW11 24 04 01
3 Pages
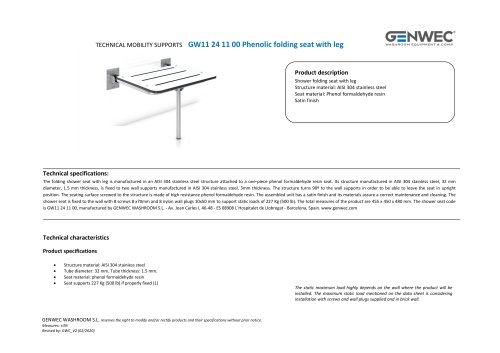 GW11 24 11 00
3 Pages
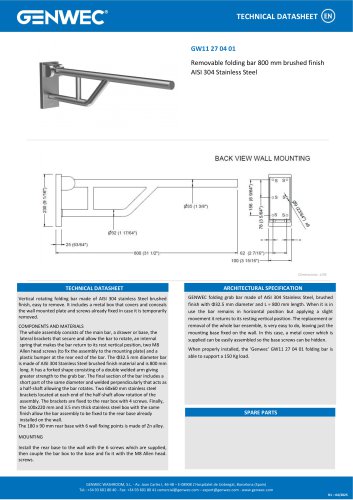 GW11 27 04 01
1 Page
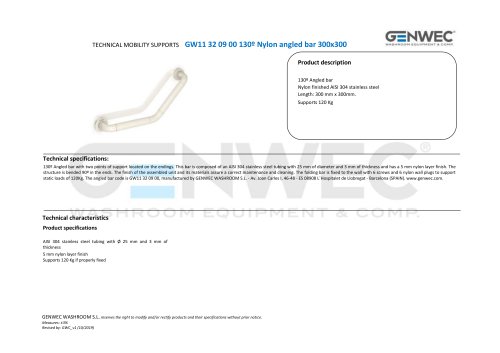 GW11 32 09 00
2 Pages
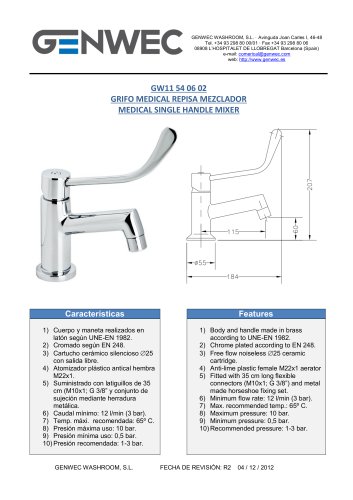 GW11 54 06 02
1 Page
 GW09 01 04 01
8 Pages
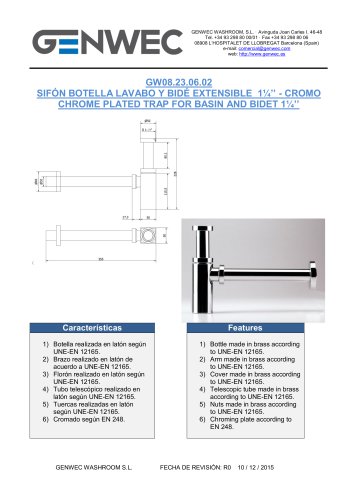 GW08 23 06 02
1 Page
 GW08 24 06 02
1 Page
 GW08 50 04 01
12 Pages
 GW08 51 04 01
12 Pages
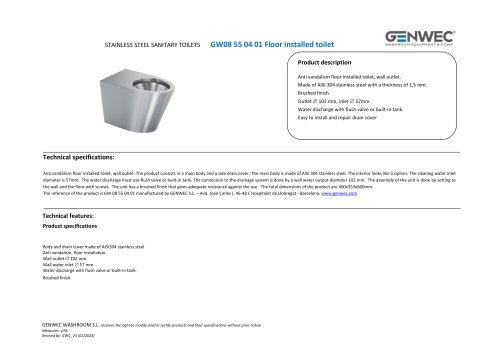 GW08 55 04 01
2 Pages
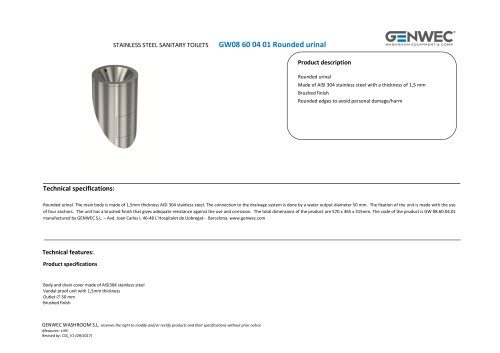 GW08 60 04 01 Rounded urinal
2 Pages
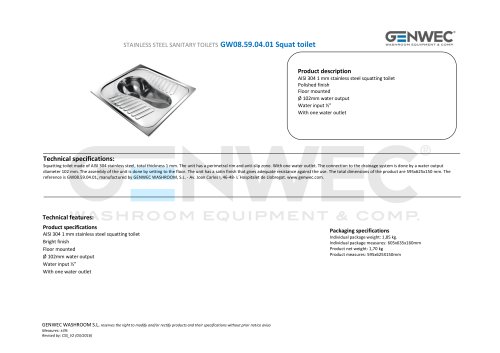 GW08.59.04.01 Squat toilet
2 Pages
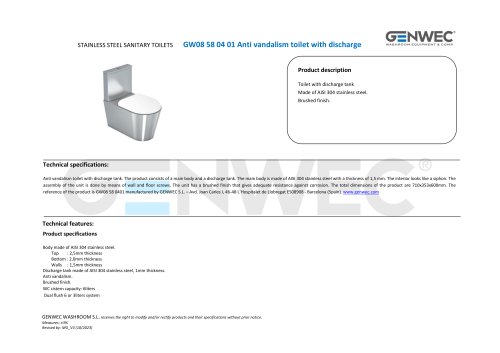 GW08 58 04 01
2 Pages
 GW07 05 04 01
1 Page
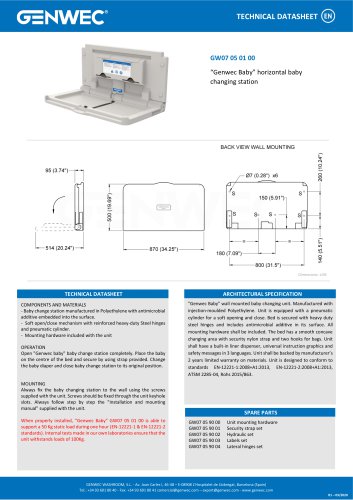 GW07 05 01 00
1 Page
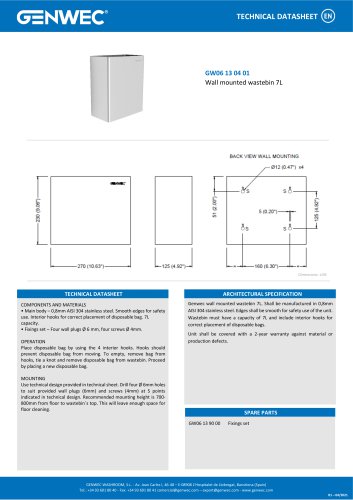 GW06 13 04 01
1 Page
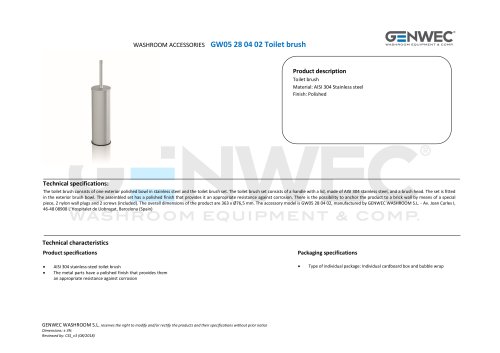 GW05 28 04 02 Toilet brush
2 Pages
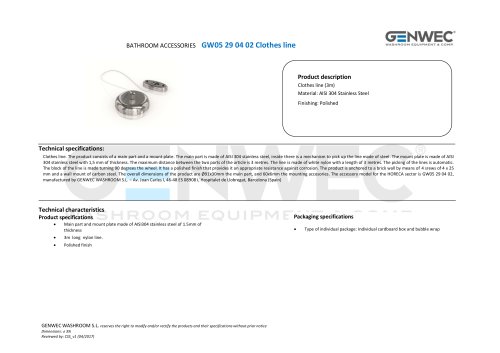 GW05 29 04 02 Clothes line
2 Pages
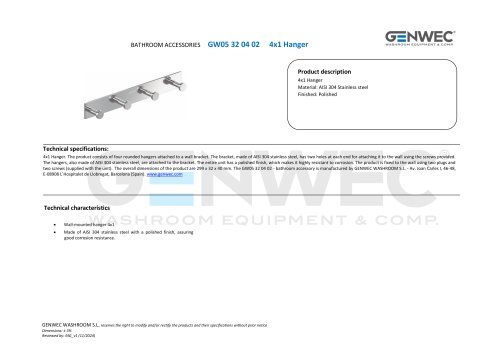 GW05 32 04 02
2 Pages
 GW04 20 04 01
8 Pages
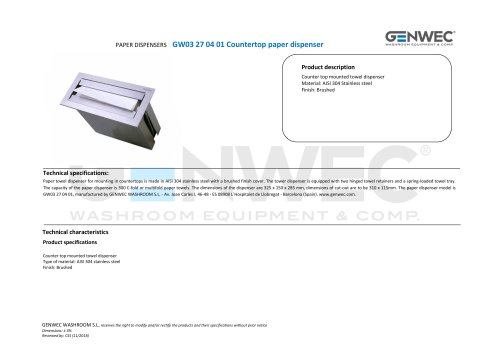 GW03 27 04 01
2 Pages
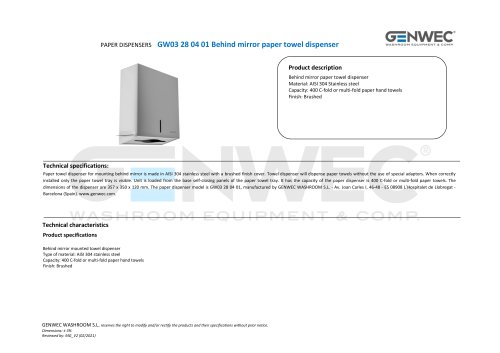 GW03 28 04 01
2 Pages
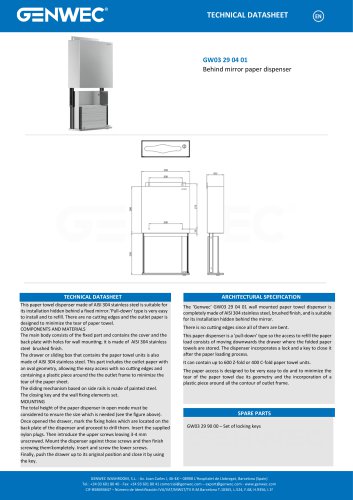 GW03 29 04 01
1 Page
 GW02 08 01 03
8 Pages
 GW01 26 03 00
2 Pages
 GW01 26 04 01
2 Pages
 GW01 26 04 02
2 Pages
 GW01 17 Installation Manual
71 Pages
 GW01 16 01 00
20 Pages
 GW03 20 01 00 ABS
2 Pages
 GW03 19 01 04 ABS
2 Pages
 GW03 19 01 00 ABS
2 Pages
 GW03 19 01 00
2 Pages
 GW03 18 01 04
2 Pages
 GW03 18 01 00
2 Pages
 GW03 27 04 01
2 Pages
 GW03 16 04 02
2 Pages
 GW03 24 04 01
2 Pages
 GW03 04 04 02
2 Pages
 GW03 04 04 01
2 Pages
 GW03 11 04 02
2 Pages
 GW03 10 04 02
2 Pages
 GW03 13 04 01
2 Pages
 GW03 12 04 01
2 Pages
 GW03 10 04 01
2 Pages
 GW03 08 04 02
2 Pages
 GW03 28 04 01
2 Pages
 GW02 01 01 00 Hair dryer
1 Page
 GW01 40 FALCON series
2 Pages
 gw03 02
1 Page
 gw03 05
1 Page
 GW04 16 01 00SM
1 Page


- Industrial tap
- Mixer faucet
- Indoor mixer tap
- Wash stand
- Modern washbasin
- Bathroom single-handle faucet
- Metal mixer tap
- 1-hole single-handle faucet
- Contemporary single-handle mixer tap
- Washbasin tap
- Countertop single-handle mixer tap
- Lavatory mixer tap
- Lever mixer tap
- Industrial dust-bin
- Shelves
- Contemporary litter bin
- Contemporary shelves
- Rectangular sink
- Commercial bin
- Countertop sink