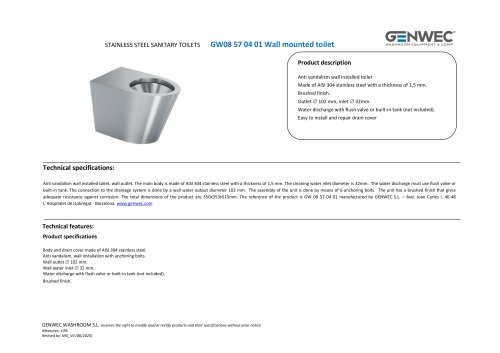
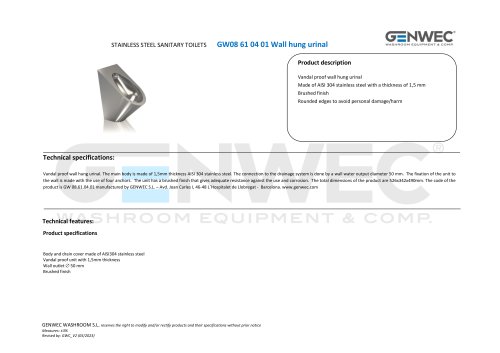
CLASSICflow Hand dryer nstruction manual
1 /16Pages
CLASSICflow Hand dryer nstruction manual
1 /16Pages
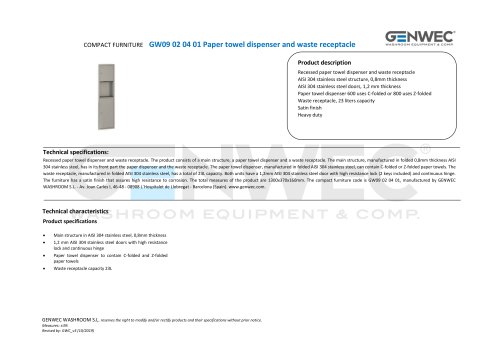
Catalog excerpts

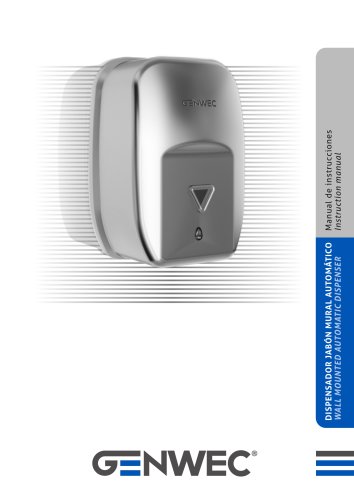
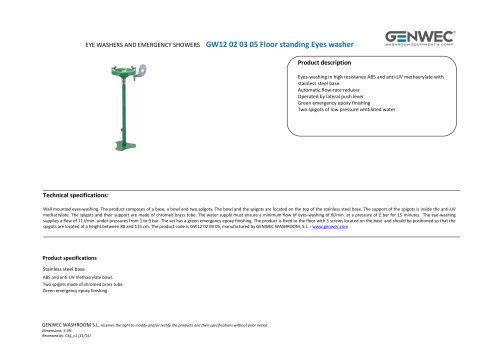
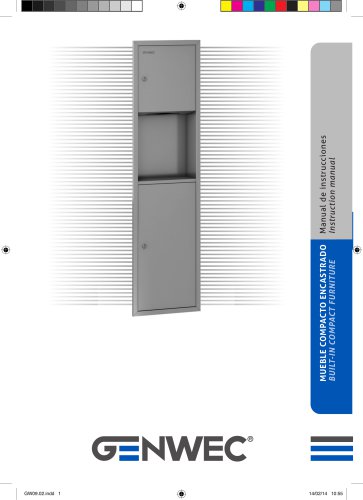
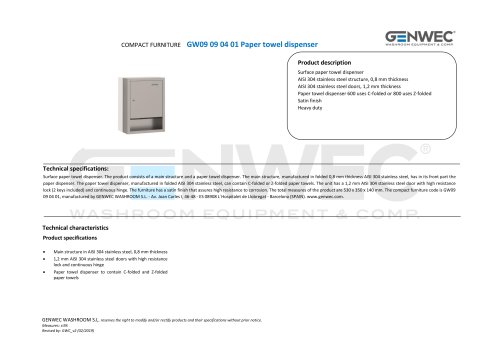
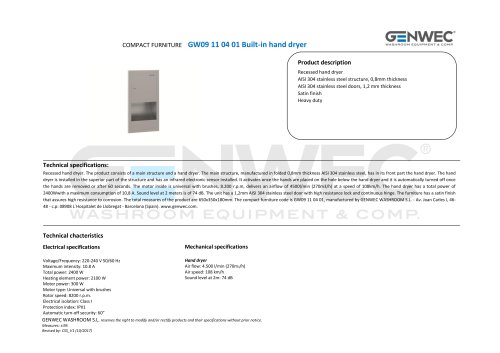
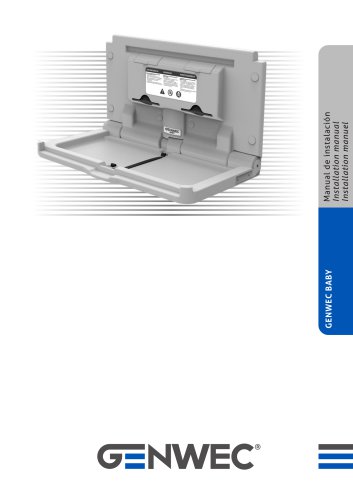
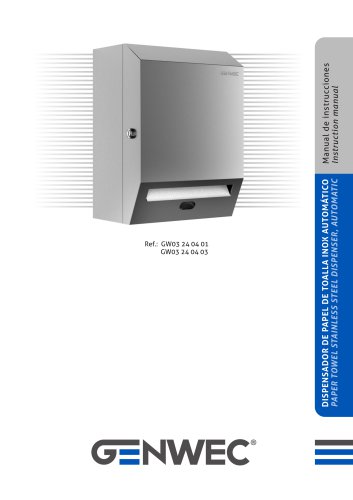
Manual de instrucciones Instruction manual SECAMANOS CLASSICFLOW CLASSICFLOW HAND DRYER
Open the catalog to page 1
INSTRUCCIONES DE SEGURIDAD Antes de realizar cualquier operación, lea cuidadosamente estas instrucciones y aplíquelas. • Sólo un técnico cualificado puede realizar tareas de instalación, ajuste y mantenimiento de este aparato. • Tenga presente que al retirar la carcasa del secador, partes activas del mismo pueden quedar al descubierto pudiendo ocasionar riesgo de electrocución. • Antes de realizar cualquier manipulación eléctrica, debe cortarse el suministro eléctrico que proporciona la tensión que alimenta el secador. • Se deben prever medios de desconexión de la red de alimentación, con una...
Open the catalog to page 2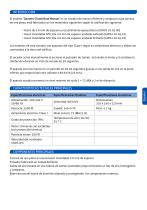
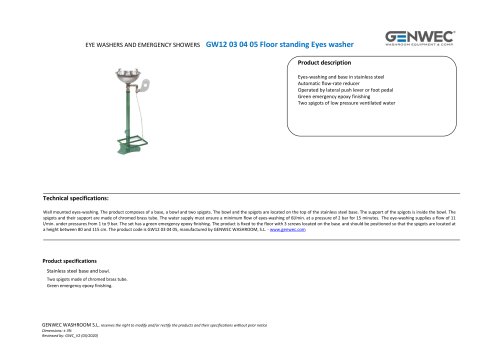
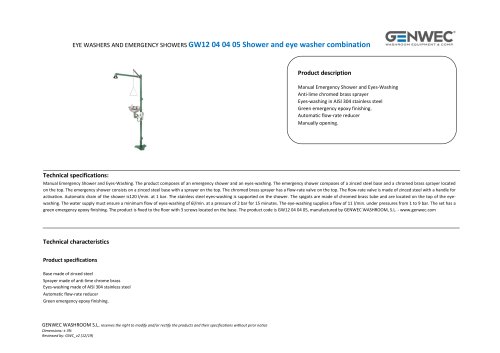
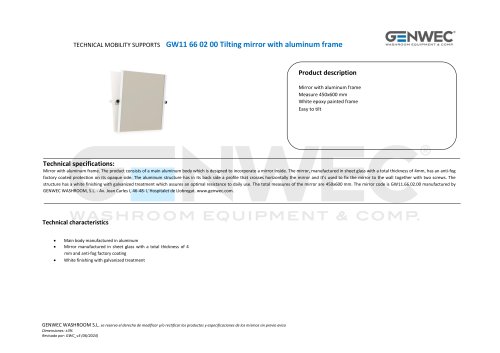
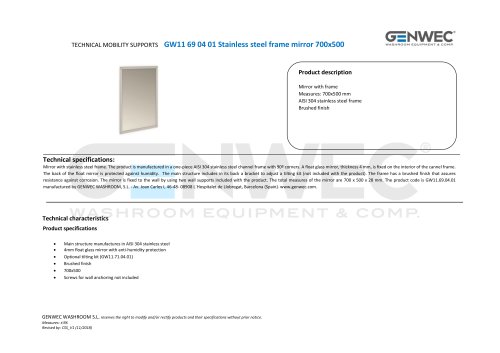
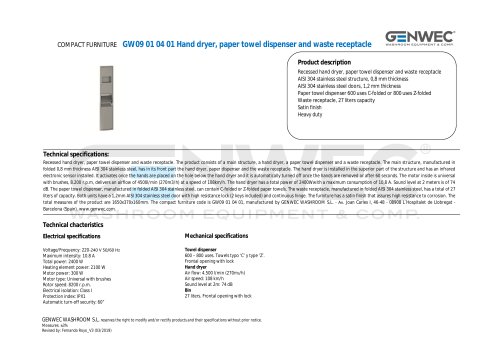
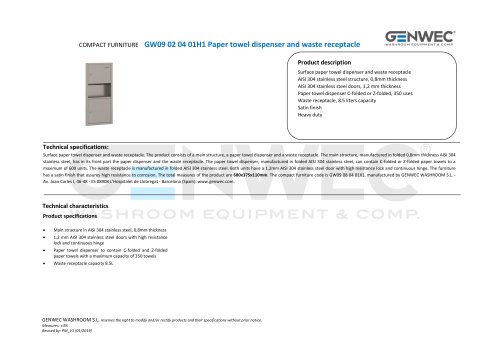
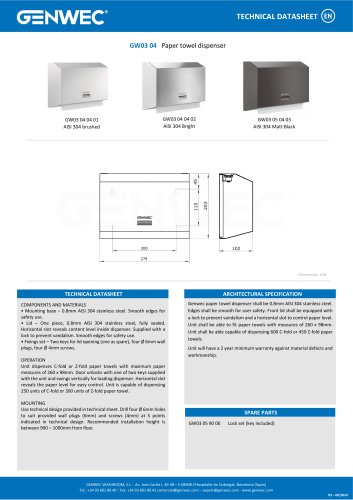
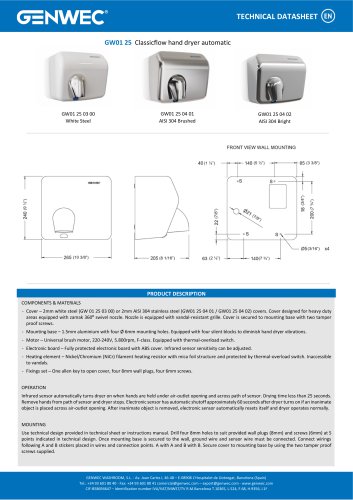
El modelo 'Genwec Classicflow Manual' es un secador de manos eficiente y compacto cuya carcasa, de una pieza, esta fabricada con los materiales siguientes segun la codificacion siguiente: • Acero de 2.0 mm de espesor y recubrimiento epoxy blanco (GW01 26 03 00) • Acero inoxidable AISI 304 2.0 mm de espesor acabado satinado (GW01 26 04 01) • Acero inoxidable AISI 304 2.0 mm de espesor acabado brillante (GW01 26 04 02) Los modelos de este secador son aparatos del tipo Clase I segun su aislamiento electrico y deben ser conectados a la tierra del edificio. El secador actua manualmente al accionar...
Open the catalog to page 3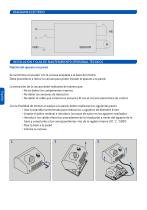
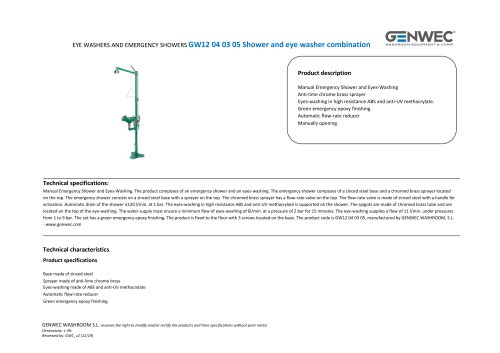
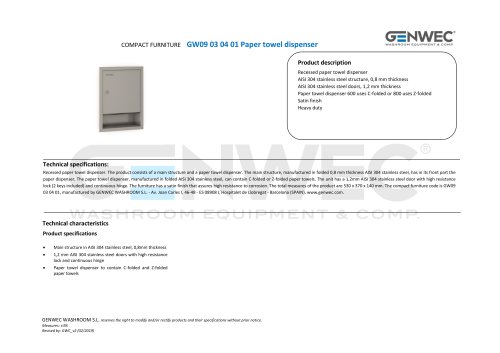
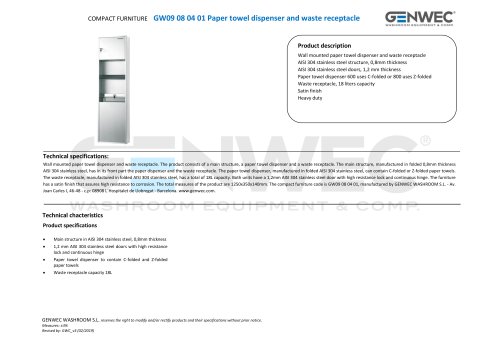
DIAGRAMA ELÉCTRICO INSTALACION Y GUIA DE MANTENIMIENTO (PERSONAL TÉCNICO) Fijación del aparato a la pared Se suministra el secador con la carcasa acoplada a la base del mismo. Debe procederse a retirar la carcasa para poder instalar el aparato a la pared. La extracción de la carcasa debe realizarse de manera que: • No se dañen los componentes internos • No dañar los sensores de detección • No dañar el cable que conecta los sensores IR con el circuito electrónico de control Con la finalidad de montar el equipo a la pared, deben realizarse los siguientes pasos: • Usar la plantilla suministrada...
Open the catalog to page 4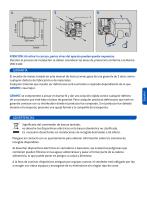
ATENCIÓN: Al retirar la carcasa, partes vivas del aparato pueden quedar expuestas. Durante el proceso de instalación se deben considerar las áreas de protección conforme a la Norma VDE 0100 GENWEC se compromete a actuar en buena fe y dar una solución rápida contra cualquier defecto de un producto que esté bajo el plazo de garantía. Para cualquier producto defectuoso que esté en garantía contacte con su distribuidor dónde el producto fue comprado. Si el producto fue dañado durante el transporte, presente una queja formal a la compañía de transportes. El secador de manos tratado en este manual...
Open the catalog to page 5
SAFETY INSTRUCTIONS Before to carry on any operation, please read carefully and take into account the following instructions. • Only a qualified technician can install, adjust and maintain this device. • Be careful when removing the metal cover since active and live parts of the device become accessible so there is a potential risk of electric shock. • Before any electrical manipulation, the electrical supply from mains must be cut. • Means for disconnection, with contact separations at least 3 mm (0.12”), must be incorporated in the fixing wiring involving all poles, in accordance with wiring...
Open the catalog to page 7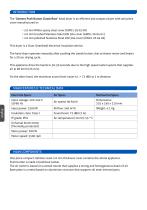
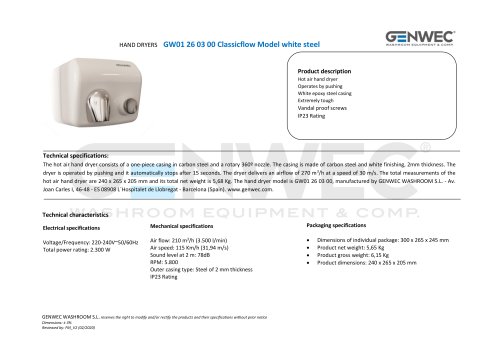
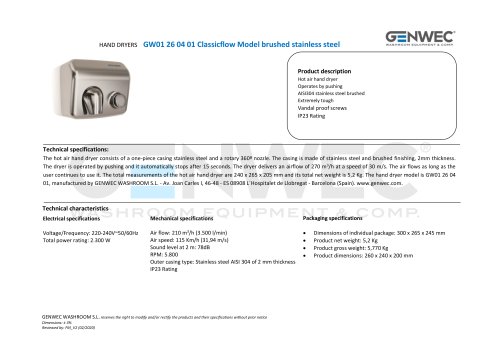
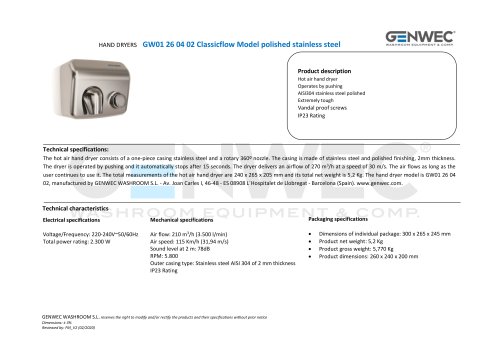
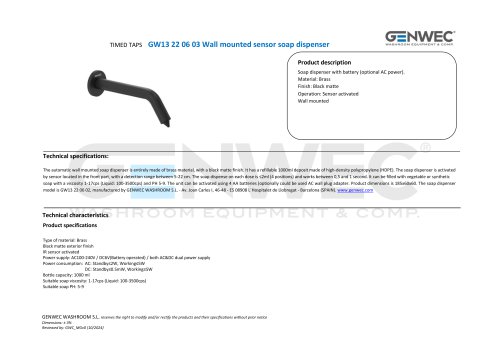
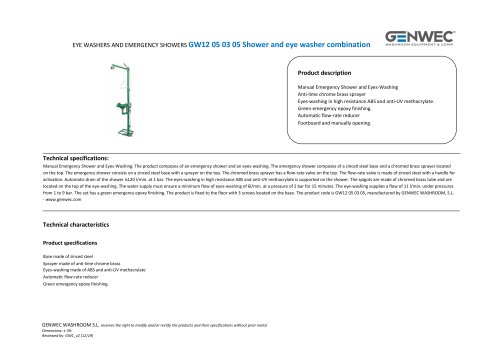
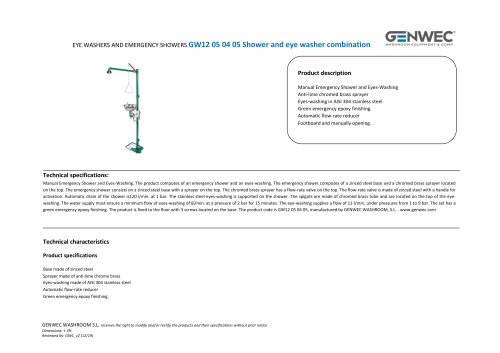
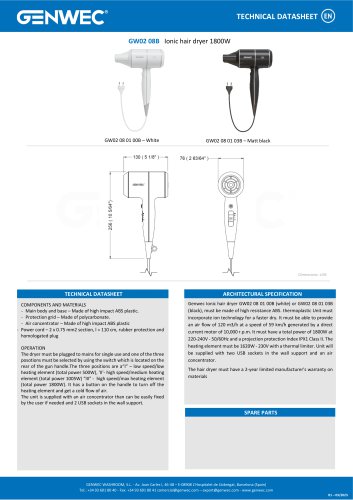
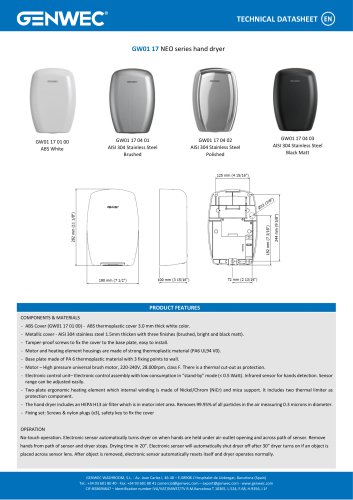
The 'Genwec Push Button Classicflow' hand dryer is an efficient and compact dryer with one piece cover manufactured in: • 2.0 mm White epoxy steel cover (GW01 26 03 00) • 2.0 mm brushed Stainless Steel AISI 304 cover (GW01 26 04 01) • 2.0 mm polished Stainless Steel AISI 304 cover (GW01 26 04 02) This dryer is a Class I (earthed) electrical insulation device. The hand dryer operates manually after pushing the zamak button, that activates motor and heater for a 30 sec drying cycle. This appliance dries the hands in 30-50 seconds due to the high speed outlet system that supplies air at 90 Km/h...
Open the catalog to page 8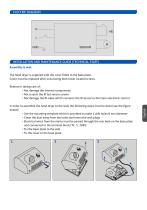
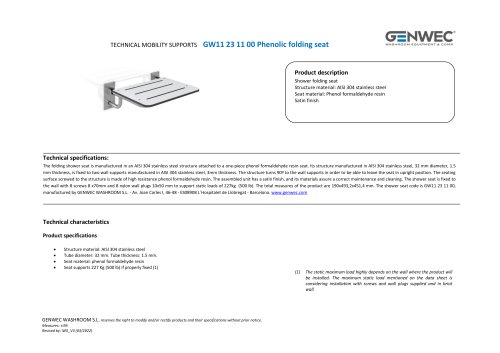
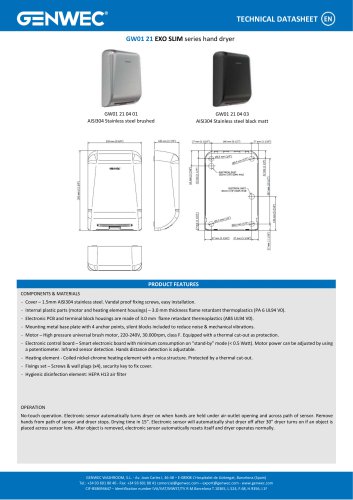
INSTALLATION AND MAINTENANCE GUIDE (TECHNICAL STAFF) Assembly to wall The hand dryer is supplied with the cover fitted to the base plate. Cover must be replaced after unscrewing both lower located screws. Remove it taking care of: • Not damage the internal components • Not scratch the IR led sensor screen • Not damage the IR cable which connects the IR sensor to the main electronic control In order to assemble the hand dryer to the wall, the following steps must be done (see the figure below): • Use the mounting template which is provided to make 4 drill holes 8 mm diameter • Clean the dust away...
Open the catalog to page 9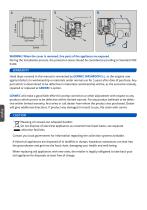
WARNING: When the cover is removed, live parts of the appliance are exposed. During the installation process, the protection areas should be considered according to Standard VDE 0100. WARRANTY Hand dryer covered in this manual is warranted by GENWEC WASHROOM S.L. to the original user against defects in workmanship or materials under normal use for 3 years after date of purchase. Any part which is determined to be defective in materialor workmanship will be, as the exclusive remedy, repaired or replaced at GENWEC’s option. GENWEC will make a good faith effort for promp correction or other adjustment...
Open the catalog to page 10
تعليمات السالمة يُرجى قراءة التعليمات التالية بعناية وأخذها في االعتبار قبل إجراء أي عملية. • ال يمكن تركيب هذا الجهاز وضبطه وصيانته إال من قبل فني مؤهل. نظرا ألنه يتم كشف أجزاء نشطة ومتصلة بالكهرباء من الجهاز ،لذلك يكون هناك حذرا عند إزالة الغطاء المعدني ً • كن ً خطر محتمل لحدوث صدمة كهربائية. • يجب فصل التيار الكهربائي من الموصالت الرئيسية قبل إجراء أي معالجة كهربائية. • يجب تضمين وسائل فصل ،بتباعد تالمس على األقل 3مم (” ،)0.12في أسالك التثبيت التي تتضمن جميع األقطاب ،وفقًا لقواعد األسالك. • الجهاز هو جهاز كهربائي عازل من الفئة األولى ،لذا يجب تأريضه....
Open the catalog to page 12
مقدمة مجفف األيدي " "Genwec Push Button Classicflowهو مجفف فعّال وصغير الحجم بغطاء قطعة واحدة مصنع في: • غطاء من فوالذ اإليبوكسي األبيض 2.0مم ()GW01 26 03 00 • غطاء AISI 304من الفوالذ المقاوم للصدأ المصقول 2.0مم ()GW01 26 04 01 • غطاء AISI 304من الفوالذ المقاوم للصدأ المصقول 2.0مم ()GW01 26 04 02 هذا المجفف هو جهاز عزل كهربائي (مؤرض) من الفئة األولى. يعمل مجفف اليدين يدويًا بعد الضغط على زر زاماك الذي ينشط المحرك والسخان لدورة تجفيف لمدة 30ثانية. يجفف هذا الجهاز األيدي في غضون 50-30ثانية بسبب نظام اإلخراج عالي السرعة الذي يمد الهواء بسرعة 90كم/الساعة...
Open the catalog to page 13All Genwec catalogs and technical brochures
 CATALOG 4.0
198 Pages
 BATHROOM ACCESORIES BROCHURE
24 Pages
 GW13 01 06 02
1 Page
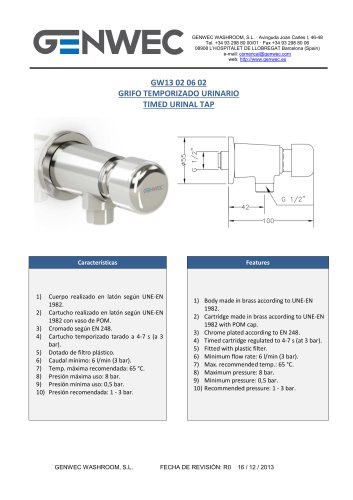 GW13 02 06 02
1 Page
 GW13 03 06 02
1 Page
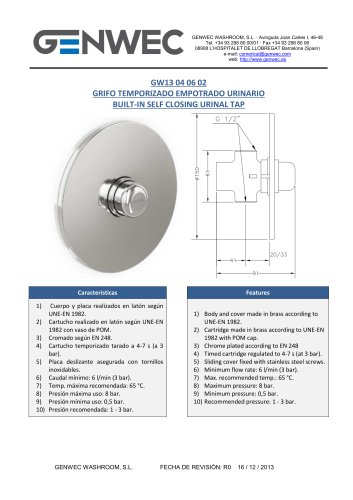 GW13 04 06 02
1 Page
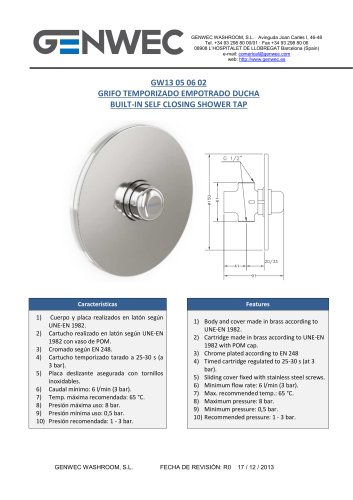 GW13 05 06 02
1 Page
 GW13 06 06 02
1 Page
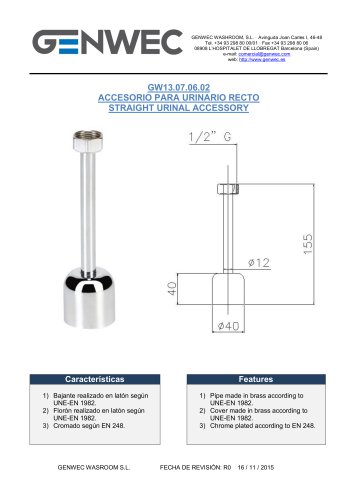
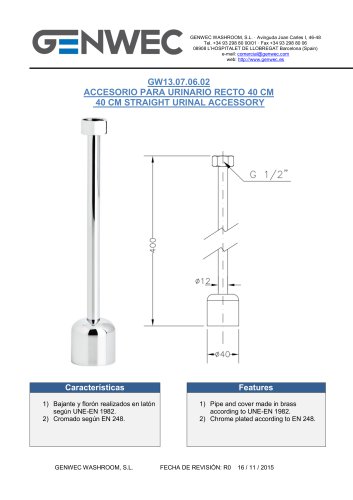 GW13 07 06 02
1 Page
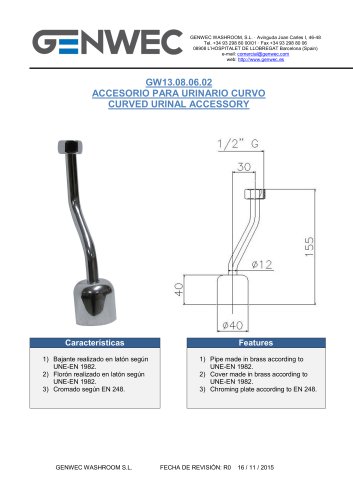 GW13 08 06 02
1 Page
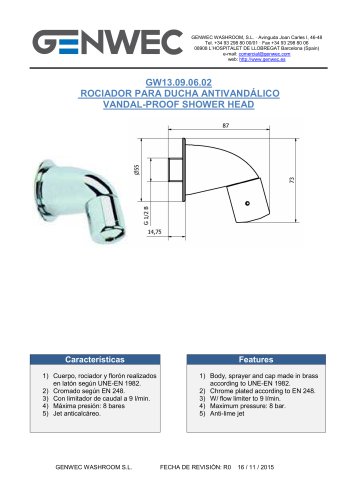 GW13 09 06 02
1 Page
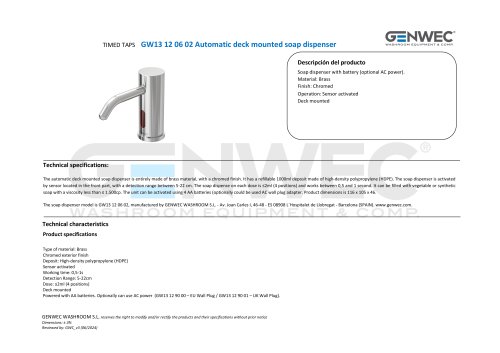
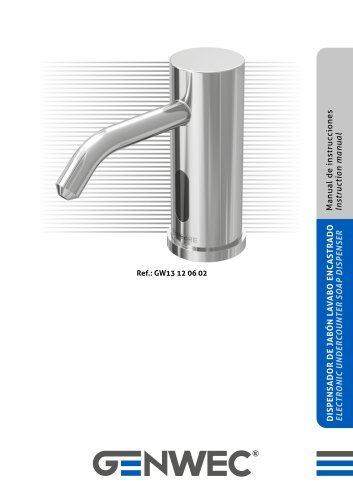 GW13 12 06 02
16 Pages
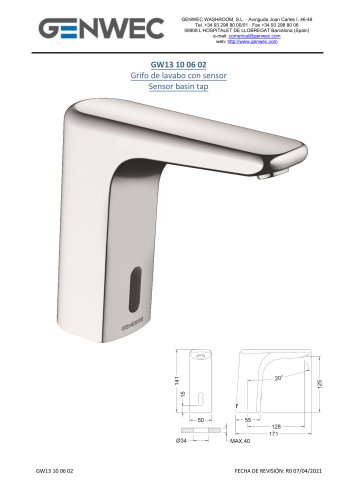 GW13 10 06 02
5 Pages
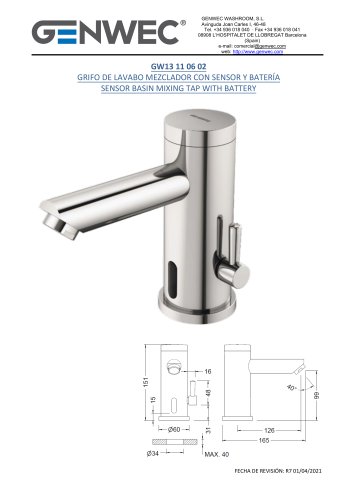 GW13 11 06 02
7 Pages
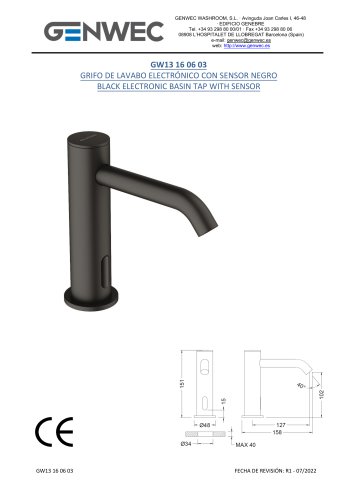 GW13 16 06 03
6 Pages
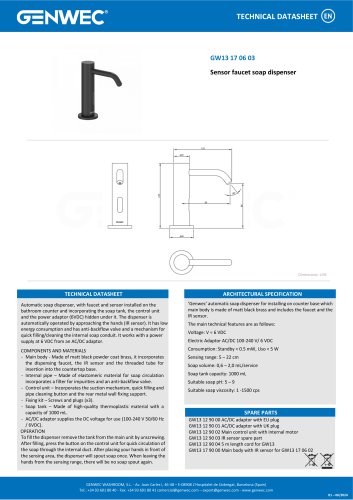
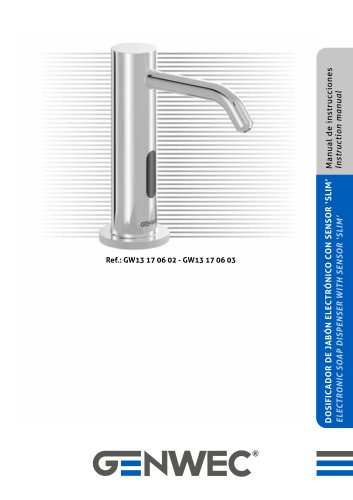
 GW13 17 06 02
1 Page
 GW13 16 06 02
6 Pages
 GW13 17 06 03
1 Page
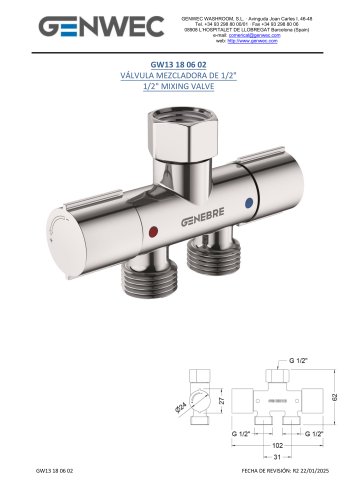 GW13 18 06 02
5 Pages
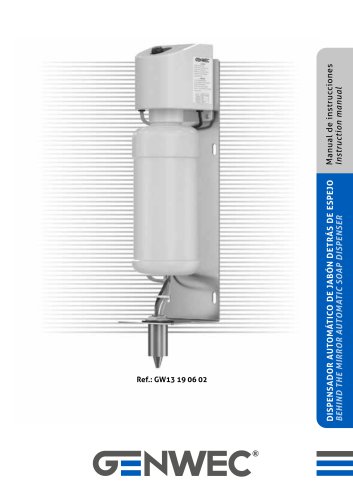 nstruction manual GW13 19 06 02
12 Pages
 GW13 19 06 02
1 Page
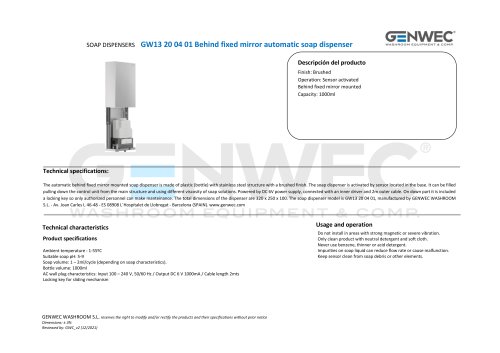
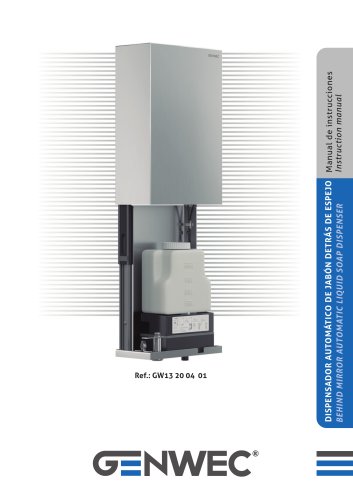 GW13 20 04 01
12 Pages
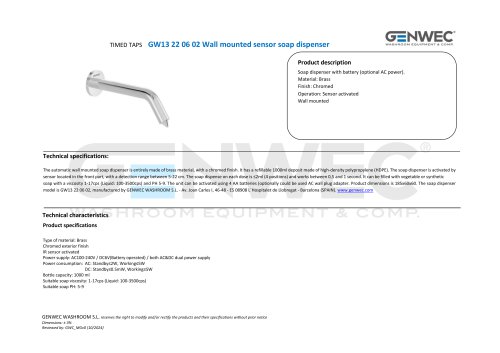
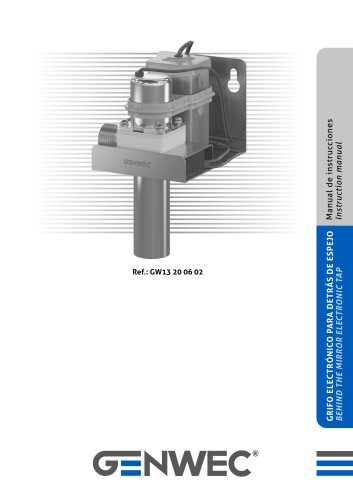 GW13 20 06 02
8 Pages
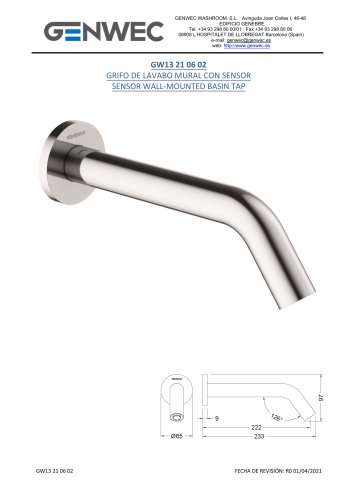 GW13 21 06 02
6 Pages
 GW13 21 06 03
6 Pages
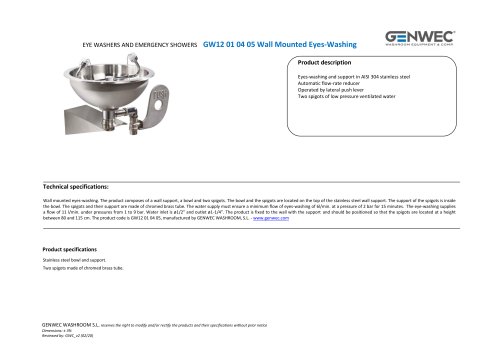
 GW12 01 04 05
8 Pages
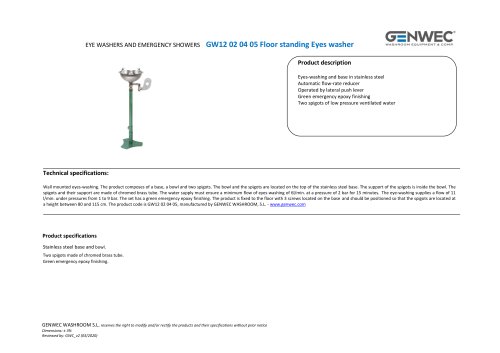
 GW12 02 04 05
8 Pages
 GW12 02 03 05
8 Pages
 GW12 03 03 05
8 Pages
 GW12 03 04 05
8 Pages
 GW12 04 03 05
12 Pages
 GW12 04 04 05
12 Pages
 GW12 05 03 05
12 Pages
 nstruction manual GW12 05 04 05
12 Pages
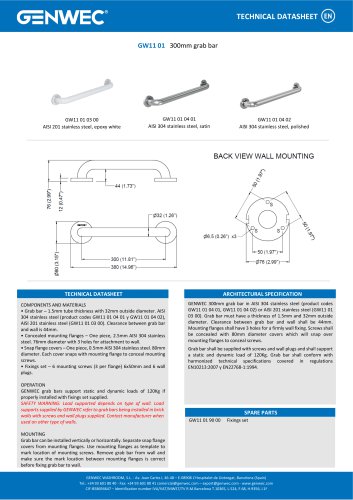 GW11 01 300mm grab bar
1 Page
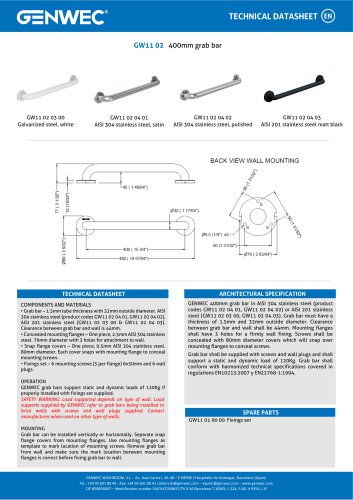 GW11 02 400mm grab bar
1 Page
 GW11 04 04 03
1 Page
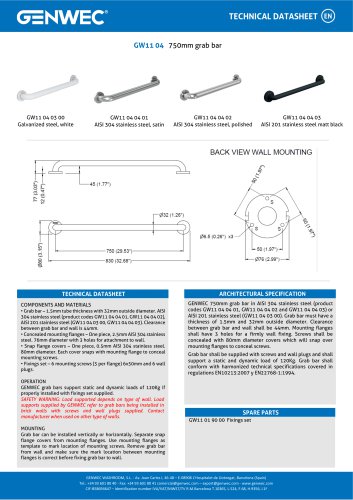
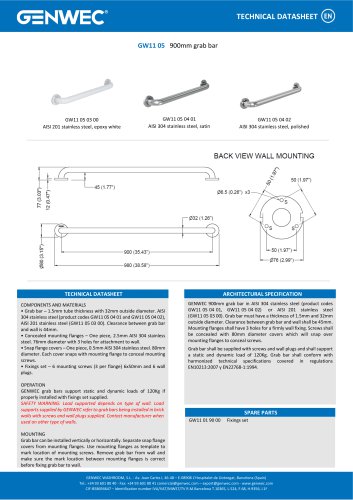 GW11 05 900mm grab bar
1 Page
 GW11 06 03 00
1 Page
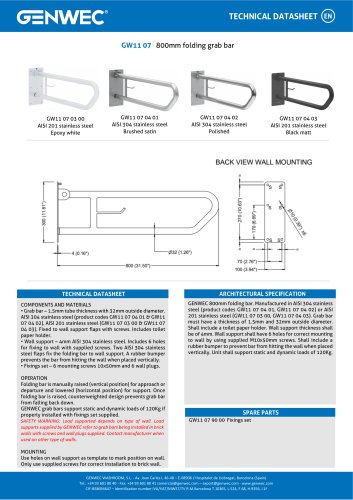 GW11 07 04 02
1 Page
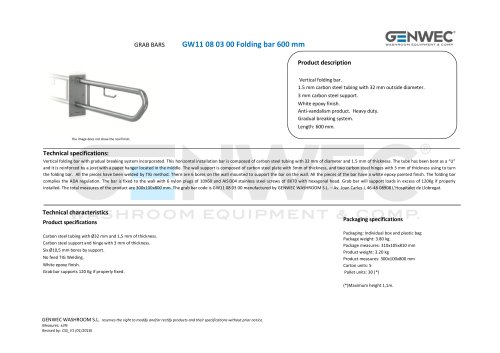 GW11 08 03 00
3 Pages
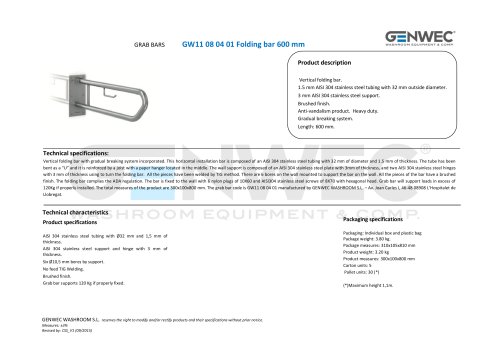 GW11 08 04 01
3 Pages
 GW11 08 04 02
3 Pages
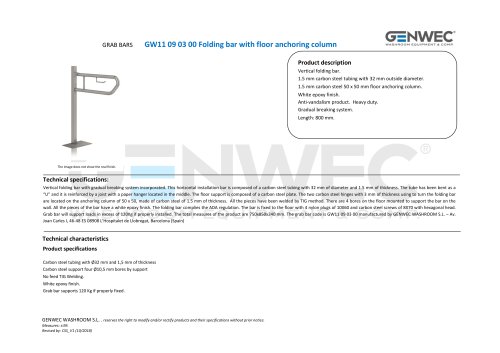 GW11 09 03 00
3 Pages
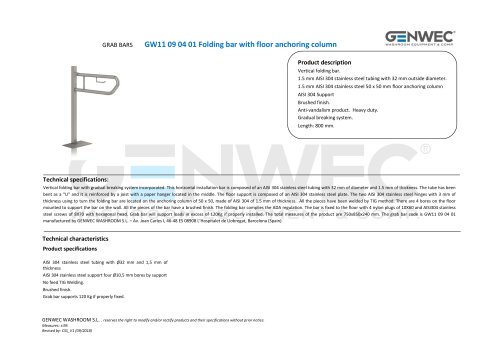 GW11 09 04 01
3 Pages
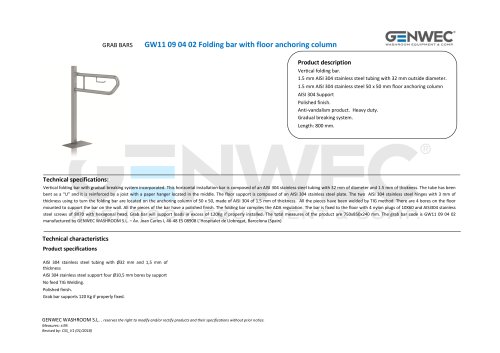 GW11 09 04 02
3 Pages
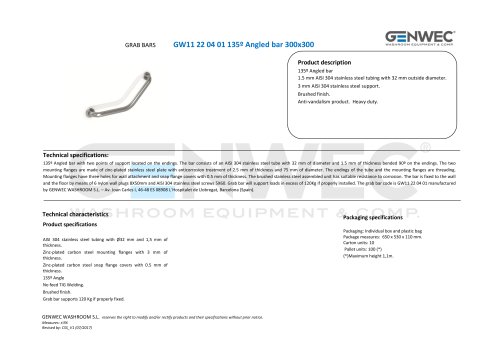 GW11 22 04 01
2 Pages
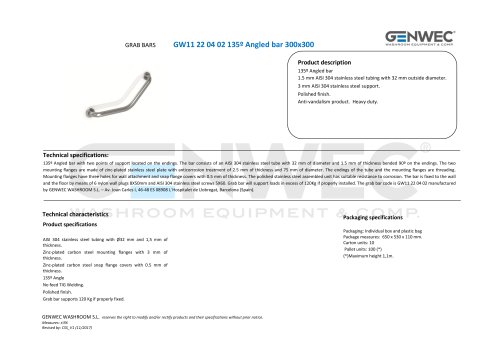 GW11 22 04 02
2 Pages
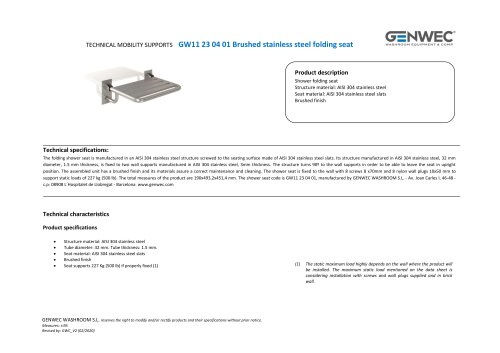 GW11 23 04 01
3 Pages
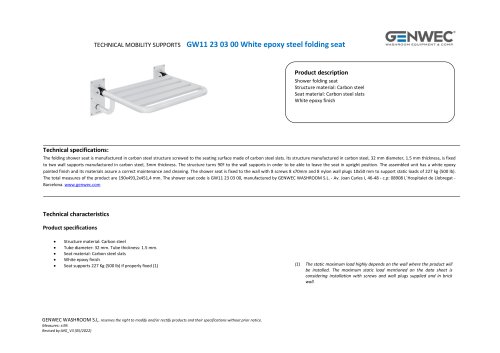 GW11 23 03 00
3 Pages
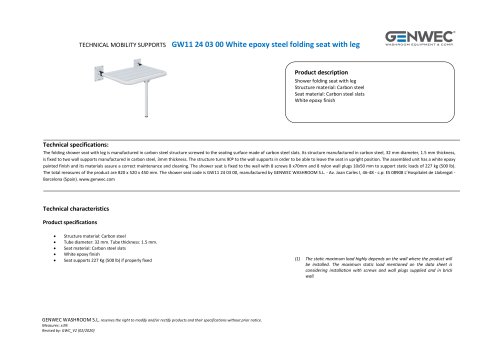 GW11 24 03 00
3 Pages
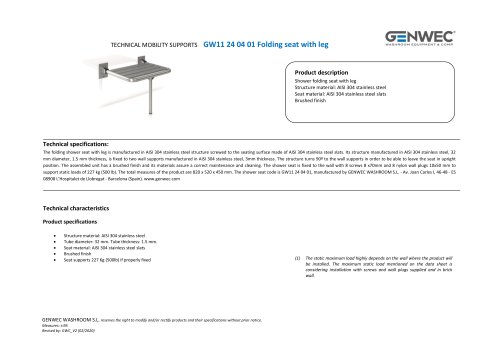 GW11 24 04 01
3 Pages
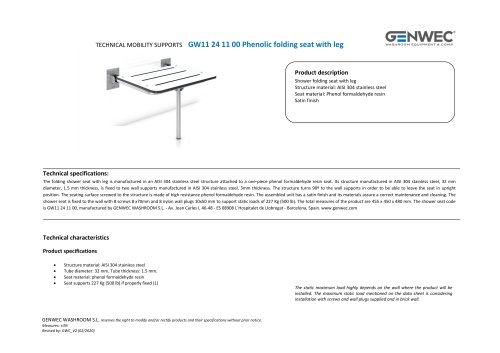 GW11 24 11 00
3 Pages
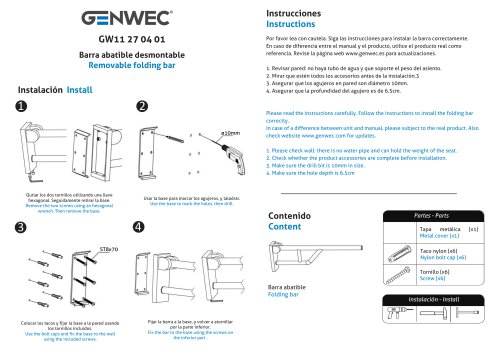
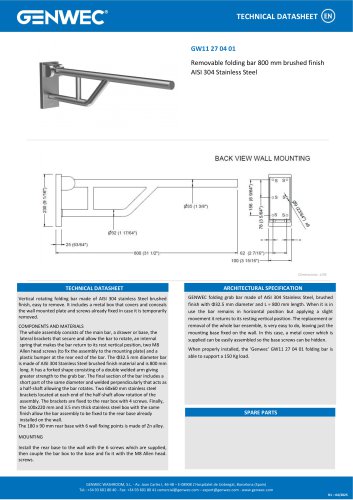 GW11 27 04 01
1 Page
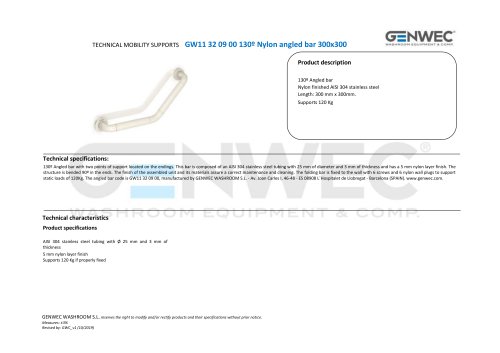 GW11 32 09 00
2 Pages
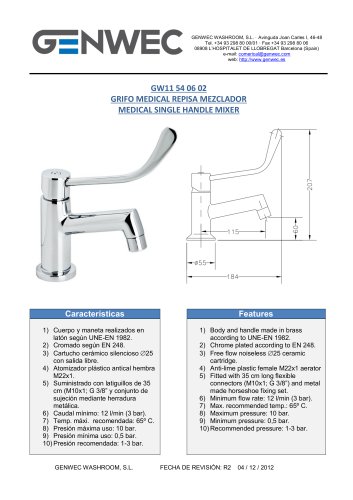 GW11 54 06 02
1 Page
 GW09 01 04 01
8 Pages
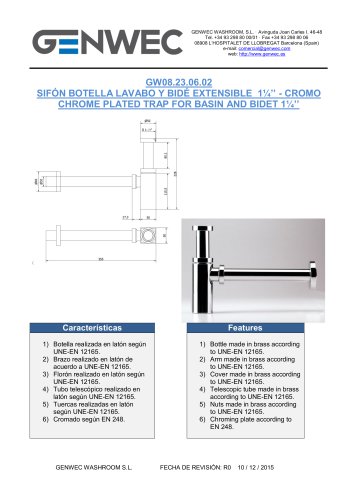 GW08 23 06 02
1 Page
 GW08 24 06 02
1 Page
 GW08 50 04 01
12 Pages
 GW08 51 04 01
12 Pages
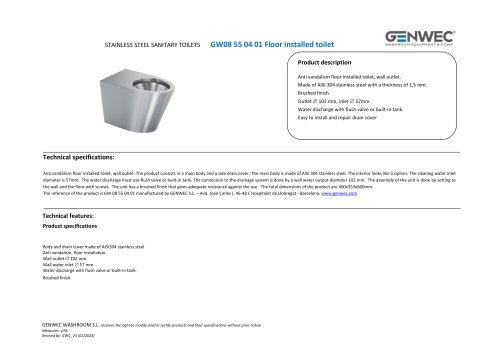 GW08 55 04 01
2 Pages
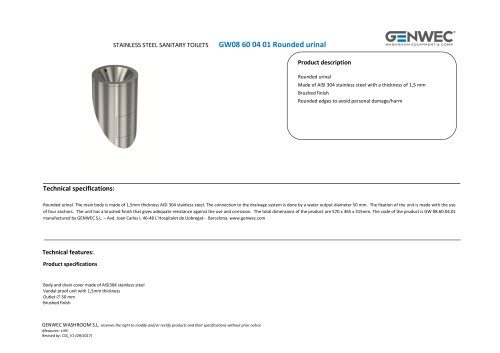 GW08 60 04 01 Rounded urinal
2 Pages
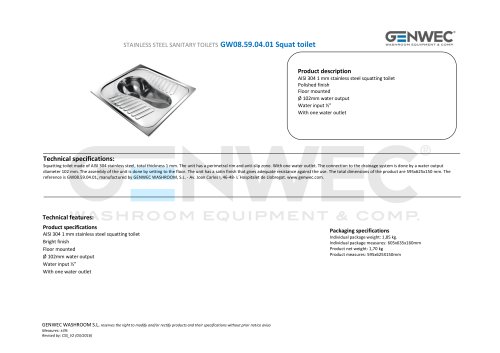 GW08.59.04.01 Squat toilet
2 Pages
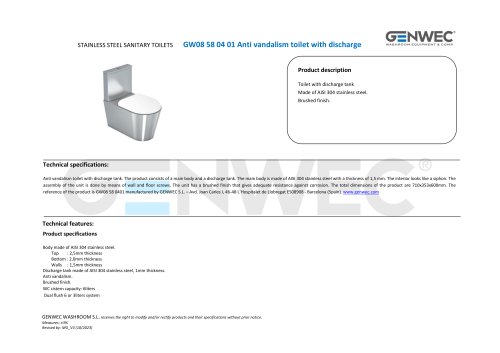 GW08 58 04 01
2 Pages
 GW07 05 04 01
1 Page
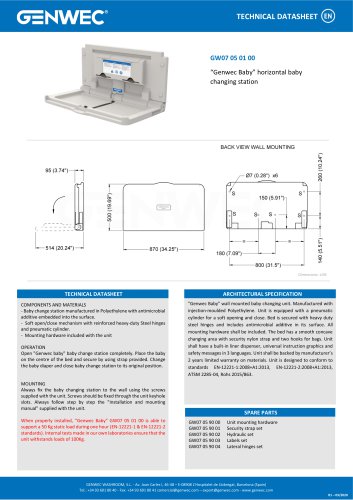 GW07 05 01 00
1 Page
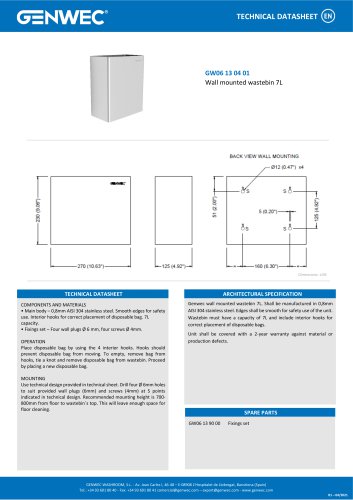 GW06 13 04 01
1 Page
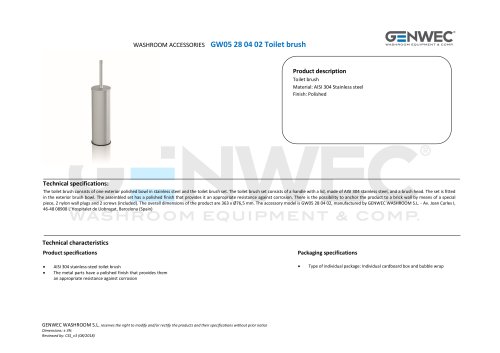 GW05 28 04 02 Toilet brush
2 Pages
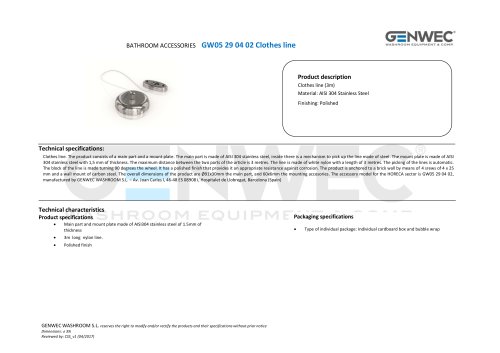 GW05 29 04 02 Clothes line
2 Pages
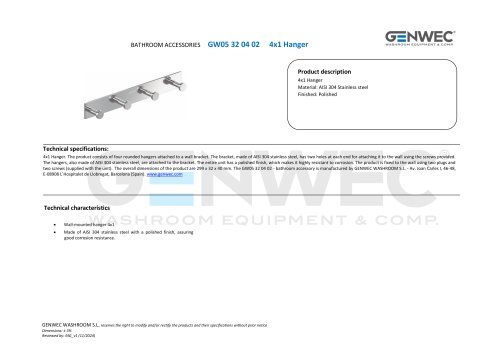 GW05 32 04 02
2 Pages
 GW04 20 04 01
8 Pages
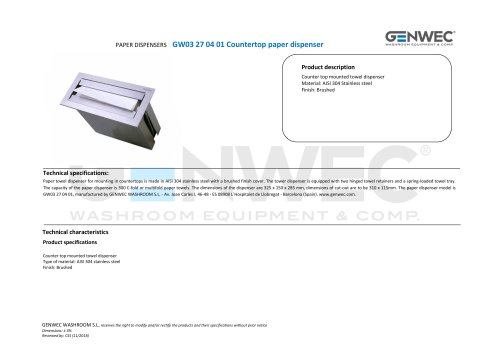 GW03 27 04 01
2 Pages
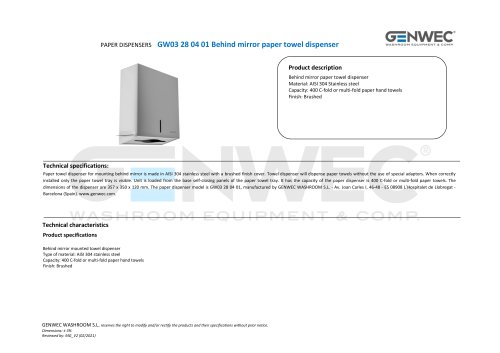 GW03 28 04 01
2 Pages
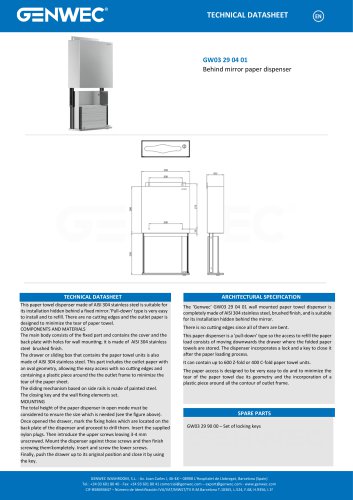 GW03 29 04 01
1 Page
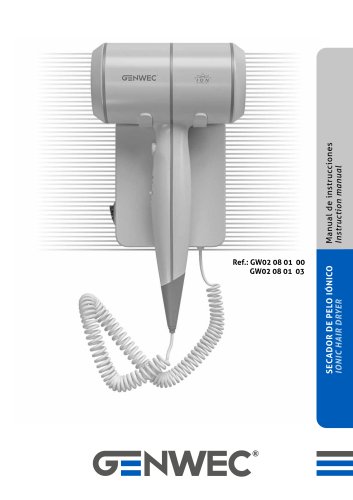 GW02 08 01 03
8 Pages
 GW01 26 03 00
2 Pages
 GW01 26 04 01
2 Pages
 GW01 26 04 02
2 Pages
 GW01 17 Installation Manual
71 Pages
 GW01 16 01 00
20 Pages
 GW03 20 01 00 ABS
2 Pages
 GW03 19 01 04 ABS
2 Pages
 GW03 19 01 00 ABS
2 Pages
 GW03 19 01 00
2 Pages
 GW03 18 01 04
2 Pages
 GW03 18 01 00
2 Pages
 GW03 27 04 01
2 Pages
 GW03 16 04 02
2 Pages
 GW03 24 04 01
2 Pages
 GW03 04 04 02
2 Pages
 GW03 04 04 01
2 Pages
 GW03 11 04 02
2 Pages
 GW03 10 04 02
2 Pages
 GW03 13 04 01
2 Pages
 GW03 12 04 01
2 Pages
 GW03 10 04 01
2 Pages
 GW03 08 04 02
2 Pages
 GW03 28 04 01
2 Pages
 GW02 01 01 00 Hair dryer
1 Page
 GW01 40 FALCON series
2 Pages
 gw03 02
1 Page
 gw03 05
1 Page
 GW04 16 01 00SM
1 Page


- Industrial tap
- Mixer faucet
- Indoor mixer tap
- Wash stand
- Modern washbasin
- Bathroom single-handle faucet
- Metal mixer tap
- 1-hole single-handle faucet
- Contemporary single-handle mixer tap
- Washbasin tap
- Countertop single-handle mixer tap
- Lavatory mixer tap
- Lever mixer tap
- Industrial dust-bin
- Shelves
- Contemporary litter bin
- Contemporary shelves
- Rectangular sink
- Commercial bin
- Countertop sink