
Catalog excerpts
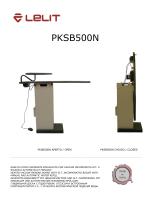
ASSE DA STIRO ASPIRANTE RISCALDATA CON CALDAIA INCORPORATA 5LT. A RICARICA AUTOMATICA E MANUALE HEATED VACUUM IRONING BOARD WITH 5LT. INCORPORATED BOILER WITH MANUAL AND AUTOMATIC WATER REFILL GEHEIZTES BÜGELBRETT MIT ABSAUGFUNKTION UND 5LT. DAMPFKESSEL MIT MANUELLER UND AUTOMATISCHER WASSERNACHFÜLLUNG ГЛАДИЛЬНАЯ ДОСКА С ПОДОГРЕВОМ, ОТСОСОМ И ВСТРОЕННЫМ ПАРОГЕНЕРАТОРОМ 5 Л., С Р
Open the catalog to page 1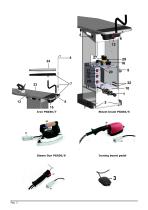
Ironing board pedal
Open the catalog to page 2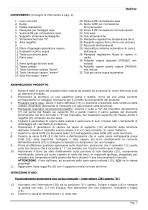
Italiano COMPONENTI (immagini di riferimento a pag. 2): 1. Cavo corrente 2. Ruote 3. Pedale aspirazione 4. Manopole per fissaggio asse 5. Spina ILME per connessione asse 6. Supporto stiramaniche/Reggifilo 7. Stiramaniche/Tubo “S” 8. Asta reggifilo 9. 10. Piano d’appoggio generatore vapore 11. Rubinetto scarico acqua 12. Tasto accensione asse 13. Piano asse 14. 15. Parte ignifuga del telo asse 16. Tappo caldaia 17. Tasto luminoso caldaia “boiler” 18. Tasto luminoso vapore “steam” 19. Spia fine acqua “water” 20. Presa ILME connessione asse 21. Spina ILME per connessione ferro/accessori 22....
Open the catalog to page 3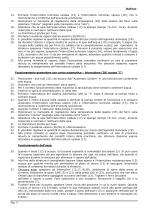
Premere l’interruttore luminoso caldaia (17) e l’interruttore luminoso vapore (18), che si illumineranno a conferma dell’avvenuta accensione. Posizionare la manopola di regolazione della temperatura (25) della piastra del ferro sulla posizione “cotone” (segnato sulla manopola come “ooo”). Attendere che la spia dell’interruttore caldaia (17) si spenga (tempo 15 min. circa); durante l’esercizio è normale il riattivarsi della spia. La macchina è pronta per l’uso. Premere il pulsante vapore dell’accessorio (26/30/31). E’ possibile regolare la quantità di vapore desiderata per mezzo...
Open the catalog to page 4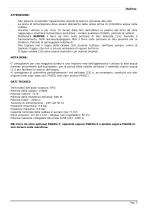
Italiano ATTENZIONE: - Non lasciare incustodito l'apparecchio quando la spina è connessa alle rete. La spina di alimentazione deve essere disinserita dalla presa prima di immettere acqua nella caldaia. Durante l'utilizzo e per circa 15 minuti dalla fine dell'utilizzo la piastra del ferro da stiro raggiunge e mantiene temperature pericolose - evitare qualsiasi contatto, pericolo di ustioni! Mantenere SEMPRE il ferro da stiro sulla porzione di telo dedicata (15). Durante il funzionamento, NON lasciare/appoggiare MAI il ferro sulla porzione di telo prevista per la stiratura. Pericolo di...
Open the catalog to page 5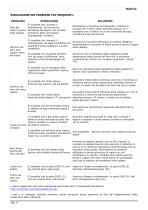
Italiano RISOLUZIONE DEI PROBLEMI PIÙ FREQUENTI: PROBLEMA E’ possibile che, durante il Esce del riempimento, sia fuoriuscita vapore (poco) dell’acqua dal tappo e sia entrata dalla caldaia all’interno della carrozzeria, impregnando l’isolante SOLUZIONE Utilizzando la macchina normalmente, l’isolante si asciuga con il calore della macchina accesa; se il problema non si risolve in un ora (macchina accesa), contattare il servizio tecnico Dal ferro da stiro non esce vapore Svuotare la macchina dell’acqua in eccesso (eseguire attentamente le istruzioni di sfiato prima di aprire il tappo della...
Open the catalog to page 6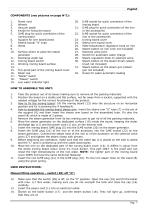
Power cord Wheels Vacuum pedal Knobs for fixing the board ILME plug for quick connection of the ironing board Support for arm board/wand Sleeve board/ “S” tube Wand Surface where to place the steam generator Discharge water tap Ironing board switch Working ironing board surface Fire-proof part of the ironing board cover Boiler cap “Boiler” switch “Steam” switch Low water indicator light ILME socket for quick connection of the ironing board ILME plug for quick connection of the iron or the accessories ILME socket for quick connection of the iron or the accessories Ironing board cover Sleeve...
Open the catalog to page 7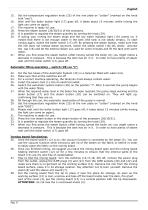
Set the temperature regulation knob (25) of the iron plate on “cotton” (marked on the knob with “ooo”). Wait until the boiler button light (17) goes off, it takes about 15 minutes (while ironing the light can come on again). The machine is ready for use. Press the steam button (26/30/31) of the accessory. It is possible to regulate the steam quantity by turning the knob (29). If during your ironing the steam stops and the low water indicator light (19) comes on, it means that there is not enough water in the tank (the tank is not totally empty). To start ironing again, switch the boiler...
Open the catalog to page 8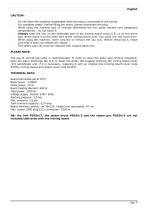
English CAUTION: - Do not leave the machine unattended while the plug is connected to the socket. For complete safety, before filling the boiler, please disconnect the plug. While using the machine and 15 minutes afterwards the iron plate reaches very dangerous temperatures – do not touch it. Always keep the iron on the dedicated part of the ironing board cover (15) or on the given pad. Never leave it on the other part of the ironing board cover. You could ruin the cover/iron! While using the machine, never unscrew or remove the cap (16). Before removing it, make sure that it does not...
Open the catalog to page 9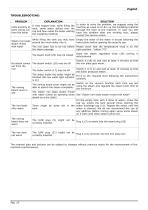
English TROUBLESHOOTING: PROBLEM Little quantity of team comes out from the boiler SOLUTION In order to solve the problem, we suggest using the It may happen that, while filling the machine as usual so to dry up the insulating material tank, some water spilled over the through the heat of the machine. In case you still cap and flew inside the boiler wetting have this problem after one working hour, please the insulating material contact the service centre. While filling the tank you may have Steam iron leaks poured too much water into it. steam mixed with water The iron plate has to be hot...
Open the catalog to page 10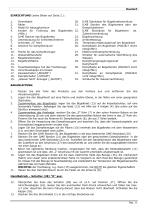
Stromkabel Räder Pedal für Absaugfunktion Knobel für Fixierung des Bügelbretts (4Stk.) ILME Stecker des Bügelbretts Unterstützung für Armbrett/Antenne Armbrett/ „S“ Rohr Antenne für Dampfschlauch Fläche für das Dampferzeuger Wasserabflusshahn Bügelbrettschalter Bügelbrettfläche Feuerbeständiges Teil des Tischbezugs Verschlusskappe am Kessel Kesselschalter („BOILER“) Dampfschalter („STEAM“) „Wasser fehlt“ Anzeiger („WATER“) ILME Steckdose für Bügelbrettanschluss ILME Stecker des Bügeleisens oder der Dampfzubehören ILME Steckdose für Bügeleisen- od. Zuberhörverbindung Bügeltischbezug...
Open the catalog to page 11All GEMME ITALIAN PRODUCERS S.R.L. catalogs and technical brochures
-
LELIT Bianca
1 Pages
-
PUS200/D
12 Pages
-
PA70N
16 Pages
-
PA71N & PA173
24 Pages
-
PUS300/D
12 Pages
-
Espresso machines catalogue
68 Pages


