Catalog excerpts

WELCOME & CONGRATULATIONS Product Registration Register Your Product REGISTRATION CARD should be filled in completely, Electrolux Home Products. Serial Plate Location Cooktop Serial Plate Location Please record your model and serial numbers below for future reference. Model Number:_ Serial Number:_ Purchase Date:_ Congratulations on your purchase of a new appliance! At Electrolux Home Products, we are very proud of our product and are completely committed to providing you with the best service possible. Your satisfaction is our We know you'll enjoy your new appliance and Thank You for...
Open the catalog to page 2
IMPORTANT SAFETY INSTRUCTIONS Read all instructions before using this appliance. Save these instructions for future reference. £k This is the safety alert symbol. It is used to alert you to potential personal injury hazards. Obey all safety messages that follow this symbol to avoid possible injury This symbol will help alert you to situations that may cause serious bodily harm, death or property This symbol will help alert you to situations that may cause bodily injury or property damage. IMPORTANT indicates installation, operation or maintenance information which is important but not To...
Open the catalog to page 3
IMPORTANT SAFETY INSTRUCTIONS Never use your appliance for warming or heating • DO NOT TOUCH SURFACE UNITS OR AREAS NEAR THESE UNITS. Surface units may be hot even though they are dark in color. Areas near surface units may become hot enough to cause burns. During and after use, do not touch, or let clothing or other flammable materials touch these areas until they have had sufficient time to cool. Among these areas are the cooktop and areas facing the cooktop. • Wear Proper Apparel. Loose-fitting or hanging garments should never be worn while using the appliance. Do not let clothing or...
Open the catalog to page 4
COOKTOP FEATURES Read these instructions carefully before using the cooktop The Cooking Zones may appear to be cool while turned ON and after they have been turned OFF. The glass surface may be HOT from residual heat transferred from the cookware and burns may occur. 1. Left Rear Cooking Zone 2. Left Front Cooking Zone 3. Right Rear Cooking Zone 4. Right Front Cooking Zone 5. Center Rear Cooking Zone (Fig. 2 only) 6. Left Front Cooking Zone Control Pads 7. Left Rear Cooking Zone Control Pads 8. Center Cooking Zone Control Pads (Fig. 2 only) 9. Right Front Cooking Zone Control Pads 10. Right...
Open the catalog to page 5
QUICK INSTRUCTIONS TO SET YOUR COOKTOP CONTROLS To Power-Up Your Cooktop - Press and Hold for 2 seconds To Set the Keep Warm Feature To Power-Up a Cooking Zone' Adjust by Pressing or Tapping : A or V Adjust by Pressing or Tapping : or f To Power-Down a Cooking Zone To Lock / Unlock the Controls Press and Hold for 3 seconds : En
Open the catalog to page 6
BEFORE USING THE COOKTOP Induction Cooktop Characteristics A COOLER COOKTOP- A unique feature of the Induction Cooktop is whether turned ON or OFF, the cooktop surface remains cooler than standard ceramic cooktops. The Cooking Zones may appear to be cool while turned ON and after they have been turned OFF. The glass I surface may be HOT from residual heat transferred from the cookware and burns may occur. MAGNETIC DETECTOR- The coil sensor automatically detects whether the pan is magnetic and eliminates ac- cidental "turn-On." PAN SIZE DETECTION- The pan recognition sensor au- tomatically...
Open the catalog to page 7
BEFORE USING THE COOKTOP Cookware Recommendations Be sure to follow the following recommendations for using cookware as shown: Cooking Zone surface. i-Min. size-H minimum size required for the Cooking Zone used. Pan bottom rests on cook- top trim or does not rest • Heavy handle tilts pan. rectly on Cooking Zone Flat pan bottom & straight • Pan size meets or exceeds size for the Cooking Zone. ANY one of the incorrect conditions listed above in Fig. 1 may be detected by the sensors located below the ceramic cooktop surface. If the cookware does not meet any of these conditions, one or more of...
Open the catalog to page 8
SETTING COOKTOP CONTROLS Using the Touch Control Be sure that your finger is placed in the center of the touch pad. If the finger is not placed on the center of a pad, the cooktop may not respond to the selection made. Lightly contact the pad with the flat part of yourentire fingertip. Do not just use the narrow end of your fingertip. The Cooktop POWER key pad activates the entire Cooktop. To power the cooktop, touch and hold the POWER key pad for 2 seconds. A beep will sound and the Power LED will glow (Fig. 2). The cooktop will be in a ready mode for 10 seconds. If no other key pads are...
Open the catalog to page 9
SETTING COOKTOP CONTROLS Setting Cooktop Controls Operating the Cooking Zones The Induction cooktop has four or five Cooking Zones designed for cookware of various sizes. Be sure to place cookware that meets the minimum and maximum pan size requirements (see pages 7 &8) for the Cooking Zone desired and is best for the amount of food being prepared. Place the cookware with the prepared food on the Cooking Zone BEFORE setting any of the Cooktop controls. To Quickly Operate a Cooking Zone 1. Place the correct cookware containing prepared food on the desired Cooking Zone. 2. Touch the main key...
Open the catalog to page 10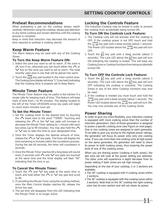
SETTING COOKTOP CONTROLS Preheat Recommendations When preheating a pan on the cooktop always watch carefully. Whenever using the cooktop, always pay attention to any items cooking and remain attentive until the cooking Keep in mind that induction may decrease the amount of time required to preheat a cooking utensil. Keep Warm Feature The Warm feature may be used with any of the Cooking To Turn the Keep Warm Feature ON: 1. Select the zone you want to set to warm. If the zone is off, turn it on, otherwise you can touch either the /\ or S/ key on the zone you want to set to warm. The most...
Open the catalog to page 11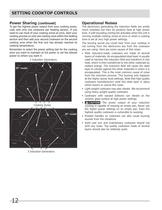
SETTING COOKTOP CONTROLS Power Sharing (continued) To get the highest power output from your cooking zones, cook with only one cookware per heating section. If you need to use most of your cooking zones at once, start your cooking process on only one cooking zone within the heating section and then add your second cookware on the second cooking zone when the first one has already reached its cooking temperature. Remember to select the power setting last for the cooking zone you want to maintain at full power or set the altered power to where you want it. Cooking Zones Operational Noises The...
Open the catalog to page 12
