- Catalogs
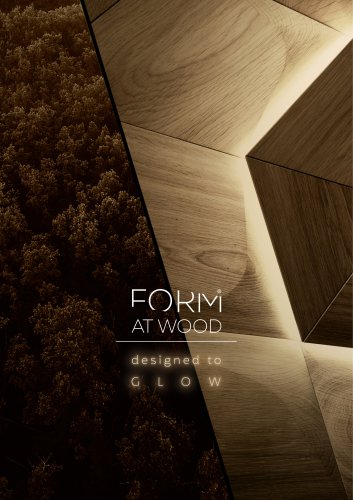
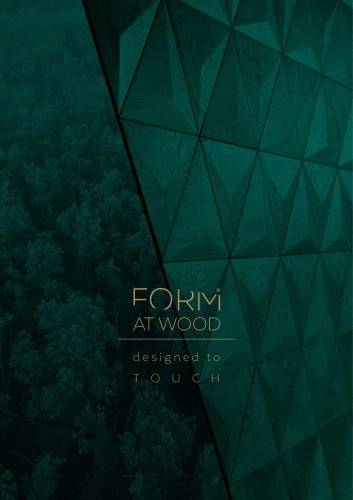
- FORM AT WOOD
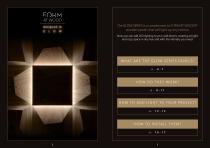
- GLOW PANELS - LIGHTING SERIES
GLOW PANELS - LIGHTING SERIES
1 /11Pages
GLOW PANELS - LIGHTING SERIES
1 /11Pages
Catalog excerpts
The GLOW SERIES is a complement to FORM AT WOOD® wooden panels that will light up any interior. Now you can add LED lighting to your wall decors, creating a bright and cozy space in any hue and with the intensity you need.
Open the catalog to page 2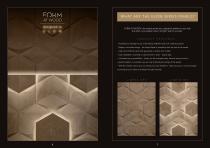
FORM AT WOOD® decorative panels are a beautiful addition to any wall, but what if you added a touch of light? See for yourself… - Possibility to add light to any of the EDGE, SMOOTH and FLAT collection panels - Elegant, minimalist design - the lamps blend in seamlessly with the rest of the panels - High-tech COB LED strips that guarantee a uniform line of light - Easy installation, requiring no special skills or tools - plug & play - Unlimited set-up possibilities - lamps can be arranged freely, without need to stick to a specific pattern or modules, you are only limited by the design of the...
Open the catalog to page 4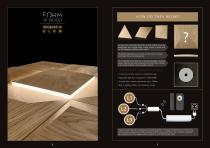
Any panel from the EDGE, SMOOTH, or FLAT collections can be transformed into a stylish lamp. Simply choose a model, and we will integrate a lighting system into it. The lamp’s edge features an advanced LED strip that subtly illuminates the surrounding panels. The underside of the lamp has a specially designed mounting system, allowing the lamp to be easily removed when needed. A mounting template is also included in the kit. - Control via remote control or smartphone app - Adjustable light hue ranging from 2700-6500K - Smooth light intensity adjustment up to 1300lm - Built-in lighting effects...
Open the catalog to page 5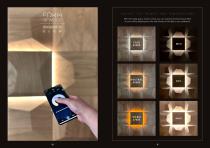
With the mobile app or remote control, you can customize the illumination effect on your wall by adjusting the color and intensity of the light to your preference.
Open the catalog to page 6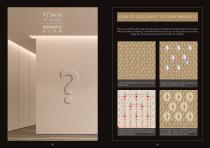
Below you will find a few steps that will guide you through the development of the project with the addition of lighting. To facilitate this process for you, we will support you at every stage, also providing necessary technical data for installers. 1. Select the panels you wish to use for decorating your wall. 2. Decide which panels to light up, picking any locations and quantity of panels. 3 After your selection, our designers will create a customized wiring plan, adjusting wire lengths as needed for each panel. 4. You’ll receive a basic visualization to preview the final effect, allowing you...
Open the catalog to page 7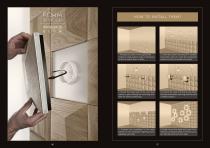
1. Arrange the cables in the appropriate locations, using painter’s tape or temporary stickers to secure them in place. 2. Install the panels following the standard instructions until you reach the designated location for the first LED panels. 3. Remove the mounting tape protection, connect the cable to the plug, and then install the LED panel in the right place. 4. Connect the LED accessories to the power supply and make sure the panels light up when each one is installed. 5. Continue the installation in the same manner for the subsequent lighting points, repeating each step. 6. Once installation...
Open the catalog to page 9
If you are wondering how our wood panels can brighten up your interior - write to us: [email protected] www.formatwood.com FORM AT WOOD® has full exclusive rights (including property intellectual rights) in the scope of all designs presented in the catalog.
Open the catalog to page 11All FORM AT WOOD catalogs and technical brochures
 COLOR CARD
6 Pages
 ARCH
ARCH3 Pages
 TRIANGLE
2 Pages
 CARO PLUS
2 Pages
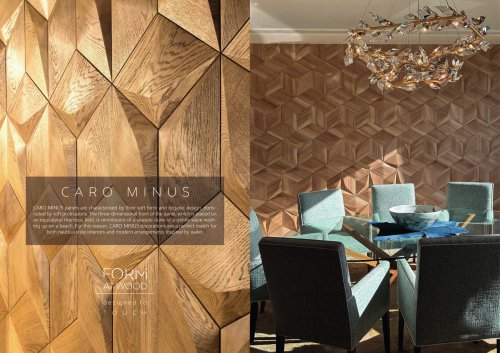 CARO MINUS
2 Pages
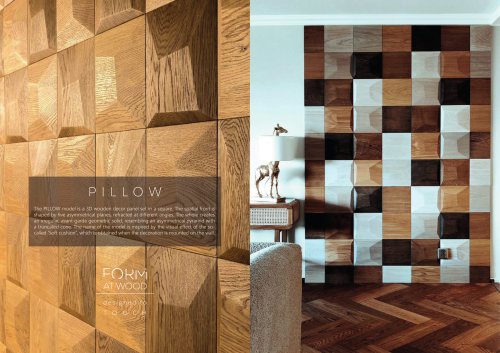 PILLOW
3 Pages
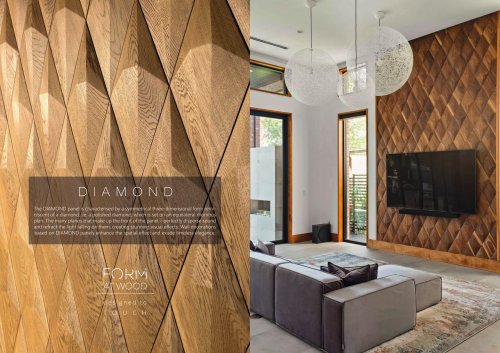 DIAMOND
3 Pages
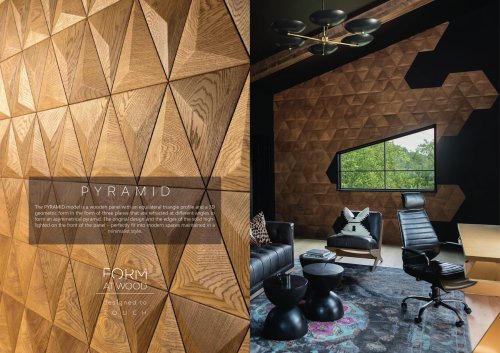 PYRAMID
3 Pages
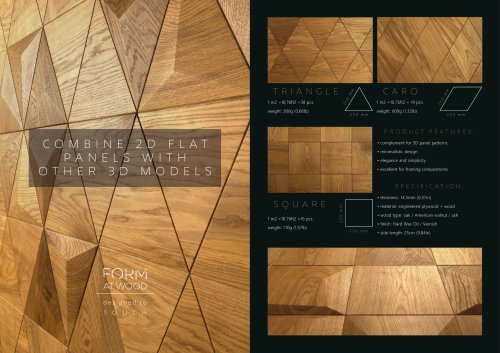 CARO
CARO2 Pages
 SQUARE
2 Pages
 FORM AT WOOD CATALOG 2025 EN
43 Pages
 DESIGN PROPOSALS - PYRAMID
13 Pages
 DESIGN PROPOSALS - PILLOW
13 Pages
 DESIGN PROPOSALS - IMPRESSIONS
13 Pages
 DESIGN PROPOSALS - DIAMOND
13 Pages
 DESIGN PROPOSALS - CARO PLUS
13 Pages
 DESIGN PROPOSALS - CARO MINUS
13 Pages
 DESIGN PROPOSALS - ARCH
13 Pages
 DESIGN PROPOSALS
43 Pages
 ACOUSTIC SERIES EN
14 Pages
 SAMPLE PROJECTS REVIEW
35 Pages
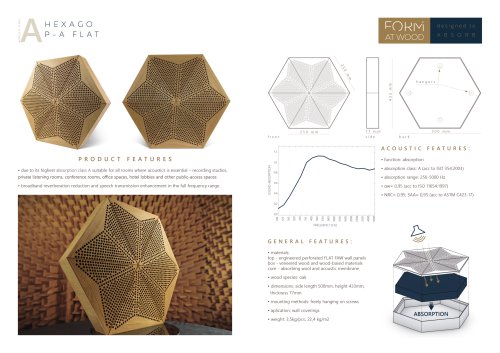 HEXAGO P-A FLAT
1 Page
 HEXAGO CM-D FLAT
1 Page
 HEXAGO CM-A FLAT
1 Page
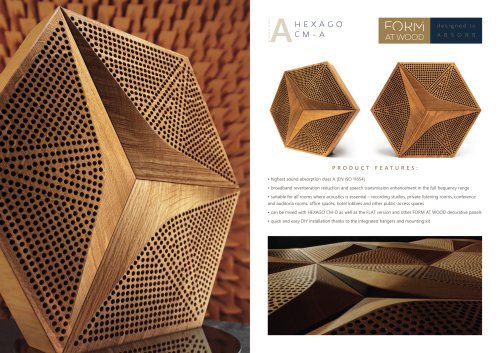 HEXAGO CM-A
3 Pages
 HEXAGO CM-D
3 Pages
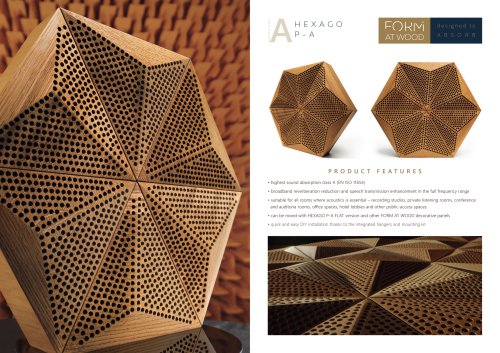 HEXAGO P-A
2 Pages
- Interior decorative panel
- Commercial decorative panel
- Wall-mounted decorative panel
- Home decorative panel
- Cover decorative panel
- Acoustic panel
- Commercial acoustic panel
- Textured decorative panel
- Decorative acoustic panel
- Acoustic wall panel
- Office acoustic panel
- Ceiling acoustic panel
- High-resistance decorative panel
- Building decorative panel
- Easy to install decorative panel
- Matte decorative panel
- Interior acoustic panel
- Wood decorative panel
- Public building acoustic panel