FLEXRING
1 /2Pages
FLEXRING
1 /2Pages
Catalog excerpts
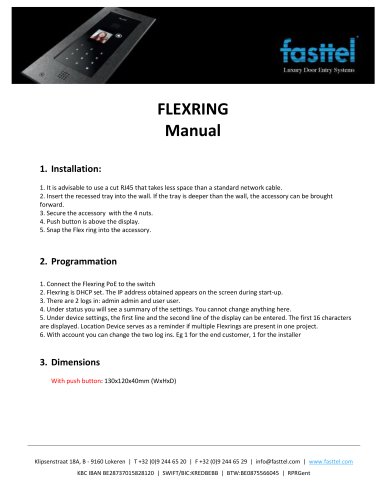
FLEXRING Manual 1. Installation: 1. It is advisable to use a cut RJ45 that takes less space than a standard network cable. 2. Insert the recessed tray into the wall. If the tray is deeper than the wall, the accessory can be brought forward. 3. Secure the accessory with the 4 nuts. 4. Push button is above the display. 5. Snap the Flex ring into the accessory. 2. Programmation 1. Connect the Flexring PoE to the switch 2. Flexring is DHCP set. The IP address obtained appears on the screen during start-up. 3. There are 2 logs in: admin admin and user user. 4. Under status you will see a summary of the settings. You cannot change anything here. 5. Under device settings, the first line and the second line of the display can be entered. The first 16 characters are displayed. Location Device serves as a reminder if multiple Flexrings are present in one project. 6. With account you can change the two log ins. Eg 1 for the end customer, 1 for the installer 3. Dimensions With push button: 130x120x40mm (WxHxD) Klipsenstraat 18A, B - 9160 Lokeren | T +32 (0)9 244 65 20 | F +32 (0)9 244 65 29 | [email protected] | www.fasttel.com KBC IBAN BE28737015828120 | SWIFT/BIC:KREDBEBB | BTW:BE0875566045 | RPRGent
Open the catalog to page 1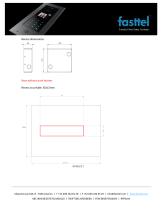
Recess dimensions: Rear without push button: Recess to privide: 65x15mm Klipsenstraat 18A, B - 9160 Lokeren | T +32 (0)9 244 65 20 | F +32 (0)9 244 65 29 | [email protected] | www.fasttel.com KBC IBAN BE28737015828120 | SWIFT/BIC:KREDBEBB | BTW:BE0875566045 | RPRGent
Open the catalog to page 2All Fasttel catalogs and technical brochures
 HiPath 3000
12 Pages
 Wizard Elegance
27 Pages
 CULT
CULT3 Pages
 2020 THE SMART DOORPHONE
28 Pages
 WIZARD ELITE IP
3 Pages
 WIZARD ELITE
3 Pages
 WIZARD CLASSIC
3 Pages
 WIZARD BRONZE
2 Pages
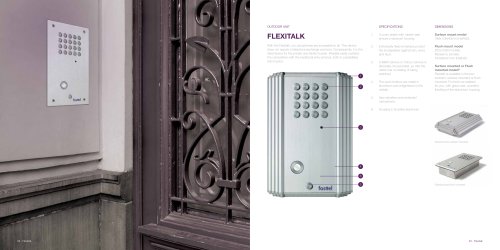 FLEXITALK
2 Pages
 2015 THE SMART DOORPHONE
48 Pages
Archived catalogs
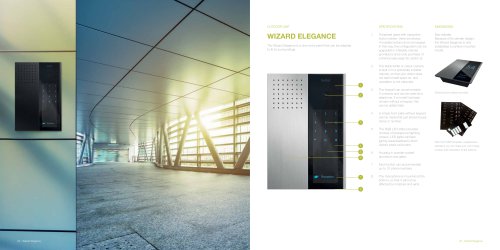 Outdoor unit WIZARD ELEGANCE
3 Pages
- Door intercom
- Metal door intercom
- Industrial letter box
- Video intercom
- White door intercom
- Door intercom with screen
- Interior digital door viewer
- IP door intercom
- Door station
- Exterior door station
- Wall-mounted mailbox
- Access control digital door viewer
- Digital door viewer with camera
- Video door intercom with screen
- Metal door station
- Video intercom with color screen
- Black door intercom
- White video door intercom
- Audio door intercom
- Exterior video door intercom