
Catalog excerpts

Assembly instructions Instructions for a simple Cubit® assembly Cubit® Modular Shelving System
Open the catalog to page 1
Assembly instructions Thank you for choosing Cubit® Make your shelving dreams come true ® with CuBIT !
Open the catalog to page 2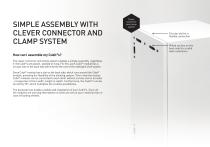
Simple assembly with clever connector and clamp system How can I assemble my Cubit®s? The clever connector and clamp system enables a simple assembly regardless if the Cubit®s are placed, stacked or hung. For this, each Cubit® module has a circular slot on the back side which forms the core of the intelligent shelf system. Every Cubit® module has a slot on the back side, which runs around the Cubit® module, providing the flexibility of the shelving system: This is how the various Cubit® modules can be connected to each other without screws and on all sides - irrespective of their width,...
Open the catalog to page 3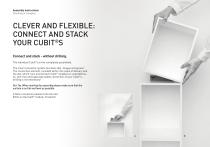
Assembly instructions Stacking or hanging CLEVER And FLEXIBle: Connect and stack your Cubit®s Connect and stack - without drilling. The individual Cubit®s arrive completely assembled. The smart connector system functions like „tongue and groove“. The connection element, included within the scope of delivery and the slot, which runs around each Cubit®, enables an unproblematic, tool-free and especially stable connection of your Cubit®s... drilling is not necessary! Our Tip: When starting the assembly please make sure that the surface is as flat and level as possible. A tick connection...
Open the catalog to page 4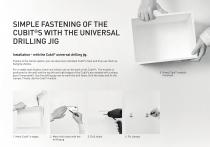
Simple fastening of the Cubit®S with the universal drilling jig Installation – with the Cubit® universal drilling jig. Thanks to the clamp system, you can also have individual Cubit®s float and thus use them as hanging shelves. For a stable wall fixation, there are milled cuts on the back of all Cubit®s. The module is positioned at the wall and the top left and right edges of the Cubit®s are marked with a sharp pencil (important!). Use the drilling jig now to mark the drill holes. Drill the holes and fix the clamps. Finally clip the Cubit® module. 1. Mark Cubit®‘s edges. 2. ark drill holes...
Open the catalog to page 5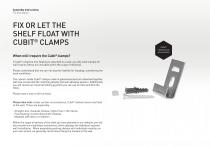
Assembly instructions Fix and adjust Fix or let the shelf float with Cubit® clamps When will I require the Cubit® clamps? If Cubit®s shall be free floating or attached to a wall, you will need clamps for wall fixation (these are included within the scope of delivery). Please understand that we can not assume liability for hanging, considering the local conditions. The custom-made Cubit® clamps made of galvanised steel are delivered together with two screws and the matching dowels and self-adhesive spacers. Additionally you will receive an universal drilling jig which you can use to mark and...
Open the catalog to page 6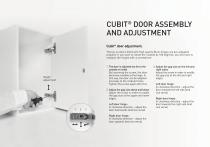
Cubit® door assembly and adjustment Cubit® door adjustment. The tip-on doors fitted with high quality Blum hinges are pre-adjusted properly. If you want to rotate the module by 180 degrees, you will have to readjust the hinges with a screwdriver. 1 The door is adjusted too far to the outside or inside By loosening the screw, the door becomes movable at the hinge. In this way, the door can be adapted precisely to the module frame. Tighten the screw again after this. Height adjustment 2 Adjust the gap size above and below Adjust the screw in order to modify the gap size at the upper and lower...
Open the catalog to page 7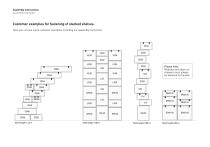
Assembly instructions Assembly examples Customer examples for fastening of stacked shelves. Here you can see some customer examples including our assembly instruction. Please note: Modules with doors or drawers must always be fastened to the wall.
Open the catalog to page 8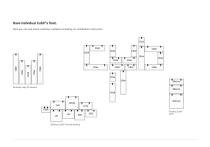
Have individual Cubit®s float. Here you can see some customer samples including our installation instruction. Vertically hung CD shelves Different Cubit® formats floating Floating Cubit® shelf
Open the catalog to page 9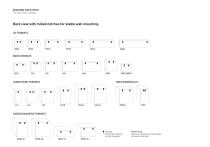
Assembly instructions Back view with milled notches for stable wall mounting. BOOK FORMATS LARGE BOOK FORMATS RING BINDERS/LPs DOORS/DRAWERS FORMATS : vertical hanging Please note: Doors and drawers should always
Open the catalog to page 10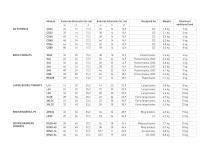
Maximum additional load 2 kg 3 kg 4 kg 5 kg 6 kg 8 kg BOOK FORMATS Pocket books Pocket books, DVD Pocket books, DVD Pocket books, DVD Pocket books, DVD Pocket books, DVD Paperbacks LARGE BOOKS FORMATS Large books Large books Large books Extra large books Extra large books Extra large books RING BINDERS/LPs DOORS/DRAWERS FORMATS Ring binders Midsized books Ring binders Accessories CD, DVD
Open the catalog to page 11
LUBJSAS 'wd 9-2 pue wd [- we 6 uaa/wjaq Aepuj oj Aepuo|A| WOJJ noA JOJ ajaqj aje BM 'woo'doqs-jjqnopjpejuoo je news Aq JO BujAiaqs OS VI 66 6' 11 2(0] 6*7+ 3uoqda]aj Aq wea]_ BJEQ jawojsno jno pejuoo aseaid j,suoijsa66ns JO suoijsanb jaqjjnj Aue BAeq noA OQ ,,„_„ LUOD-doLjs-ijqnD-MMM }e jeuueid 9}!qno pue uojieuuojuj jei|}jry
Open the catalog to page 12All Cubit catalogs and technical brochures
-
Cubit® – BITS FOR LIVING
29 Pages
-
Cubit - Bits for Living
28 Pages


