

CTA6

CTA6
Catalog excerpts
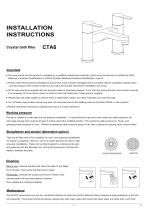
INSTALLATION INSTRUCTIONS Crystal bath filler Important ● We recommend that this product is installed by a qualified professional contractor. Such as a plumber who is certified by NVQ (National Vocational Qualification) or SNVQ (Scottish National Vocational Qualification) Level 3. ● Please check this product immediately to ensure that it has not been damaged and is complete. Before installation, please make sure this product is the correct model and you have all the parts required for installation and using. ● All the taps should be supplied with hot and cold water at balanced pressure. If not, then the mixing function will not work correctly. It is necessary to fit non-return valves on both hot and cold feeds pipe. These are not supplied. ● Please flush the water system to ensure that no metal swarf, solder, and other impurities can enter the taps. ● Turn off water supply before commencing work, this should be done at the isolating valves of inlet feeds if fitted or main stopcock. ● Please read these instructions carefully and keep it for future reference. Working pressure The tap is suitable for both high and low pressure installation. To ensure that the tap works well under low water pressure, the cold water storage tank must be at least 2 meters above the installed position. The maximum static pressure is 10 bar, and operating water pressure is 5 bar. Where the operating water pressure above 5 bar, then a pressure reducing valve must be fitted. Straightener and aerator (alternative option) Taps are all fitted with a flow straighter for use in low pressure installations. An aerator is supplied in the box, and is an option that can be used in high pressure installations. These can be interchanged by unscrewing the part, and replacing with the alternate one. During the process do not loose the washer, between the parts. FLOW STRAIGHTENER Cleaning Before use: Unscrew the filter and allow the water to run freely for 5 minutes. Then screw the filter back in place. Periodically: Unscrew the nozzle and remove. Rinse it with running water until any loose debris is cleared. Then replace the nozzle and tighten. Maintenance We do NOT recommend you use any household cleaners to clean the product. Because these cleaners change substance or formula too frequently. The product should be always cleaned only with soapy water and rinsed with clean water and dried with a soft clot
Open the catalog to page 1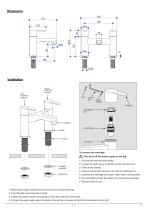
Installation COLD CONTROL HANDLE HOT CONTROL HANDLE GRUB SCREW HANDLE NOZZLE CARTRIDGE BASE To remove the cartridge. First shut off the water supply to the tap. 1: Pull out the cap from the handle. 2: Loosen the grub screw in handle, but do not remove it. RUBBER WASHER 3: Take off the handle. 4: Using a correct size spanner unscrew the retaining nut. 5: Unscrew the cartridge and wash it with clean running water. 6. Dry and lightly grease the seals (only use silicone grease) 7: Replace them in turn. 1: Remove the rubber washers and fixing nuts from the tails of the tap. 2: Insert the tails in...
Open the catalog to page 2All Clearwater Baths catalogs and technical brochures
 Palermo Petite
2 Pages
 Palermo Grande
2 Pages
 N16PCS
1 Page
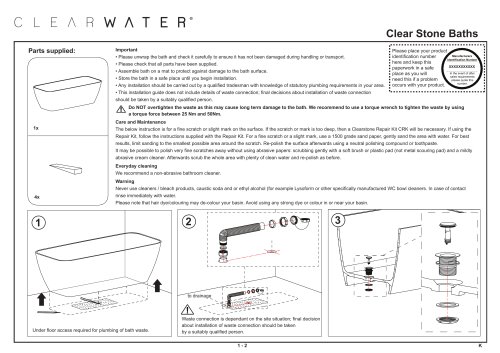 Puro with plinth
2 Pages
 Puro
Puro2 Pages
 Nuvola
2 Pages
 Sontuoso
2 Pages
 Formoso Petite
2 Pages
 Formoso Grande
2 Pages
 Patinato Petite
2 Pages
 Patinato Grande
2 Pages
 CTA5
CTA52 Pages
 CTA7
CTA72 Pages
 DUO
DUO2 Pages
 brochure
42 Pages
 Vicenza natural stone bath
2 Pages
 Vigore
2 Pages
 Lacrima natural stone bath
2 Pages
 Nebbia natural stone bath
2 Pages
 Lonio
Lonio2 Pages
 Formoso
2 Pages
 Armonia
2 Pages
 Kensington Regent
2 Pages
 Clearwater brochure
100 Pages
 Crystal basin
1 Page
 Palermo Bacino
1 Page
 Formoso Bacino
1 Page
 EcoCurve Bathscreen
1 Page
 EcoRound Bathscreen
1 Page
 Reuse
Reuse1 Page
 Sustain
1 Page
 Verde
Verde1 Page
 Emperor
1 Page
 Boat 1650
1 Page
 Classic 1500
1 Page
 Arctic
1 Page
 Saturn
1 Page
 Nouveau Petite
1 Page
 Vicenza
1 Page
 Lacrima
1 Page
 Ninfea
1 Page
 Formoso Piccolo
1 Page



Archived catalogs
 Clearwater Baths 2011
100 Pages
- Mixer faucet
- Indoor mixer tap
- Wash stand
- Contemporary wash basin
- Bathroom single-handle faucet
- Metal mixer tap
- Washbasin tap
- 1-hole single-handle faucet
- Countertop single-handle mixer tap
- Lavatory mixer tap
- Industrial bath-tub
- Rectangular sink
- Countertop sink
- Brass mixer faucet
- White bathtub
- Self-supporting bathtub
- Composite material washbasin
- Oval bathtub
- Composite bathtub