
- Catalogs
- Buschfeld Design
- poster

poster

poster
Specifications and Procedures:
- Each luminaire comes with an adapter that can be inserted on either side of the track without tools.
- Ensure the system is disconnected before installation.
- Avoid installing in humid areas.
- To install, rotate the picture rod and lock it into place, then turn the locking bolts on the adapter to 90°.
- Insert the adapter into the track opening, push firmly, and turn the locking bolts back 90°.
- Rotate the picture rod back and lock it, ensuring the label beneath the adapter is visible.
- The luminaire's length can be shortened at the upper end of the rod.
- Insert rods and secure them using the knurled screws.
Limitations and Recommendations:
- Maximum weight capacity is 10 kg per luminaire, with a total of 20 kg for two luminaires.
- Optimal installation height is between 2300 mm and 2700 mm.
Disclaimer:
- No liability is accepted for the accuracy of technical data.
- Technical improvements may be made without notice.
Catalog excerpts

INSTALLATION poster wall 700 180° optimale Höhe / optimum height 2300 - 2700 Einriegeln der Leuchte Positioning luminaire lightlight® Installationsinfo DE - Die Basis jeder Leuchte bildet ein Adapter. Dieser kann an jeder Stelle der Schiene werkzeugfrei eingeriegelt werden. - System spannungsfrei machen! - Nicht bei Feuchtigkeit installieren! - Bilderstange drehen und einrasten, seitliche Riegel des Leuchtenadapters auf 90° drehen (1.) - Adapter in den Schienenkanal einsetzen; dabei fest in die Schiene drücken (2.) - seitliche Riegel des Adapters um 90° zurückdrehen (3.) - Bilderstange zurückdrehen und einrasten, Markierungerung unter dem Adapter muss sichtbar sein. (4.) - Leuchtenlänge kann am oberen Ende der Leuchten- stangen gekürzt werden (5.) - Stangen einsetzen und Rändelschrauben festziehen (6.) EN - Every luminaire is equipped with an adapter. This can be inserted on either side of the track without tools. - disconnect the system! - do not install in humid areas/locations! - turn the picture rod and lock into place, turn the locking bolts on the side of the adapter to 90° (1) - insert the adapter into the opening in the track, push it firmly into the track, and turn the locking bolts back 90° (2) - turn the locking bolts back through 90° (3) - turn the picture rod back and lock into place, ensuring the label beneath the adapater is visible (4) - length of the luminaire can be shortened at the upper end of the luminaire rod (5) - insert rods and screw firmly into place using the knurled screws (6) Für die Richtigkeit aller technischen Daten übernehmen wir keine Gewähr. Wir behalten uns vor, unsere Produkte ohne Ankündigung zu verbessern. Design: Prof. Hans Buschfeld We accept no liability for the correctness of the technical data. We reserve the right to improve the technical quality of our products without notice. poster Leuc
Open the catalog to page 1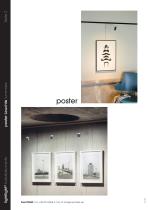
lightlight® Installationsinfo poster Leuchte luminaire
Open the catalog to page 2All Buschfeld Design catalogs and technical brochures
 thirty-five side L
8 Pages
 fifty side L
8 Pages
 spot 5
2 Pages
 Lookbook Edition one
107 Pages
 LightLight® complete brochure 2014
222 Pages
- Wall-mounted light
- Contemporary wall-mounted light
- Metal wall light
- LED wall light
- Light fixture
- Industrial LED light
- Metal light fixture
- Fixed wall light
- Commercial light fixture
- 1 bulb wall-mounted light
- White wall light
- Commercial wall light
- Black wall light
- Industrial LED spotlight
- Linear light fixture
- Metal spotlight
- Hanging light fixture
- Round wall light
- Commercial spotlight
- Round spotlight