Re-Webbing A guide to renewing the webbing upholstery of your Artek furniture
1 /17Pages

Re-Webbing A guide to renewing the webbing upholstery of your Artek furniture
1 /17Pages
Catalog excerpts

A guide to renewing the webbing upholstery of your Artek furniture
Open the catalog to page 1
INDEX • Introduction to linen webbing • Technical material information • e-webbing process: R 1. Choosing the colour 2. Defining the required amount 3. Ordering the material through your local Artek distributor 4. Step by step re-webbing guide for Chair 611 (for professionals)
Open the catalog to page 2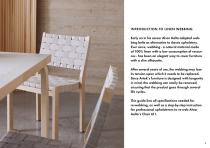
INTRODUCTION TO LINEN WEBBING Early on in his career Alvar Aalto adopted webbing belts as alternative to classic upholstery. Ever since, webbing - a natural material made of 100% linen with a low consumption of resources - has been an elegant way to cover furniture with a slim silhouette. After several years of use, the webbing may lose its tension upon which it needs to be replaced. Since Artek’s furniture is designed with longevity in mind, the webbing can easily be renewed, ensuring that the product goes through several life cycles. This guide lists all specifications needed for re-webbing,...
Open the catalog to page 3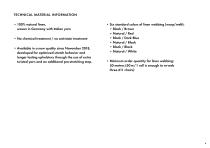
TECHNICAL MATERIAL INFORMATION • 00% natural linen, 1 woven in Germany with Italian yarn • o chemical treatment / no anti-stain treatment N • Available in a new quality since November 2018, developed for optimized stretch behavior and longer lasting upholstery through the use of extra twisted yarn and an additional pre-stretching step. • ix standard colors of linen webbing (warp/weft): S • Black / Brown • Natural / Red • Black / Dark Blue • Natural / Black • Black / Black • Natural / White • inimum order quantity for linen webbing: M 50 meters (50 m / 1 roll is enough to re
Open the catalog to page 4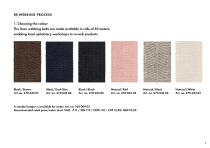
RE-WEBBING PROCESS 1. Choosing the colour The linen webbing belts are made available in rolls of 50 meters, enabling local upholstery workshops to re-web products. A sample hanger is available for order: Art. no. 764 009 03 Recommended retail price/meter (excl. VAT): € 11 / SEK 119 / NOK
Open the catalog to page 5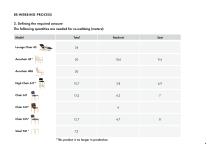
RE-WEBBING PROCESS 2. Defining the required amount The following quantities are needed for re-webbing (meters): Model *This product is no longer in production. 6
Open the catalog to page 6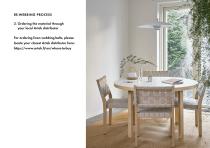
RE-WEBBING PROCESS 3. rdering the material through O your local Artek distributor For ordering linen webbing belts, please locate your closest Artek disributor here: t https://www.artek.fi/en/where-to-buy
Open the catalog to page 7
RE-WEBBING PROCESS 4. Step by step re-webbing guide for Chair 611 (for professionals) Important Notes: • he use of common 10mm (or 3⁄ ”) staples made from stainless steel is recommended. T • hen removing the old webbing from a chair, make sure to take a photo of the whole chair and the areas W where belts are attached to the wood. The photo as well as the bleached imprints of the wood will give you an indication of where to position the new belt
Open the catalog to page 8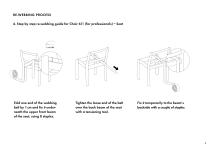
RE-WEBBING PROCESS 4. Step by step re-webbing guide for Chair 611 (for professionals) – Seat 1cm fold 1cm fold 1cm fold Fold one end of the webbing belt by 1 cm and fix it underneath the upper front beam of the seat, using 8 staples. Tighten the loose end of the belt over the back beam of the seat with a tensioning tool. Fix it temporarily to the beam’s backside with a couple of staples.
Open the catalog to page 9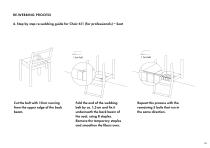
RE-WEBBING PROCESS 4. Step by step re-webbing guide for Chair 611 (for professionals) – Seat Cut the belt with 10 cm running from the upper edge of the back beam. Fold the end of the webbing belt by ca. 1,5 cm and fix it underneath the back beam of the seat, using 8 staples. Remove the temporary staples and smoothen the fibers over. Repeat this process with the remaining 5 belts that run in the same direction.
Open the catalog to page 10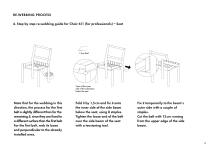
RE-WEBBING PROCESS 4. Step by step re-webbing guide for Chair 611 (for professionals) – Seat View of the inner side of the side beam below the seat Note that for the webbing in this direction, the process for the first belt is slightly diff erent than for the remaining 5, since they are fixed to a different surface than the first belt. For the first belt, web its loose end perpendicular to the al eady r installed ones. View of the inner side of the side beam below the seat Fold it by 1,5 cm and fix it onto the inner side of the side beam below the seat, using 8 staples. Tighten the loose end...
Open the catalog to page 11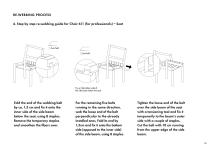
RE-WEBBING PROCESS 4. Step by step re-webbing guide for Chair 611 (for professionals) – Seat 1,5cm fold 1,5cm fold 1,5cm fold Fix on the bottom side of the side beam below the seat. the bottom side of Fix on the side beam below the seat. Fold the end of the webbing belt by ca. 1,5 cm and fix it onto the inner side of the side beam below the seat, using 8 staples. Remove the temporary staples and smoothen the fibers over. For the remaining five belts running in the same direction, web the loose end of the belt perpendicular to the already installed ones. Fold its end by 1,5cm and fix it onto the...
Open the catalog to page 12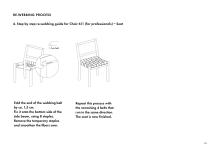
RE-WEBBING PROCESS 4. Step by step re-webbing guide for Chair 611 (for professionals) – Seat Fix behind the upper part of right rear leg. Fold the end of the webbing belt by ca. 1,5 cm. Fix it onto the bottom side of the side beam, using 8 staples. Remove the temporary staples and smoothen the fibers over. Repeat this process with the remaining 4 belts that run in the same direction. The seat is now finished.
Open the catalog to page 13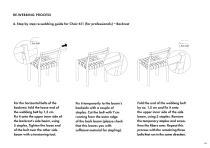
RE-WEBBING PROCESS 4. Step by step re-webbing guide for Chair 611 (for professionals) – Backrest 12. Fix behind the upper part of right rear leg. For the horizontal belts of the backrest, fold the loose end of the webbing belt by 1,5 cm. Fix it onto the upper inner side of the backrest’s side beam, using 5 staples. Tighten the loose end of the belt over the other side beam with a tensioning tool. Fix it temporarily to the beam’s backside with a couple of staples. Cut the belt with 7 cm running from the outer edge of the back beam (please check that this leaves you with sufficient material for...
Open the catalog to page 14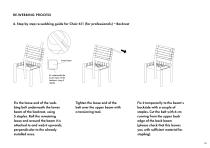
RE-WEBBING PROCESS 4. Step by step re-webbing guide for Chair 611 (for professionals) – Backrest lower beam fix underneath the lower beam of the backrest, using 5 staples fix underneath the lower beam of the backrest, using 5 staples Fix the loose end of the webbing belt underneath the lower beam of the backrest, using 5 staples. Roll the remaining loose end around the beam it is attached to and web it upwards, perpendicular to the already installed ones. Tighten the loose end of the belt over the upper beam with a tensioning tool. Fix it temporarily to the beam’s backside with a couple of staples....
Open the catalog to page 15All Artek catalogs and technical brochures
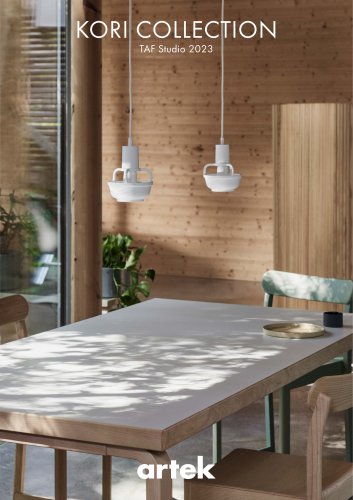 Artek Kori Collection 2023
11 Pages
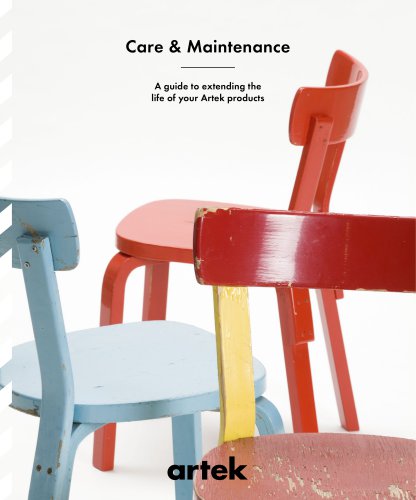 Care and Maintenance Guide
13 Pages
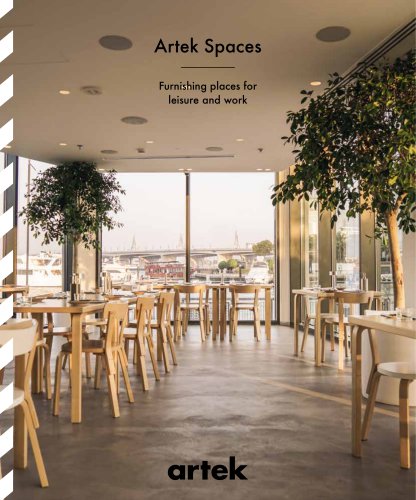 Aetek Space Brochure 2025
61 Pages
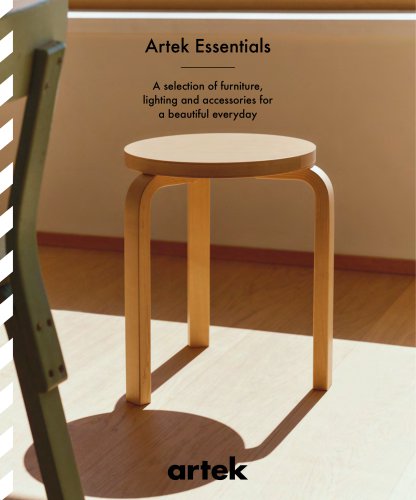 Artek Essentials Catalogue 2025
81 Pages
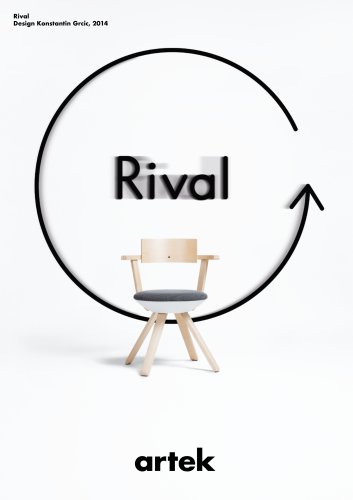 Rival Chair Brochure
12 Pages
Archived catalogs
 Lukki
Lukki1 Page
 WIR105
1 Page
 549
5491 Page
 KG001-KG002
1 Page
 ARMCHAIR 400
1 Page
 CHAIR 611
2 Pages
 Domino
1 Page
 A333
A3331 Page
 ARMCHAIR 401/402
1 Page
 ARMCHAIR 403
1 Page
 ARMCHAIR 41 "PAIMIO"
1 Page
 ARMCHAIR 42
1 Page
 ARMCHAIR 531/532/533
1 Page
 DOMUS LOUNGE CHAIR
1 Page
 10 UNIT SYSTEM
2 Pages
 ASLAK CHAIR
1 Page
 CHAIR 23
1 Page
 CHAIR 65/N65
1 Page
 FLOOR LAMP A805
1 Page
 FLOOR LAMP A809
1 Page
 FLOOR LAMP A808
1 Page
 EXTENSION TABLE 97/H99
1 Page
 DOMINO TABLE
1 Page
 My Life is My Home 2014
7 Pages
 Artek Accessories Catalogue_2016
23 Pages
 Artek Catalogue 2015
67 Pages
 Artek Spaces 2018
45 Pages
 Artek Collection Catalogue 2018
73 Pages
 stool 60 / stool E60
2 Pages
 LUKKI STOOL
1 Page
 PIRKKA STOOL
1 Page
 64 / K65
1 Page
 Artek essentials
75 Pages
 Care & Maintenance
13 Pages
 ATELIER COLLECTION
10 Pages
 KAARI COLLECTION
11 Pages
 KIILA COLLECTION
7 Pages
 Artek spaces
56 Pages
 ROPE CHAIR
7 Pages
 69
691 Page
 60
601 Page
 kiki collection
2 Pages
 karuselli
2 Pages
 WALL LIGHT A330S
4 Pages
 ARMCHAIR 406
1 Page
 chair 68
1 Page
 PN001 “KANTO”
1 Page
 112A, B
1 Page
 domus
domus2 Pages
 PIRKKA TABLE
1 Page
 KORI COLLECTION TAF Studio 2023
11 Pages
 Artek Essentials Catalogue 2024
81 Pages
 ARMCHAIR 26
1 Page
 Artek Light Fittings
16 Pages
 Artek Catalogue
48 Pages


- ROMUS lamp
- ROMUS indoor lamp
- ROMUS contemporary lamp
- ROMUS home lamp
- ROMUS corded lamp
- ROMUS metal lamp
- ROMUS sofa
- ROMUS fabric sofa
- ROMUS single lamp
- ROMUS pendant lamp
- ROMUS armchair
- ROMUS white lamp
- ROMUS contemporary chair
- ROMUS wall light
- ROMUS indoor chair
- ROMUS home chair
- Industrial fabric
- ROMUS contemporary armchair
- ROMUS straight lamp