
- Catalogs
- Armstrong ceilings - USA
- INSTALLATION INSTRUCTIONS - WOODHAVEN CEILINGS


INSTALLATION INSTRUCTIONS - WOODHAVEN CEILINGS

INSTALLATION INSTRUCTIONS - WOODHAVEN CEILINGS
Preparation:
Allow planks to acclimate to room humidity by opening cartons 2-3 days prior to installation. Maintain consistent humidity levels throughout the process. Mix planks from different cartons for a uniform look.
Installation Guidelines:
Ensure the installation surface is level and planks can move freely within clips. Maintain gaps around the room perimeter and obstructions, and avoid attaching planks directly to trim or walls. Use expansion joints for spans over 21 feet, covered with trim.
Tools Required:
Hand saw, saber saw, chalk line, screwdriver, dust mask, circular saw, tape measure, drill/screw gun, stud finder, pencil, gloves, safety glasses, straight edge, carpenter's level, string/jet line, screws, glue.
Installation Process:
Use the Easy Up® track and clip system. For ceilings over 21 feet, plan for expansion joints. Install tracks perpendicular to joists, starting 2 inches from the wall, with a maximum spacing of 24 inches. Level tracks using a bubble level and shims. Connect planks using tongue and groove, maintaining a 3/4-inch gap for expansion. Finish with crown molding.
Safety Precautions:
Wear protective clothing, gloves, and safety glasses. Ensure adequate ventilation to avoid inhaling wood dust.
Maintenance:
Clean planks with a damp cloth.
Additional Installation Instructions:
1. Preparing the Installation: Ensure gaps for expansion and contraction, covered by crown molding. Use water-based wood glue on shiplap joints for Item 1149 Bead Board.
2. Installing the First Row: Measure, cut, and install the first row, leaving a 3/4-inch gap at the wall. Use a chalk line and furring strips for alignment.
3. Installing Remaining Planks: Stagger seams and maintain gaps at ends. Use tongue and groove connections, securing with screws or nails.
4. Installing Molding: Choose molding to cover expansion gaps, nailing to wall studs every 24 inches.
5. Large Ceiling Requirements: Use expansion joints with additional support for ceilings over 21 feet.
6. General Installation Guidelines: Do not install over existing acoustical tile ceilings. Use Easy Up® clips for support every 24 inches.
7. Installing on Walls: Planks can be used on walls, with vertical layouts not exceeding 84 inches. Use adhesive for vertical installations and clips for horizontal.
8. Maintenance and Warranty: Clean with a damp cloth and refer to the warranty details online.
Catalog excerpts

I N S TA L L AT I O N I N S T R U C T I O N S 5-in x 84-in x 3/8-in 12.7 cm x 213.36 cm x 9.525 mm 10 planks | 29 sq.ft. IMPORTANT INFORMATION • Open cartons 2-3 days prior to the install and allow material to adjust to the relative humidity in the space where it will be installed. Maintain consistent humidity levels after installation. • For the best finished appearance, mix planks from multiple cartons while installing. • Ensure proper gaps are maintained around the perimeter of the room and all obstructions. • Ensure the surface is level and planks are able to slide freely within their clips. • This is a floating ceiling and planks should not be attached directly to trim, molding or walls in a ceiling application. • Never span more than 21-ft without an expansion joint (cove
Open the catalog to page 1
WoodHaven Ceiling Plank Installation Instructions ™ We are constantly working to improve our instructions with learnings from customers like you. If you need additional guidance, call our Techline at 1-877-ARMSTRONG (276-7876). Space Considerations – Before You Begin • The system is a floating system that allows for natural movement of a home. Ensure that the surface is level and planks are able to slide freely within their clips. Unlike lumber, which can twist and warp, this system does not require nails/screws at each edge to stay flat. • Never span more than 21-ft without an expansion joint...
Open the catalog to page 2
GENERAL INSTALLATION In this example, we are installing WoodHaven planks with Easy Up track and clips over unfinished drywall. You can also install planks direct to floor joists or studs, or other existing ceilings, using the same Easy Up tracks. When installing directly to an existing ceiling, find joists and mark with chalk line. (photo A) Running perpendicular to the joists, mark where tracks will be placed. Start 2-in from the starting wall. Spacing is 24-in on center or less. (photo B) Ensure that you do not have tracks running directly over light fixture holes or other ceiling obstructions....
Open the catalog to page 3
Installing WoodHaven Planks Directly to Ceiling Joists with Furring Strips and WoodHaven Clips: ™ LARGE CEILING REQUIREMENT Furring Strip Expansion Joint If your ceiling installation is greater than 21-ft in the length direction of the WoodHaven planks, an expansion joint is required. You will need to plan this detail into the ceiling layout. Expansion joints can be placed more frequently than 21-ft to achieve a balanced visual. A drawing of this detail is shown below. ™ Cut First Border Plank 1. Familiarize yourself with the plank edges and face before you begin cutting your first plank. (illus....
Open the catalog to page 4
(NOT TO SCALE) (NOT TO SCALE) NOTE: A 2-ft x 4-ft system can be converted to a 2-ft x 2-ft system by adding 2-ft cross tees. Determine Your Layout and Size of Your Border Planks. Measure the length of the room, in the direction of your tracks, and opposite the joists, to determine the size of your border planks. Example: Your Room: 1. Total room length Room = 178" _ 6. This is your border Border plank _ plank width width = 4" When starting or ending a WoodHaven Plank installation on 15/16-in suspension system, screw the plank directly to the wall molding. TIP: This should be...
Open the catalog to page 5
TIP: Another option is to use three finishing nails as a ledge, located directly under the face of the plank, on which you can rest the plank while you slide the clips into place. Installing WoodHaven Planks Vertically on a Wall Installing the Remaining Planks Lay out the room with staggered seams. In most installations, you should be able to use the leftover cut plank from one row to start the next row, with very little waste. Do not use planks smaller than 26-in to ensure attachment with two clips. Continue installing the plank by connecting the tongue and groove on the long side and end of...
Open the catalog to page 6All Armstrong ceilings - USA catalogs and technical brochures
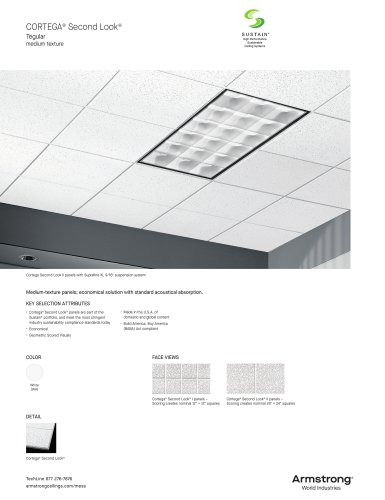 CORTEGA® Second Look®
2 Pages
 CASTWORKS™ Metaphors®
2 Pages
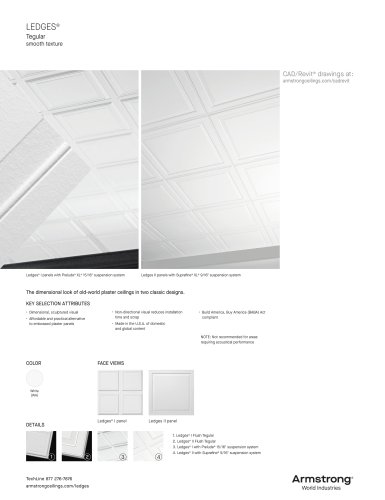 LEDGES®
2 Pages
 Wood and Wood Looks
28 Pages
 EASY ELEGANCE™
4 Pages
Archived catalogs
 Retail Ceiling Guide
28 Pages
 Custom creation
6 Pages
 Inspiring Great Spaces
8 Pages
 ALTERNA™ & ALTERNA RESERVE
56 Pages
 LUXE PLANK®
28 Pages
 VINYL plank flooring
24 Pages
 LUXURY FLOORING
40 Pages
 ABOOK 2018
47 Pages
 PRELUDE 24 - TL2
4 Pages
 Ultima+ brighten your space
6 Pages
 METALLAIRE™
6 Pages
 Room dividers
18 Pages
 WoodHaven Ceiling Planks
3 Pages
 CEILING & WALL LOOK BOOK 2023
16 Pages
 THE WINNING CHOICE
8 Pages
 sds mineral fiber
10 Pages
 Laminated Ceiling Solutions
15 Pages
 Ceiling & Wall Guide
24 Pages
 CEILING & WALL LOOK BOOK
16 Pages
 Metallaire Styles
6 Pages
 Contractor Series
8 Pages
 basement inspiration
8 Pages
 WoodHaven™ Ceiling Planks
8 Pages
 HomeStyle® Ceilings
8 Pages
 Custom Creations Brochure
2 Pages
 DECORAT I V E C E I L I N G
8 Pages
 Tin Look™ Paintable Ceilings
6 Pages
 Definitions Room Dividers
18 Pages
 Metallaire Ceilings
6 Pages
 Decorative Ceilings
6 Pages
 WoodHaven Ceilings
6 Pages
 Tin Look
4 Pages
 Retail Ceiling Guide
8 Pages


- Armstrong suspended ceiling
- Armstrong indoor suspended ceiling
- Armstrong acoustic suspended ceiling
- Metal suspended ceiling
- Armstrong panel suspended ceiling
- Armstrong decorative suspended ceiling
- Armstrong tile suspended ceiling
- Armstrong office suspended ceiling
- Armstrong perforated suspended ceiling
- Aluminum ceiling
- Armstrong color suspended ceiling
- Armstrong flame-retardant suspended ceiling
- Made from recycled materials suspended ceiling
- Armstrong commercial suspended ceiling
- Sustainable suspended ceiling
- Armstrong strip suspended ceiling
- Modular suspended ceiling
- Conference room suspended ceiling
- Wood suspended ceiling
- Armstrong light suspended ceiling