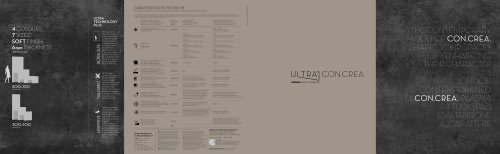
ultra technology
1 /33Pages

ultra technology
1 /33Pages
Catalog excerpts

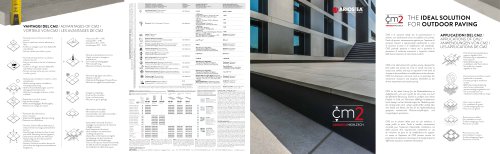
22 + Table laying instructions 25 + Kit Ultra Case ULTRA]TECHNOLOGYARIOSrEA'HIGhLJECH Stoccaggio Movimentazione Taglio Fori Posa pavimento Rivestimento parete Pulizia e manutenzione Tabella istruzioni di posa Adesivi suggeriti Kit Ultra Case
Open the catalog to page 1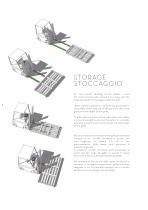
STORAGE STOCCAGGIO For the correct handling of the pallets, a fork lift truck must be used, at least 1.5 m long, with the forks positioned in the largest width position. Under normal conditions, the forks are positioned in the middle of the long side of the pallet, as they must grip the whole depth of the pallet. To allow the extraction of the slabs easily and safely, it is recommended to position the pallets in a suitable area where the lift truck can be moved around all sides of the pallet. Peruna corretta movimentazionedeipalletenecessario I’utilizzo di un carrello elevatore a forche con una...
Open the catalog to page 3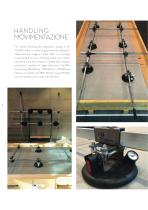
HANDLING MOVIMENTAZIONE For manual handling and subsequent laying of the “ULTRA” slabs, in order to guarantee the operators’ safety and the integrity of the slabs, it is strongly recommended to use a handling frame with suction cups and a truck for transport, available upon request, particularly suitable for large dimension “ULTRA” formats (e.g. 320x160 cm – 300x150 cm – 150x150 cm) whereas on smaller “ULTRA” formats (e.g. 100x100 cm) two double suction cups are
Open the catalog to page 5
Per la movimentazione manuale e la successiva posa in opera delle lastre “ULTRA”, al fine di garantire sicurezza per gli operatori e integrita delle lastre, e vivamente consigliato l’utilizzo del telaio di movimentazione con ventose di sicurezza, dotato di carrello per il trasporto, disponibili su richiesta, indicato in particolare per i formati “ULTRA” di dimensioni significative (es. 320x160 -300x150 cm - 150x150 cm) mentre su formati “ULTRA” inferior (es. 100x100 cm) puo essere sufficiente l’utilizzo di due biventose. INSTRUMENTS REQUIRED The instruments for lifting and handling the slabs...
Open the catalog to page 6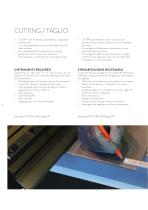
+ “ULTRA” can be easily processed by using some simple tools. + It is recommended to process the slabs on a flat work surface. + It is recommended to perform the cutting operations with at least two operators. One operator is sufficient for making the holes. + “ULTRA” permette di essere lavorato con grande facilita tramite l’utilizzo di alcuni semplici strumenti. + Si consiglia di effettuare le lavorazioni su una superficie piana di lavoro + Si consiglia di effettuare le lavorazioni di taglio in almeno due operatori, per i fori e sufficiente l’impiego di un solo operatore . STRUMENTAZIONE NECESSARIA...
Open the catalog to page 7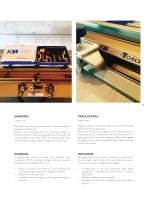
MARKING: Linear cuts Mark the dimension of the portion to be removed at both ends of the slab. Position the cutting guide with cutting carriage so that the roller on the cutting guide coincides with the lines marked on the slab. Lock the cutting guide with the cutting carriage in place using the suction cups. SCORING: To guarantee correct scoring, the pressure and movement of the cutting carriage must be constant along the whole length of the cut. + Score one end of the slab by 5 cm pushing the cutting carriage towards the edge of the slab. + Repeat on the other end. + Complete the scoring up...
Open the catalog to page 8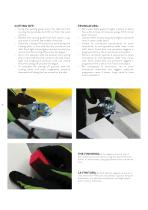
CUTTING OFF: + Using the cutting guide move the slab until the scoring line protrudes by 5/10 cm from the work surface. + Release the cutting guide from the suction cups and move it towards the middle of the slab. + Start the cutting off process by positioning the cutting pliers in line with the line scored on the slab. Exert light and progressive pressure until you notice that the cutting off process has begun. + Go to the opposite side and position the cutting pliers in line with the line scored on the slab. Exert light and progressive pressure until you notice that the cutting off process...
Open the catalog to page 9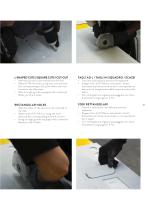
L-SHAPED CUTS / SQUARE CUTS / CUT-OUT + Mark the portion to be removed on the slab. + Make 0 7/8 mm holes, using wet core diamond bits corresponding to the point where the lines traced on the slab meet. + With an angle grinder equipped with a diamond blade, join the 4 holes. RECTANGULAR HOLES + Mark the sides of the portion to be removed on the slab. + Make holes of 0 7/8 mm, using wet core diamond bits corresponding to the 4 corners. + Using an angle grinder equipped with a diamond blade join the 4 holes. TAGLI AD L / TAGLI IN SQUADRO / SCASSI + Tracciare sulla lastra la porzione da asportare. +...
Open the catalog to page 10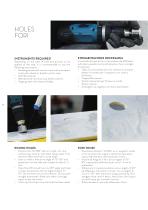
HOLES FORI INSTRUMENTS REQUIRED Depending on the type of hole and process to be applied to the slab, it is recommended to use the following instruments: + Handling frame with suction cups with a transport truck with wheels or double suction cups. + Drill/Screwdriver. + Wet diamond core bits (cup wheel cutters). + Angle grinder with diamond blade. STRUMENTAZIONE NECESSARIA A seconda del tipo di foro e lavorazione da effettuare sulla lastra, queste sono le attrezzature che si consiglia di utilizzare: + Telaio di movimentazione con ventose di sicurezza dotato di carrello per il trasporto con ruote...
Open the catalog to page 11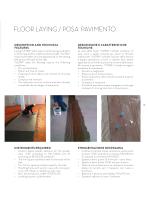
DESCRIPTION AND TECHNICAL FEATURES Laying “ULTRA” slabs require similar laying conditions to those required for traditional format slabs. “ULTRA” requires the adhesive to be applied both on the setting bed and on the back of the slab. “ULTRA” slabs for flooring require the following conditions: + Dry and seasoned. + Planar and free of cracks. + Cleaning of dust, debris and removal of concrete lumps. + Compact and resistant. + The substrate must be uniform and have already completed the shrinkage of maturation. DESCRIZIONE E CARATTERISTICHE TECNICHE La posa delle lastre “ULTRA” richiede condizioni...
Open the catalog to page 12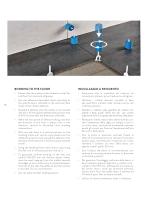
BONDING TO THE FLOOR + Ensure that the surface to be covered is solid, flat and free from dust and oil/grease. + Use the adhesives described mixed according to the specifications indicated in the technical data sheet of the chosen adhesive. + Spread the adhesive onto the surface to be covered with a 10 x 10 mm square toothed trowel across an area of 5/10 cm more than the dimensions of the slab. + Make the last spread of adhesive taking care that the direction of the lines is always only in one direction, vertical or horizontal, thus avoiding intersections. + With the slab fixed in a vertical...
Open the catalog to page 13All Ariostea catalogs and technical brochures
 general_ultra
296 Pages
 materie high tech
100 Pages
 marm cento 2 cento
52 Pages
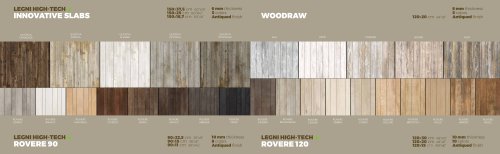 legni_high_tech
2 Pages
 cm2 fy
2 Pages
 tekno stone
64 Pages
 ultra great surfaces
224 Pages
 ultra project
124 Pages
 ultra cladding
58 Pages
 dys solutions
44 Pages
 ultra range
2 Pages
 dys
dys48 Pages
 con crea
64 Pages
 pietre cento 2 cento
2 Pages
 north stone_fy
2 Pages
 ULTRA CON.CREA
2 Pages
 Water Touch
72 Pages
 Ultra Blend
2 Pages
 Payoff
152 Pages
 Marmi Classic
72 Pages
 General Ariostea
440 Pages
 ULTRA HIGHT_TECH COLLECTIONS
264 Pages
 ARIOSTEA® GENERAL BOOK 2016
388 Pages
 TECNOPORCELAIN
14 Pages
 MATERIE HIGH-TECH
56 Pages
 IRIDIUM
56 Pages
 INNOVATIVE SLABS MARMI HIGH-TECH
24 Pages
 GREENSTONE
32 Pages
 CM2 PIETRE NATURALI HIGH-TECH
32 Pages
 PAY-OFF
153 Pages
 LEGNI HIGH-TECH
130 Pages
 Innovative slabs legni high-tech
28 Pages
 FORMA 90
10 Pages
 CM2 LEGNI HIGH-TECH
12 Pages
 Panels 2013
29 Pages
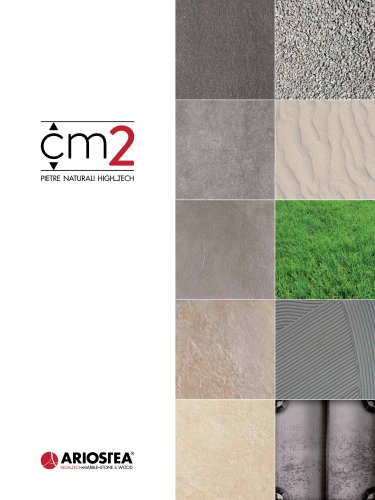 CM2 HIGH-TECH NATURAL STONES
32 Pages
 ULTRA
ULTRA116 Pages


Archived catalogs
 2019 CM2
72 Pages
 CM2
CM22 Pages
 GENERAL CATALOG 2013
297 Pages
 GENERAL CATALOGUE 2014
334 Pages
 universe
8 Pages
 GENERAL CATALOG 2012
314 Pages
 New 2010 - High-Tech Woods
10 Pages
 legni
legni58 Pages
 ARIOSTEA TECHNICAL PORCELAIN
68 Pages
 General Catalogue 2011
315 Pages